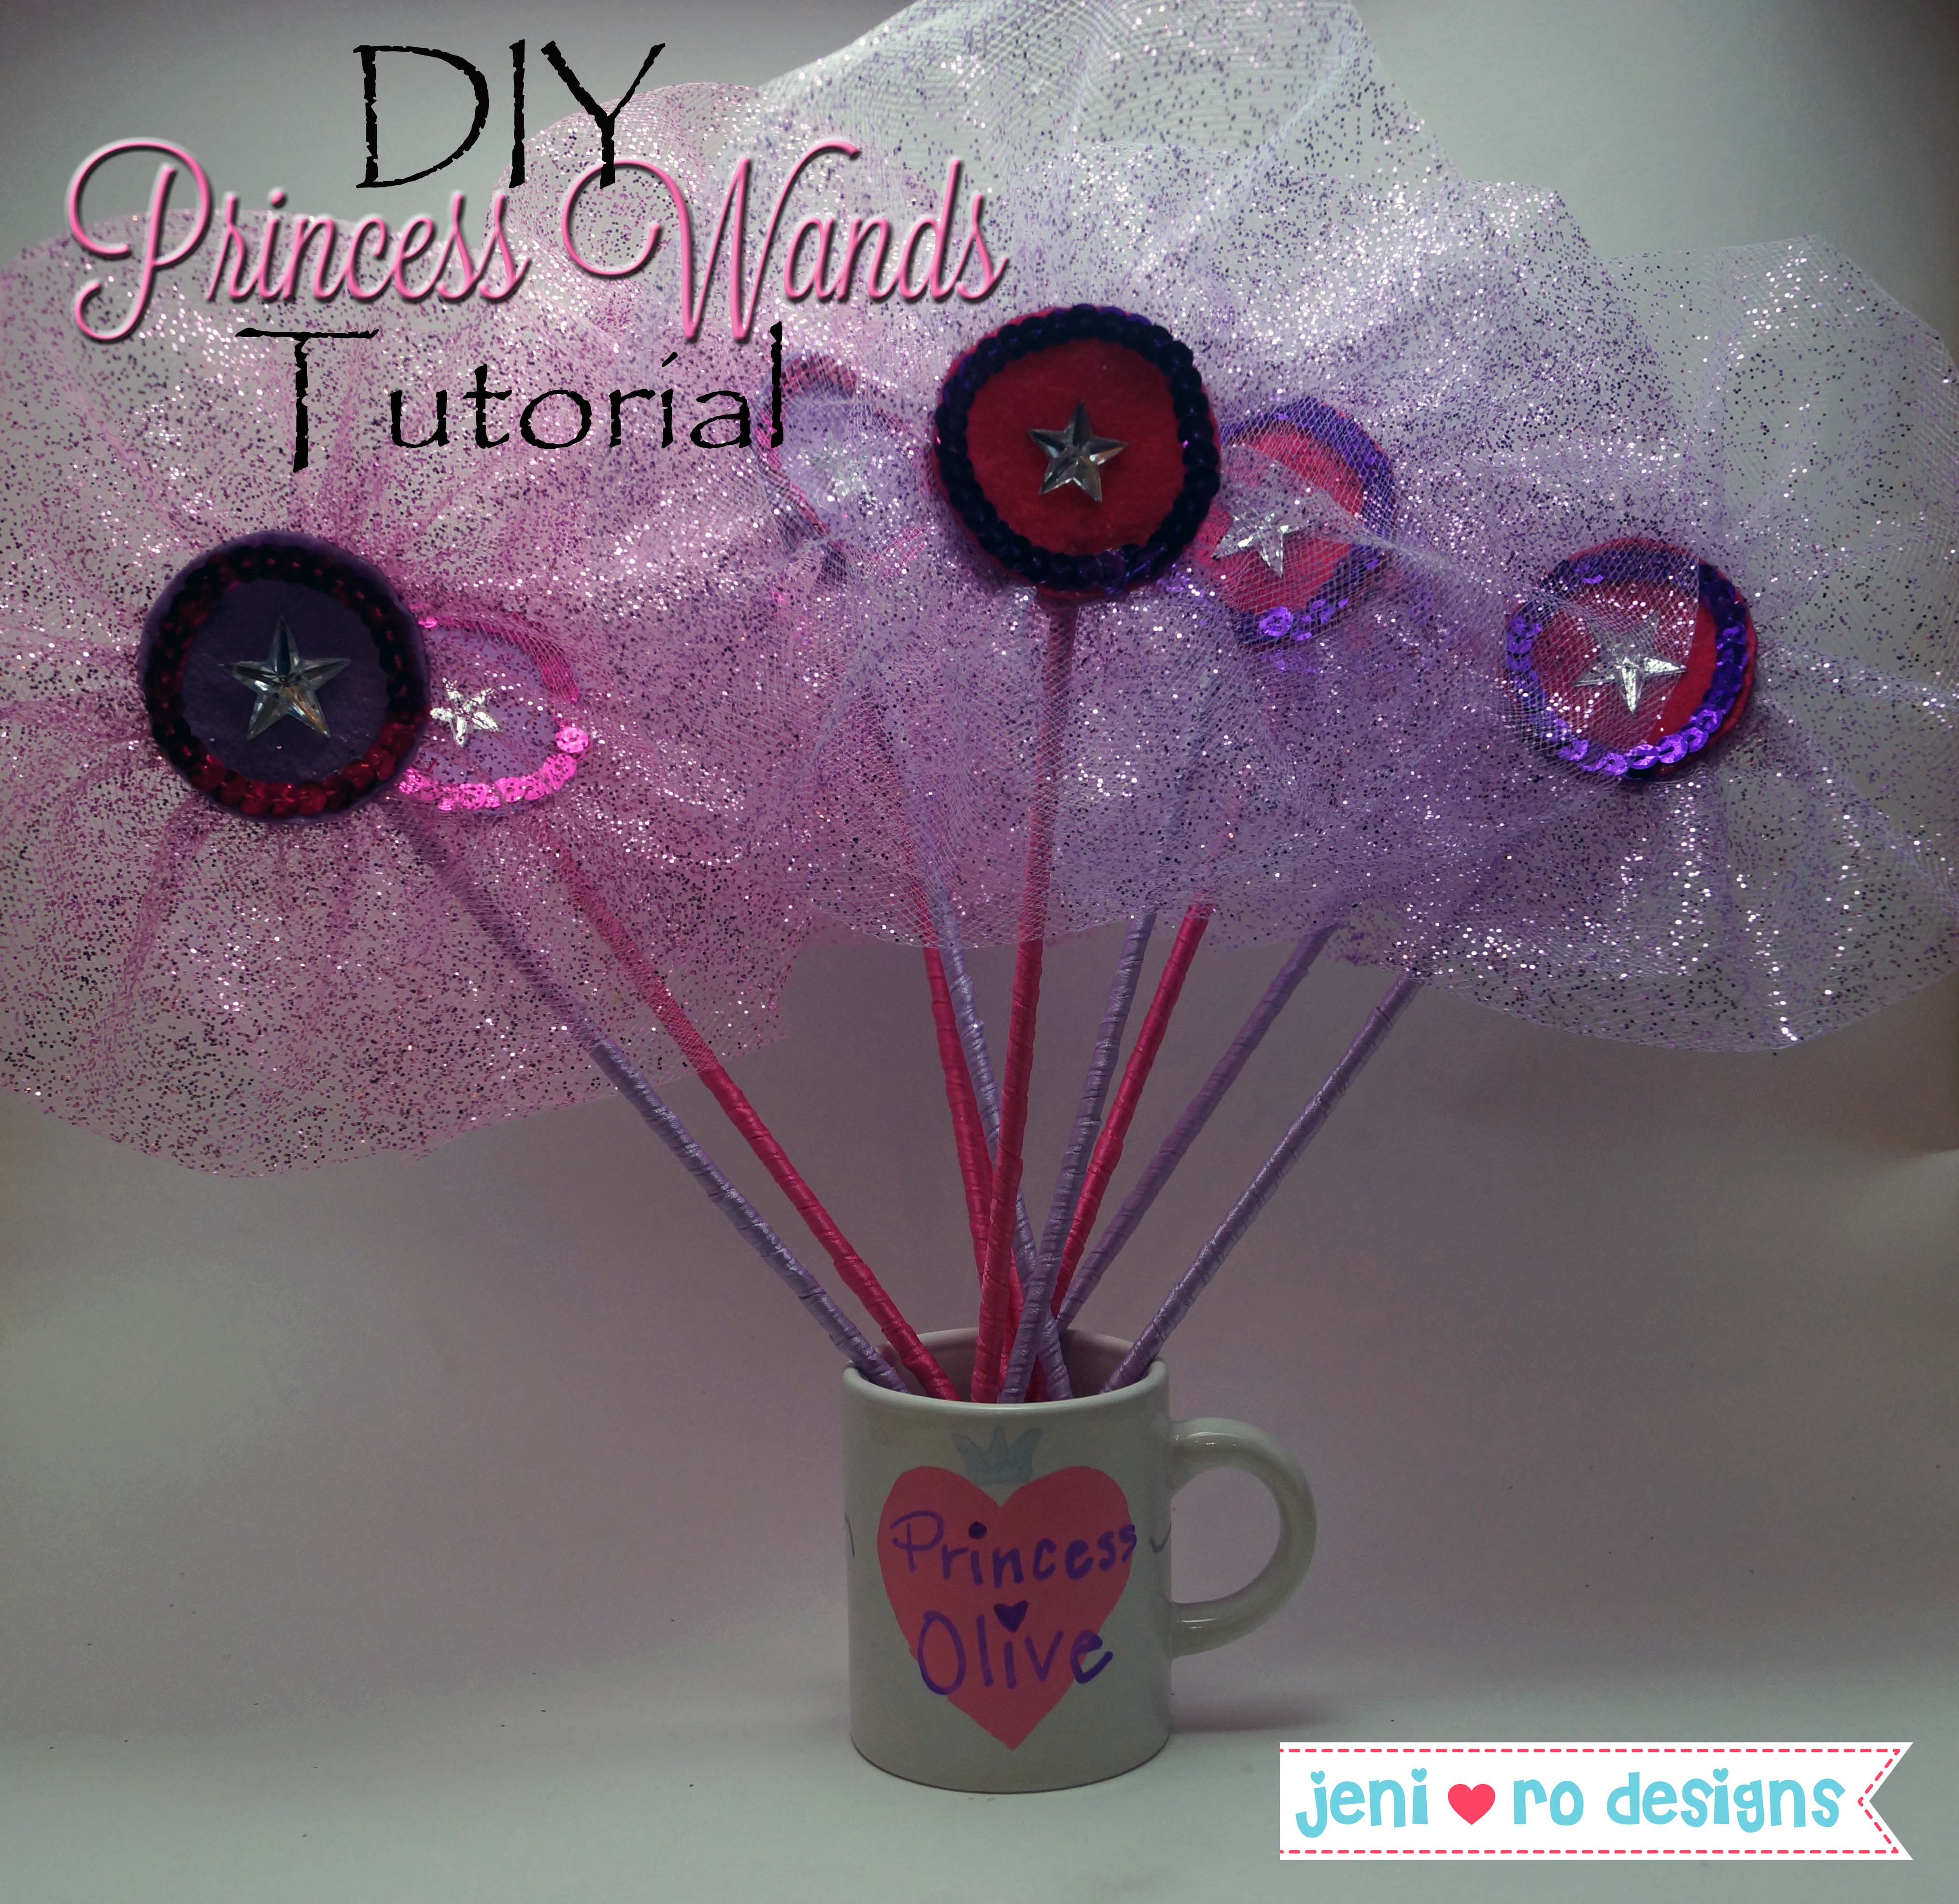
The big princess party is getting closer and I just finished up all of the favors for the kiddos. I made fun bags that I will share soon – but first I want to share the princess wands that I made for the princesses! And I wanted to share how I made them with you!
Here is what you will need to make your own princess wand!
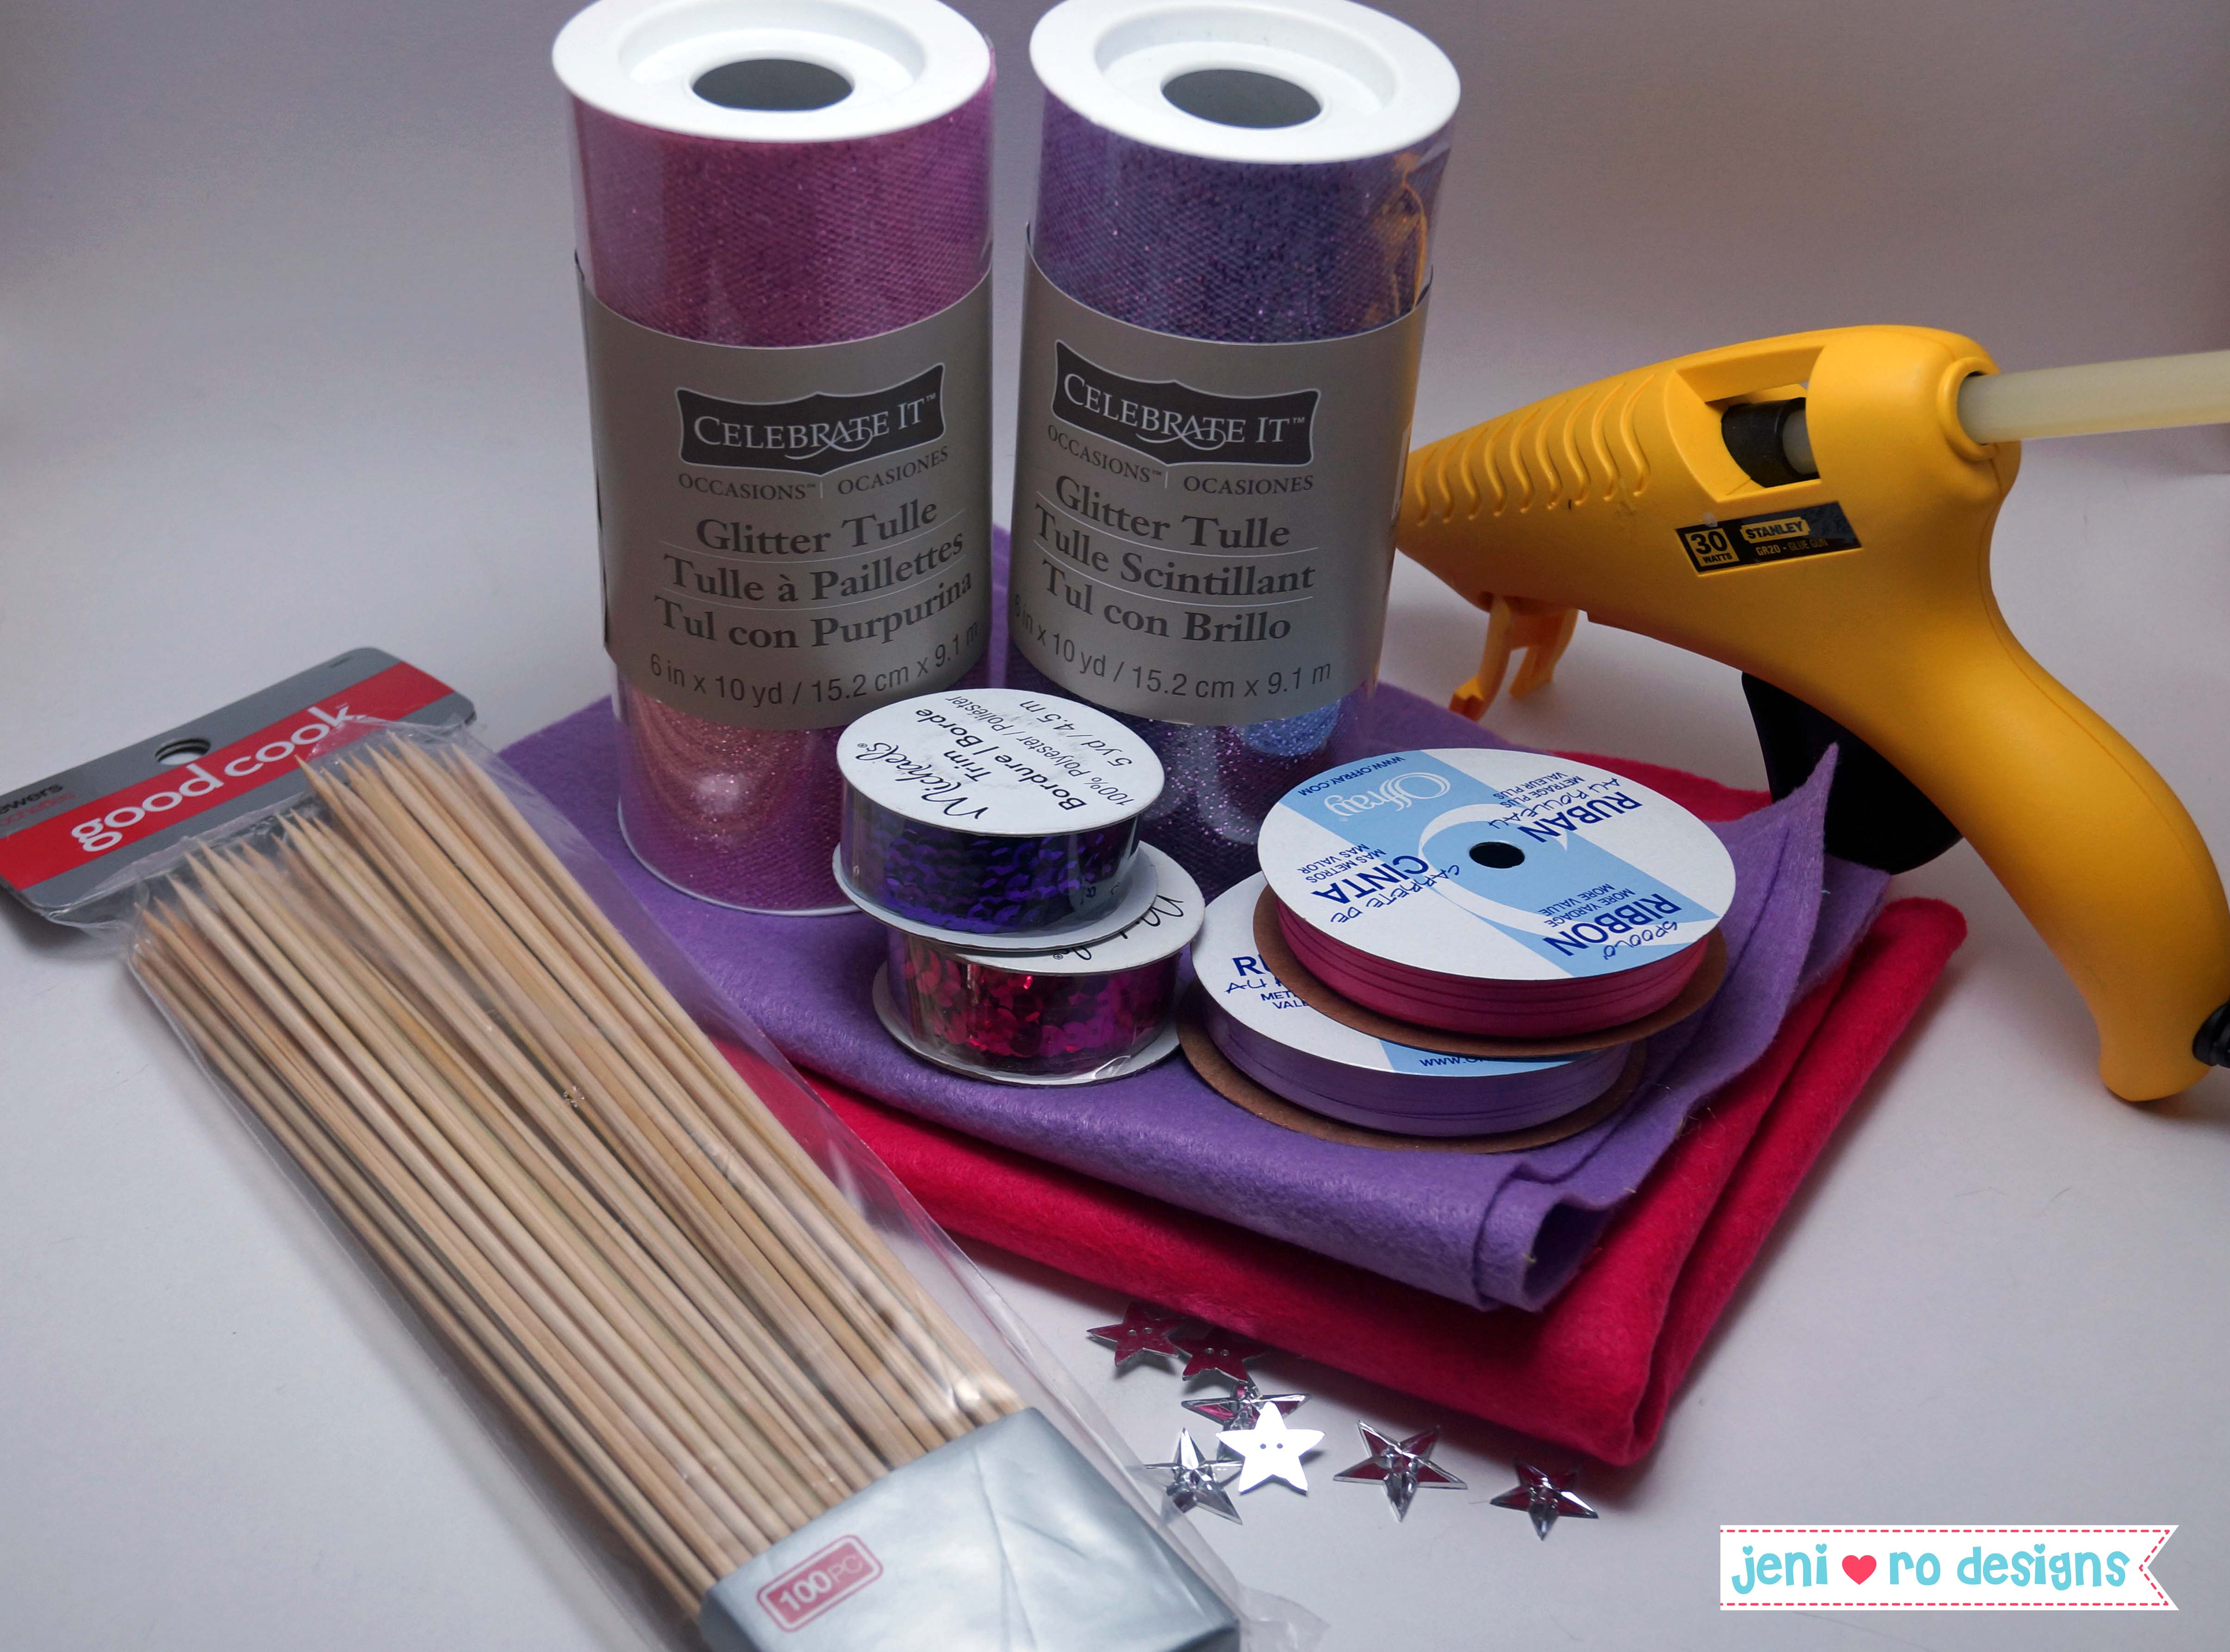
Materials Needed:
- Glitter Tulle – 6″ wide roll
- 1/4″ ribbon
- felt
- wooden skewers
- sequins/buttons for embellishment
- glue gun
- double stick tape (not pictured)
- sewing machine (not pictured)
- circle template (optional)
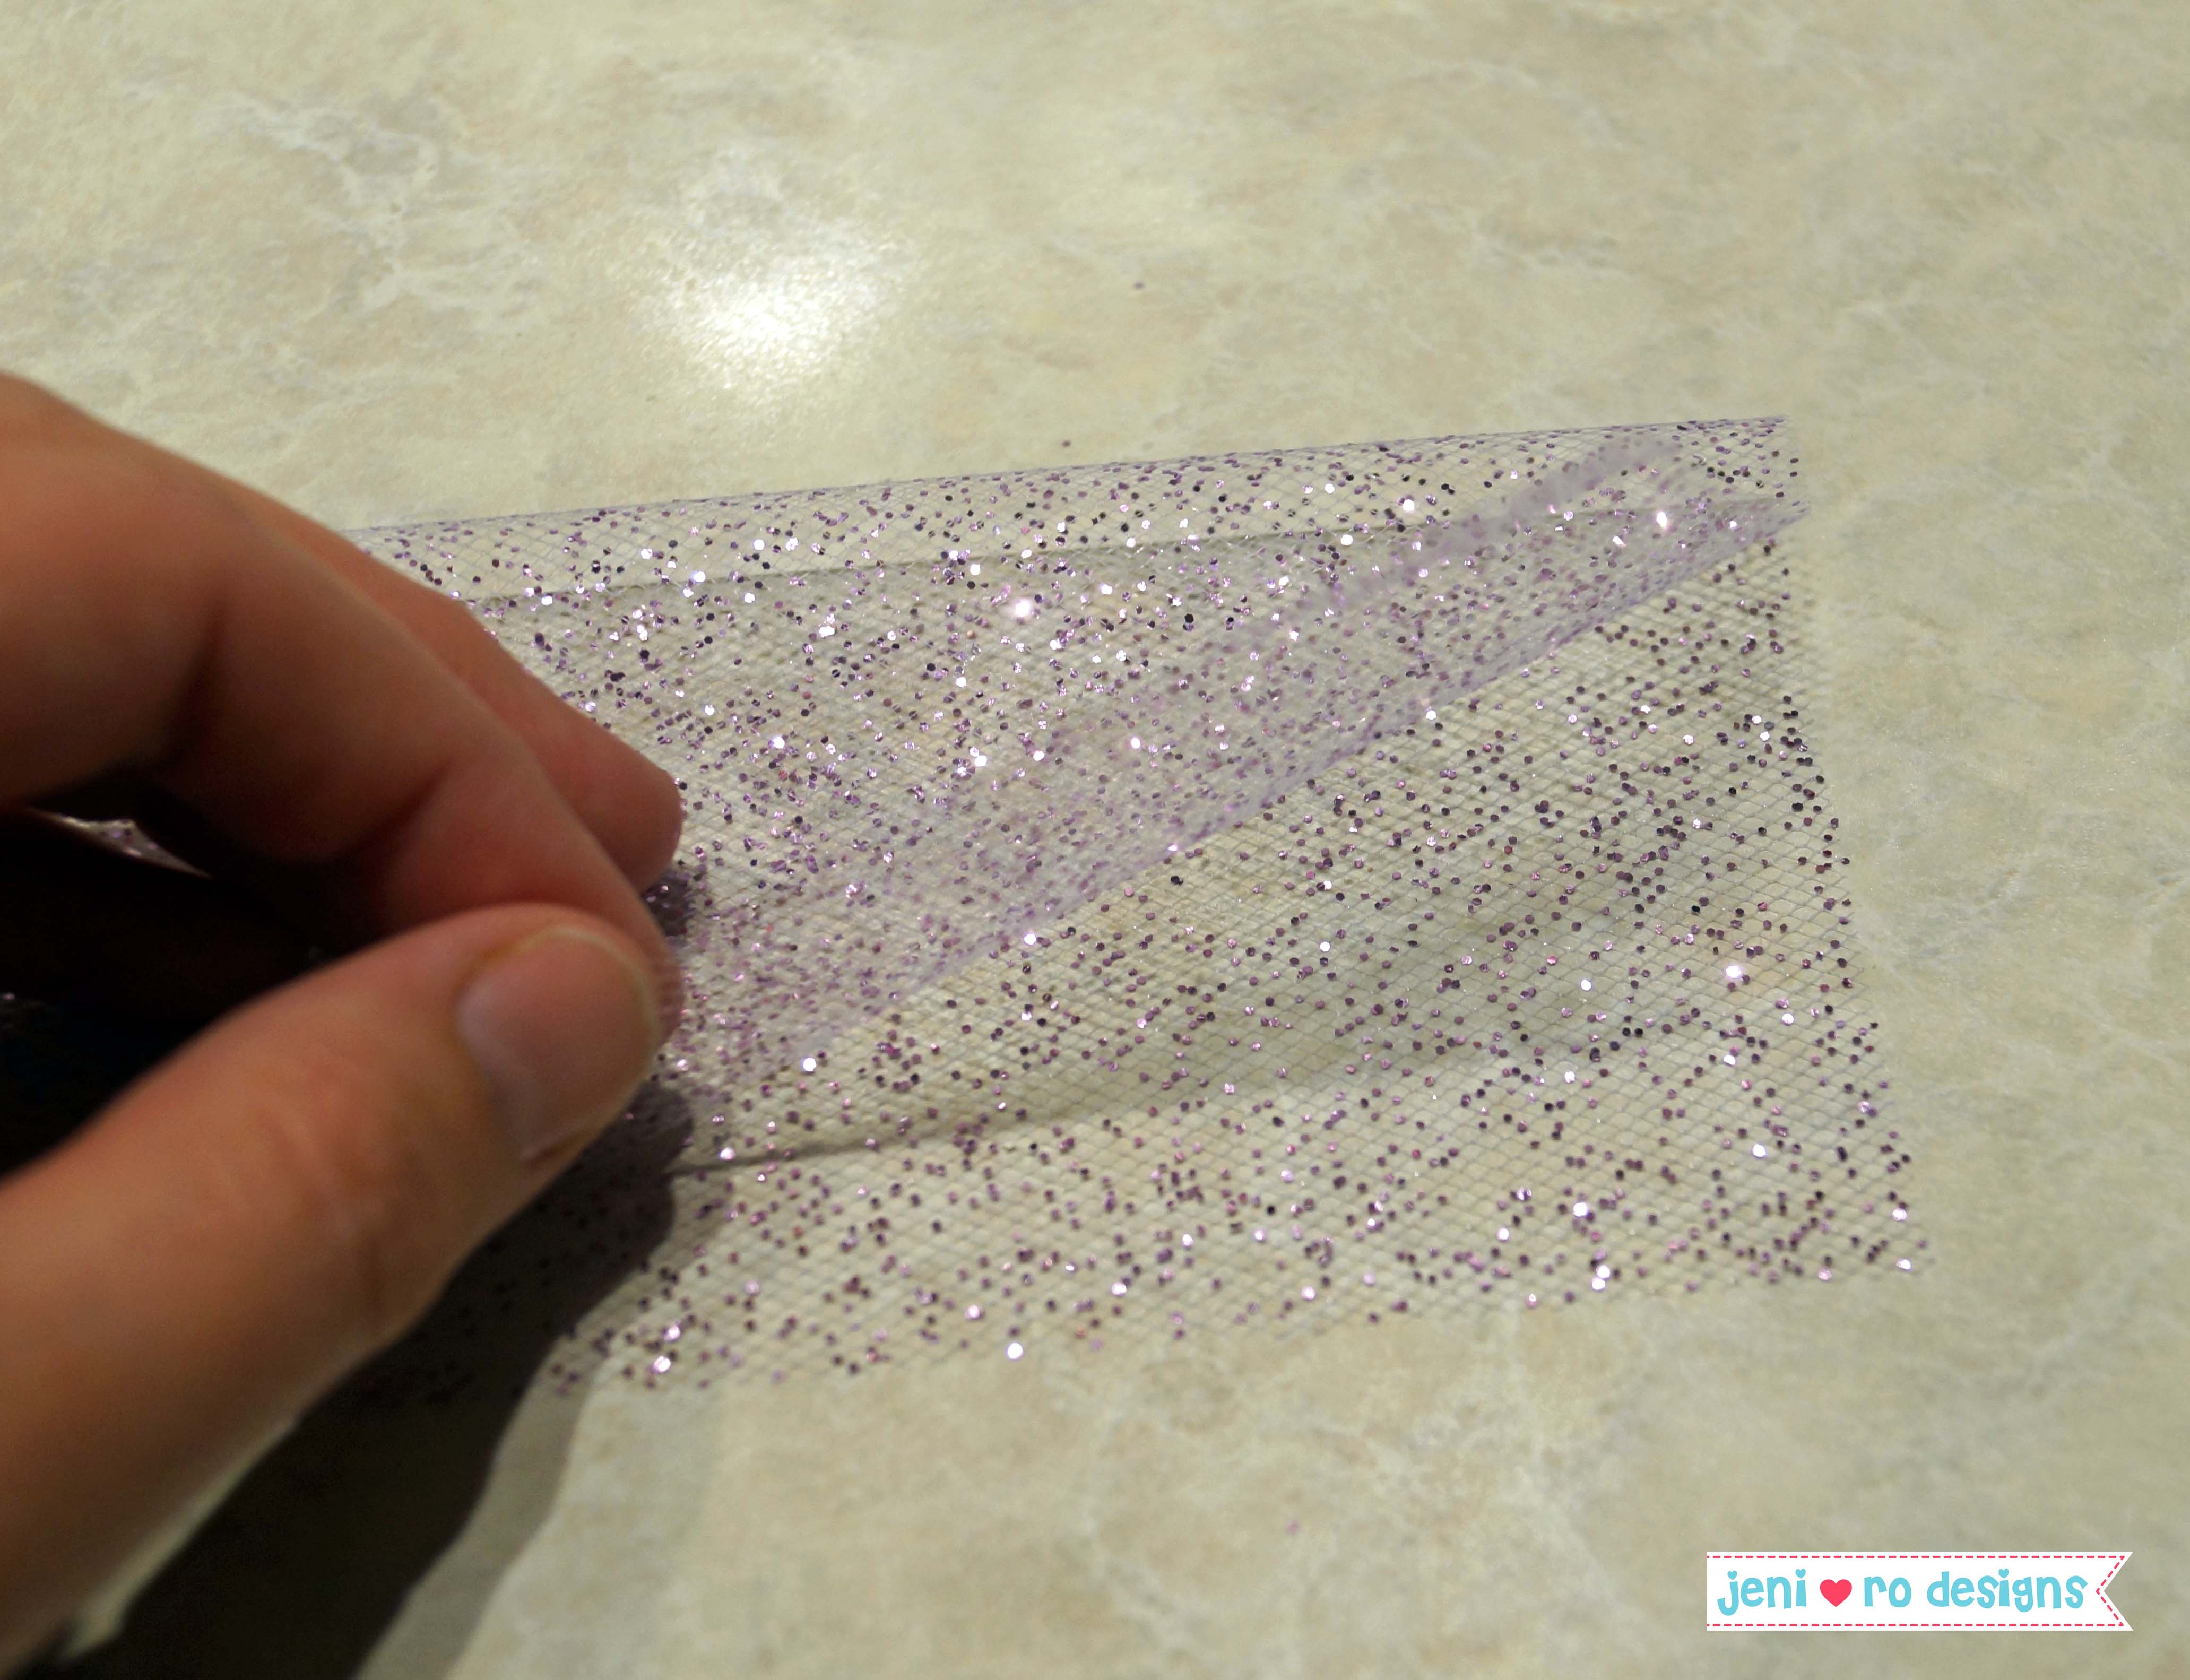
From the tulle – cut a 15-20″ length of tulle. From the felt – cut 2 – 2″ circles.

A circle template comes in very handy for the cutting the circles. I highly recommend getting one!

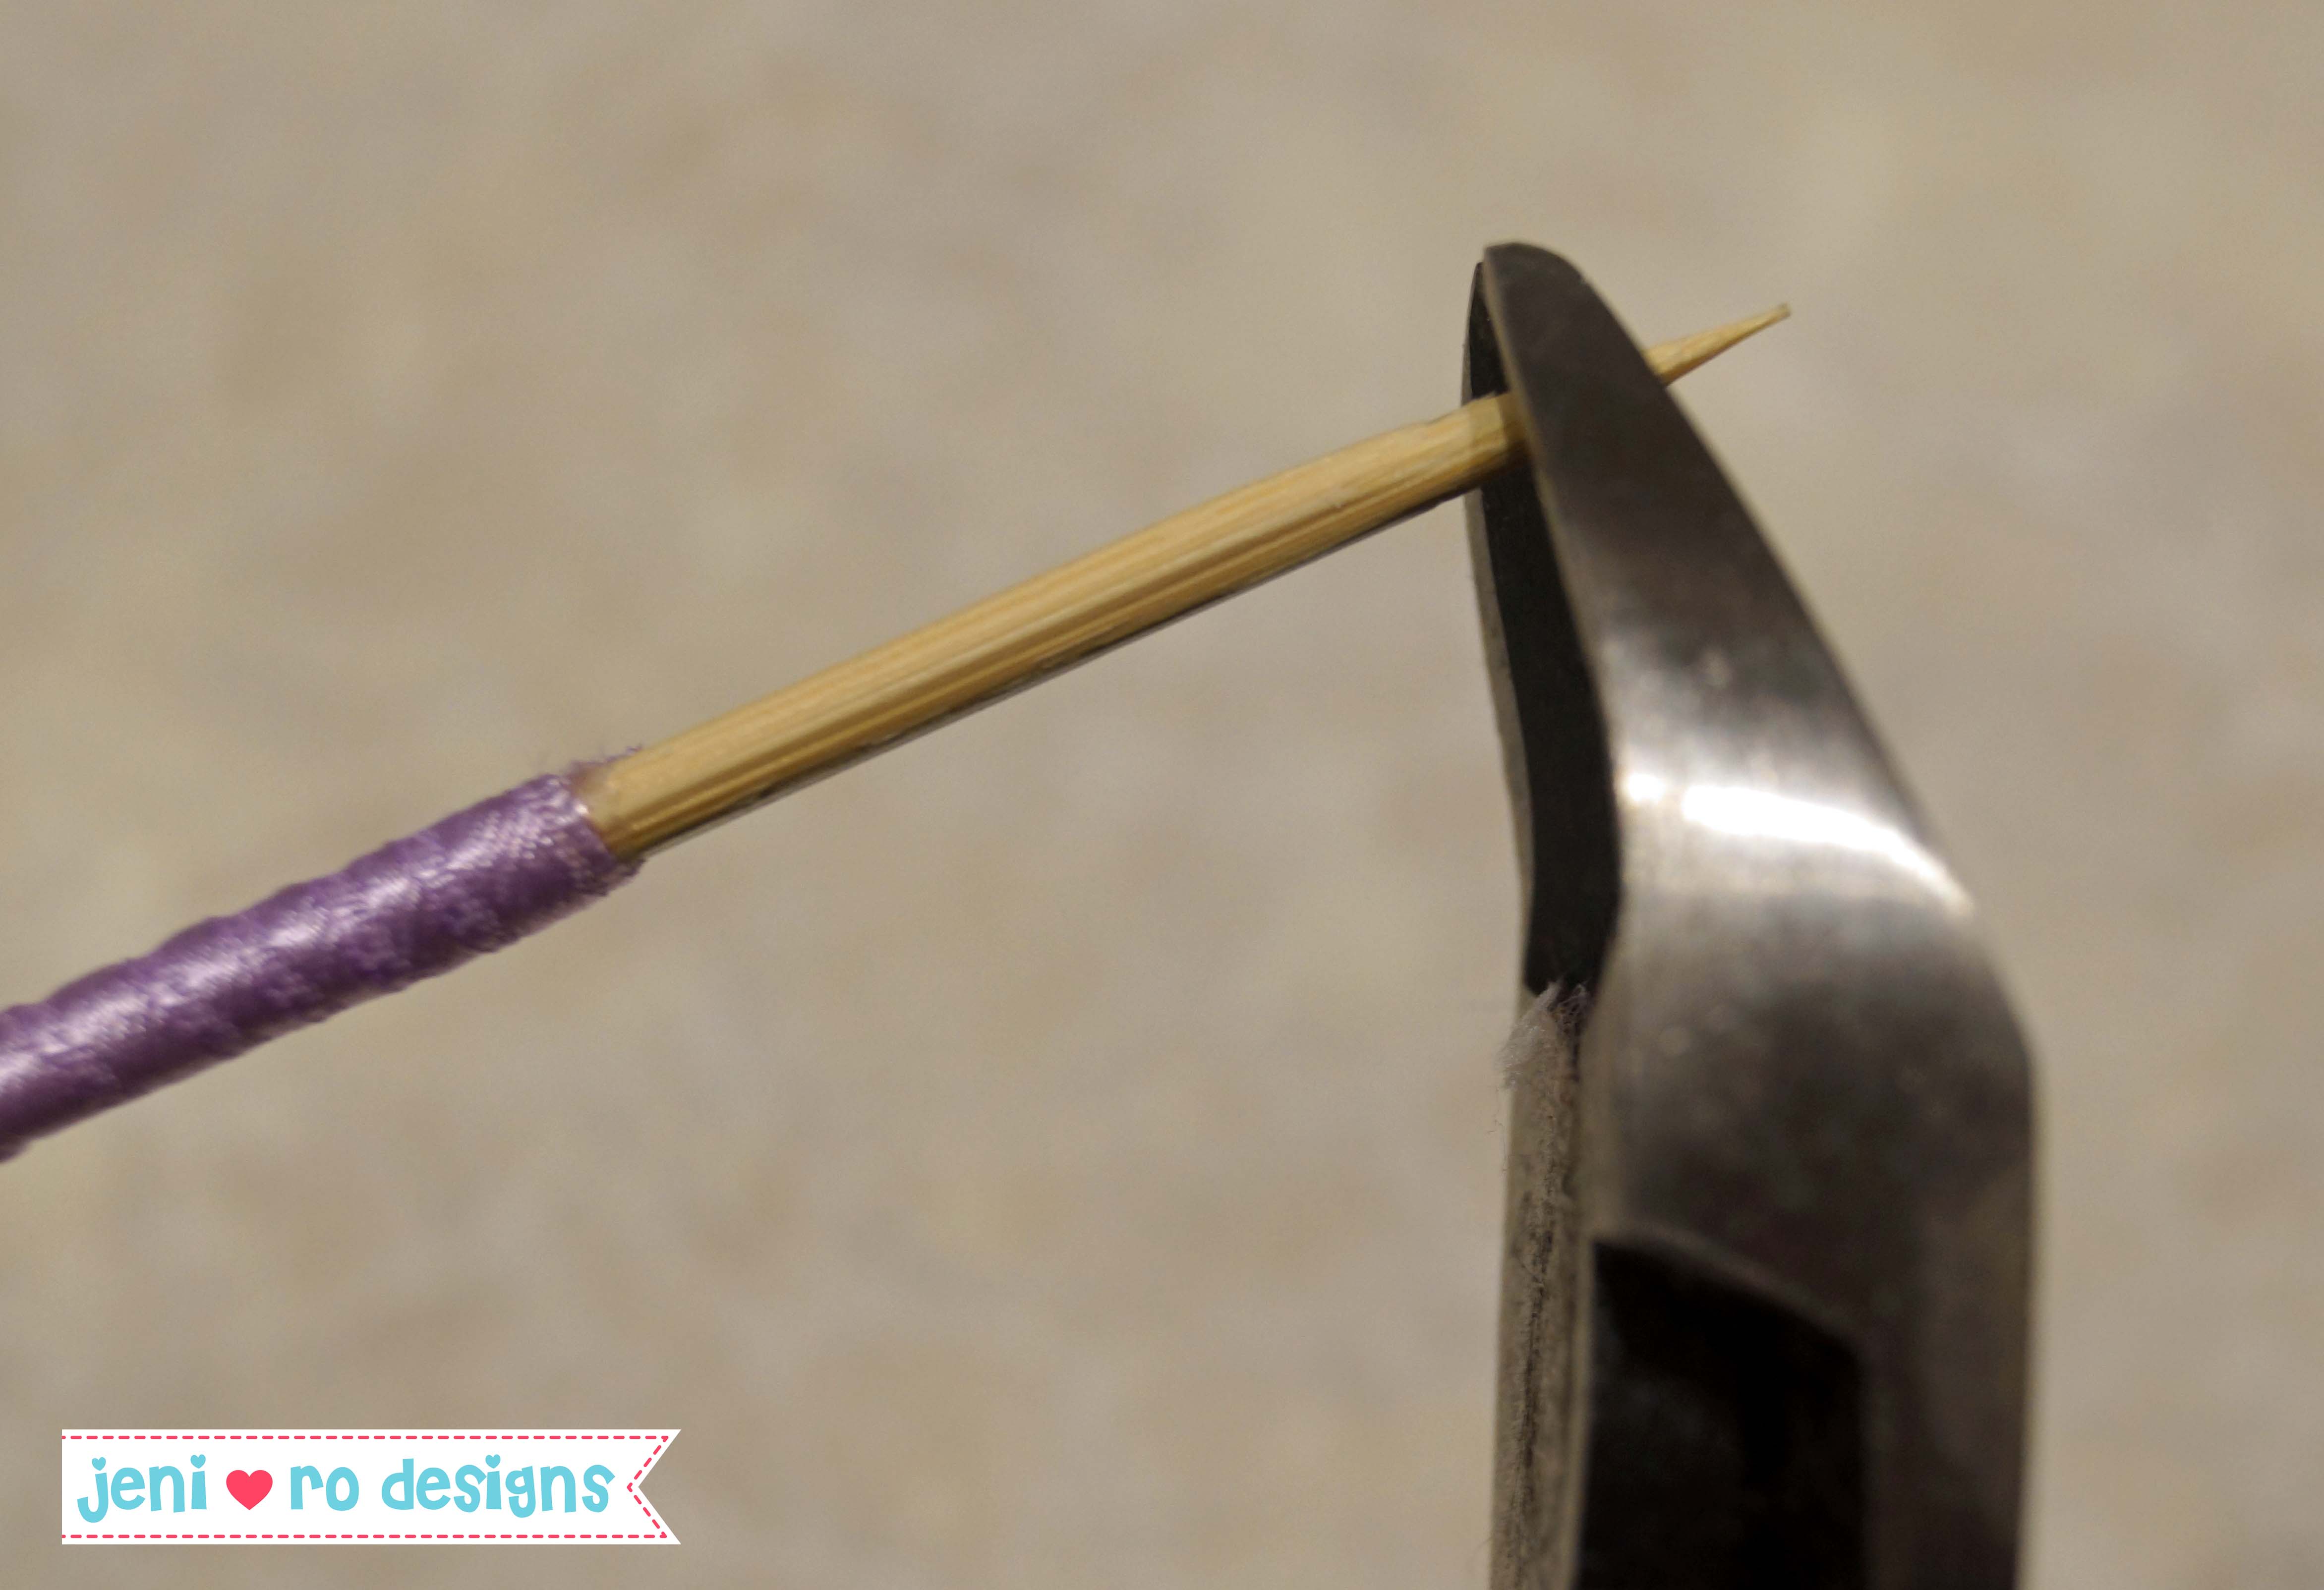
Step 1: Cover skewer with ribbon
Wrap a length of double stick tape around the skewer lengthwise.

Starting at the blunt end of the skewer, wrap the ribbon around the skewer making sure to cover the stick completely.

Hold the ribbon tight as you wrap it around the skewer. Stop the ribbon about 1-2″ from the point. Clip off the point for safety.
Step 2: Ruffle the tulle
Fold the tulle in half widthwise – so the piece is now 3″ x 15-20″.
Crank up the tension on your sewing machine and set the stitch to a long basting stitch. Sew a basting stitch about 3/8″ from the top of the open side. Do not sew on the folded edge. If you don’t have a sewing machine, you can sew a basting stitch by hand (a long running stitch) and pull tight to gather the tulle.
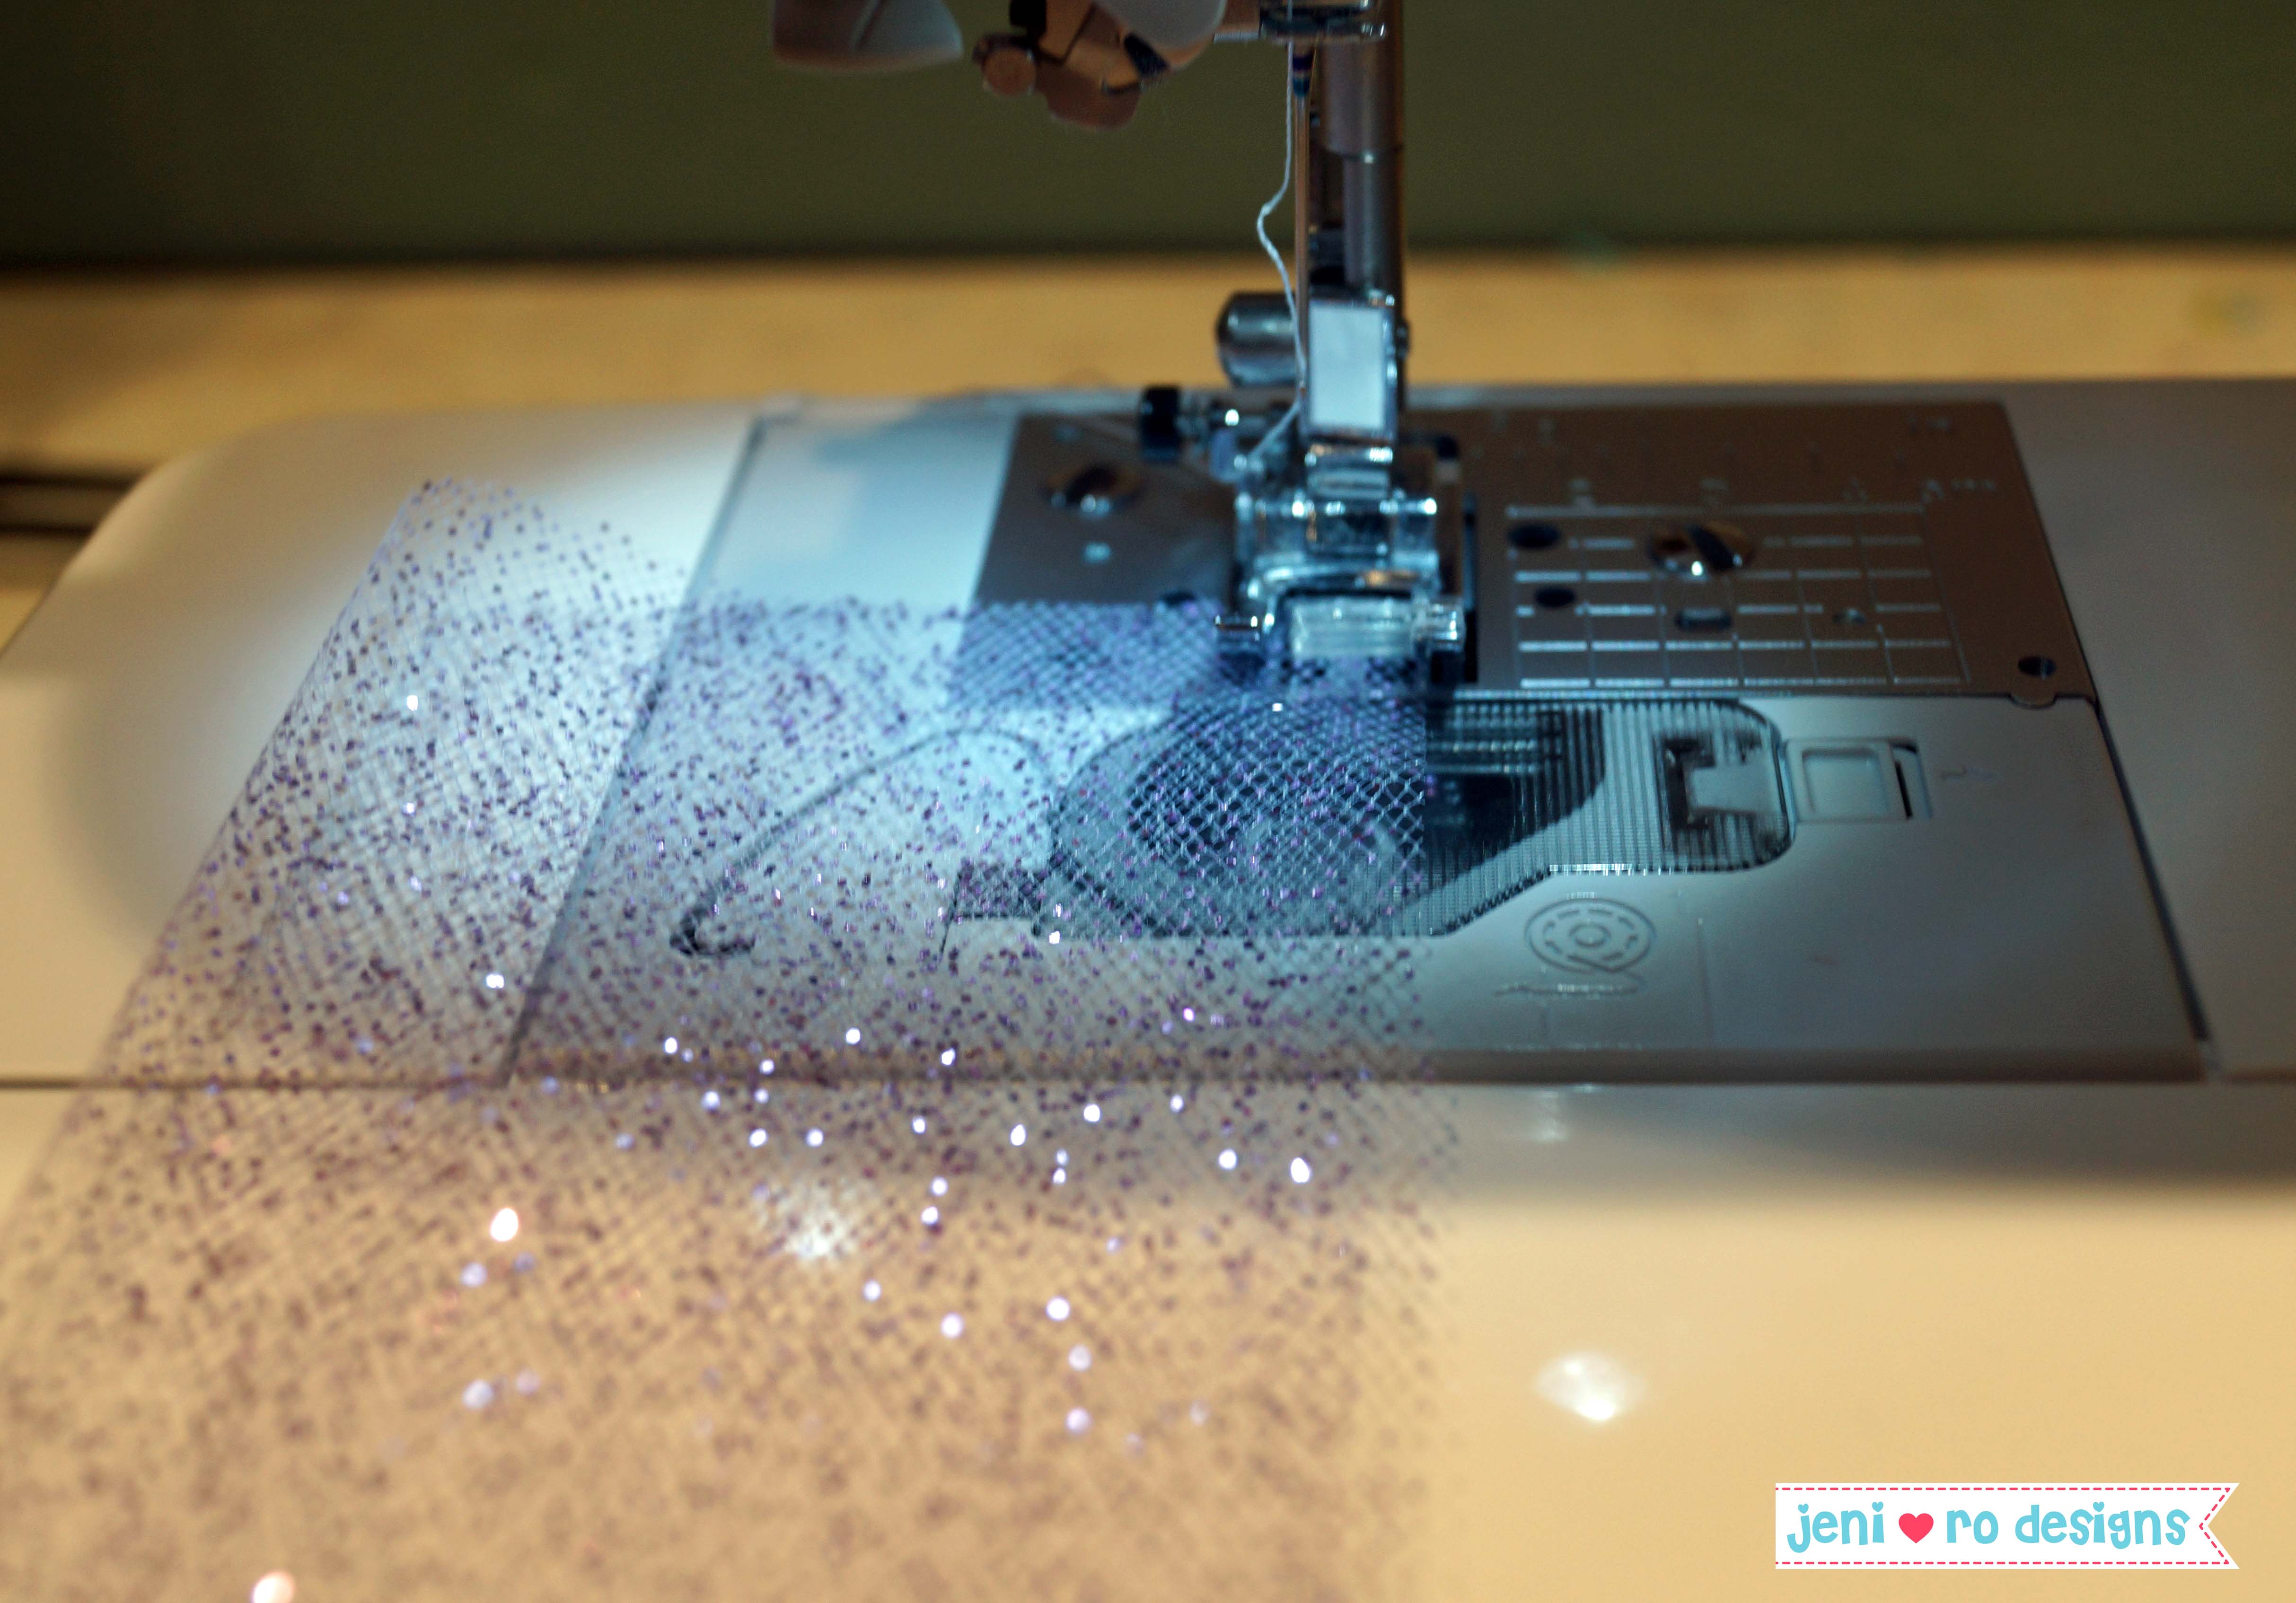
The tulle should ruffle up in a sort of circle.

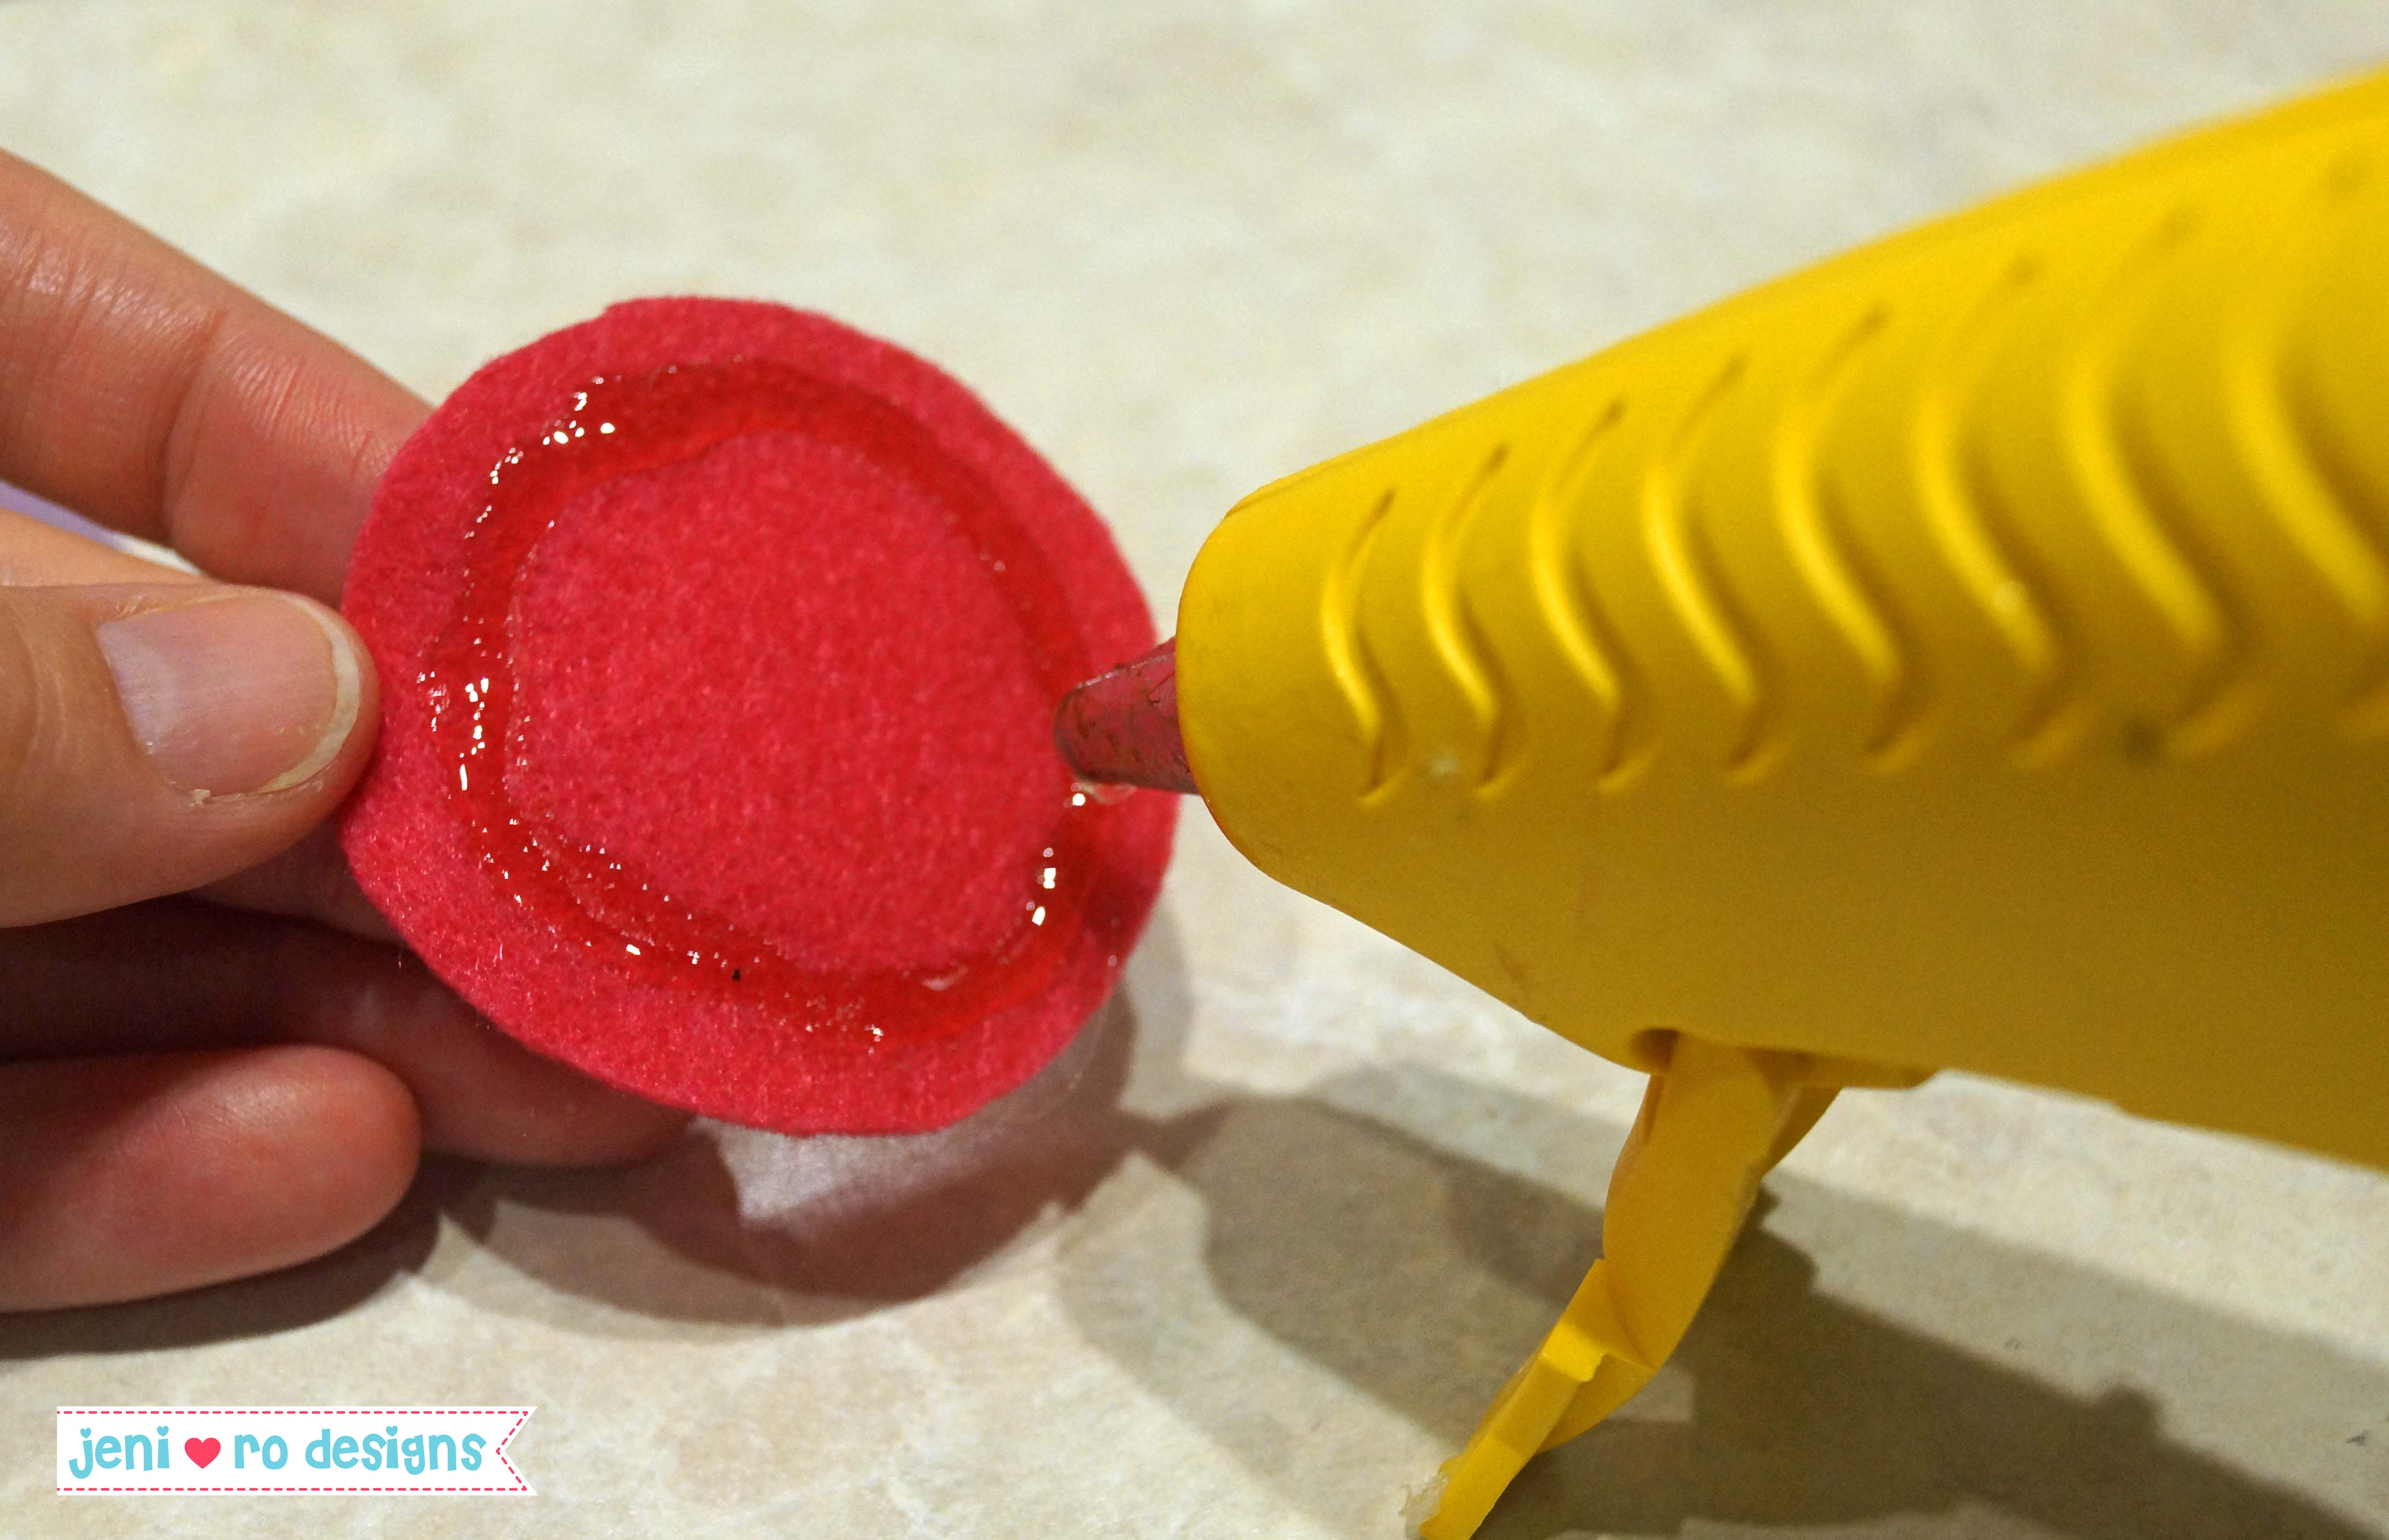
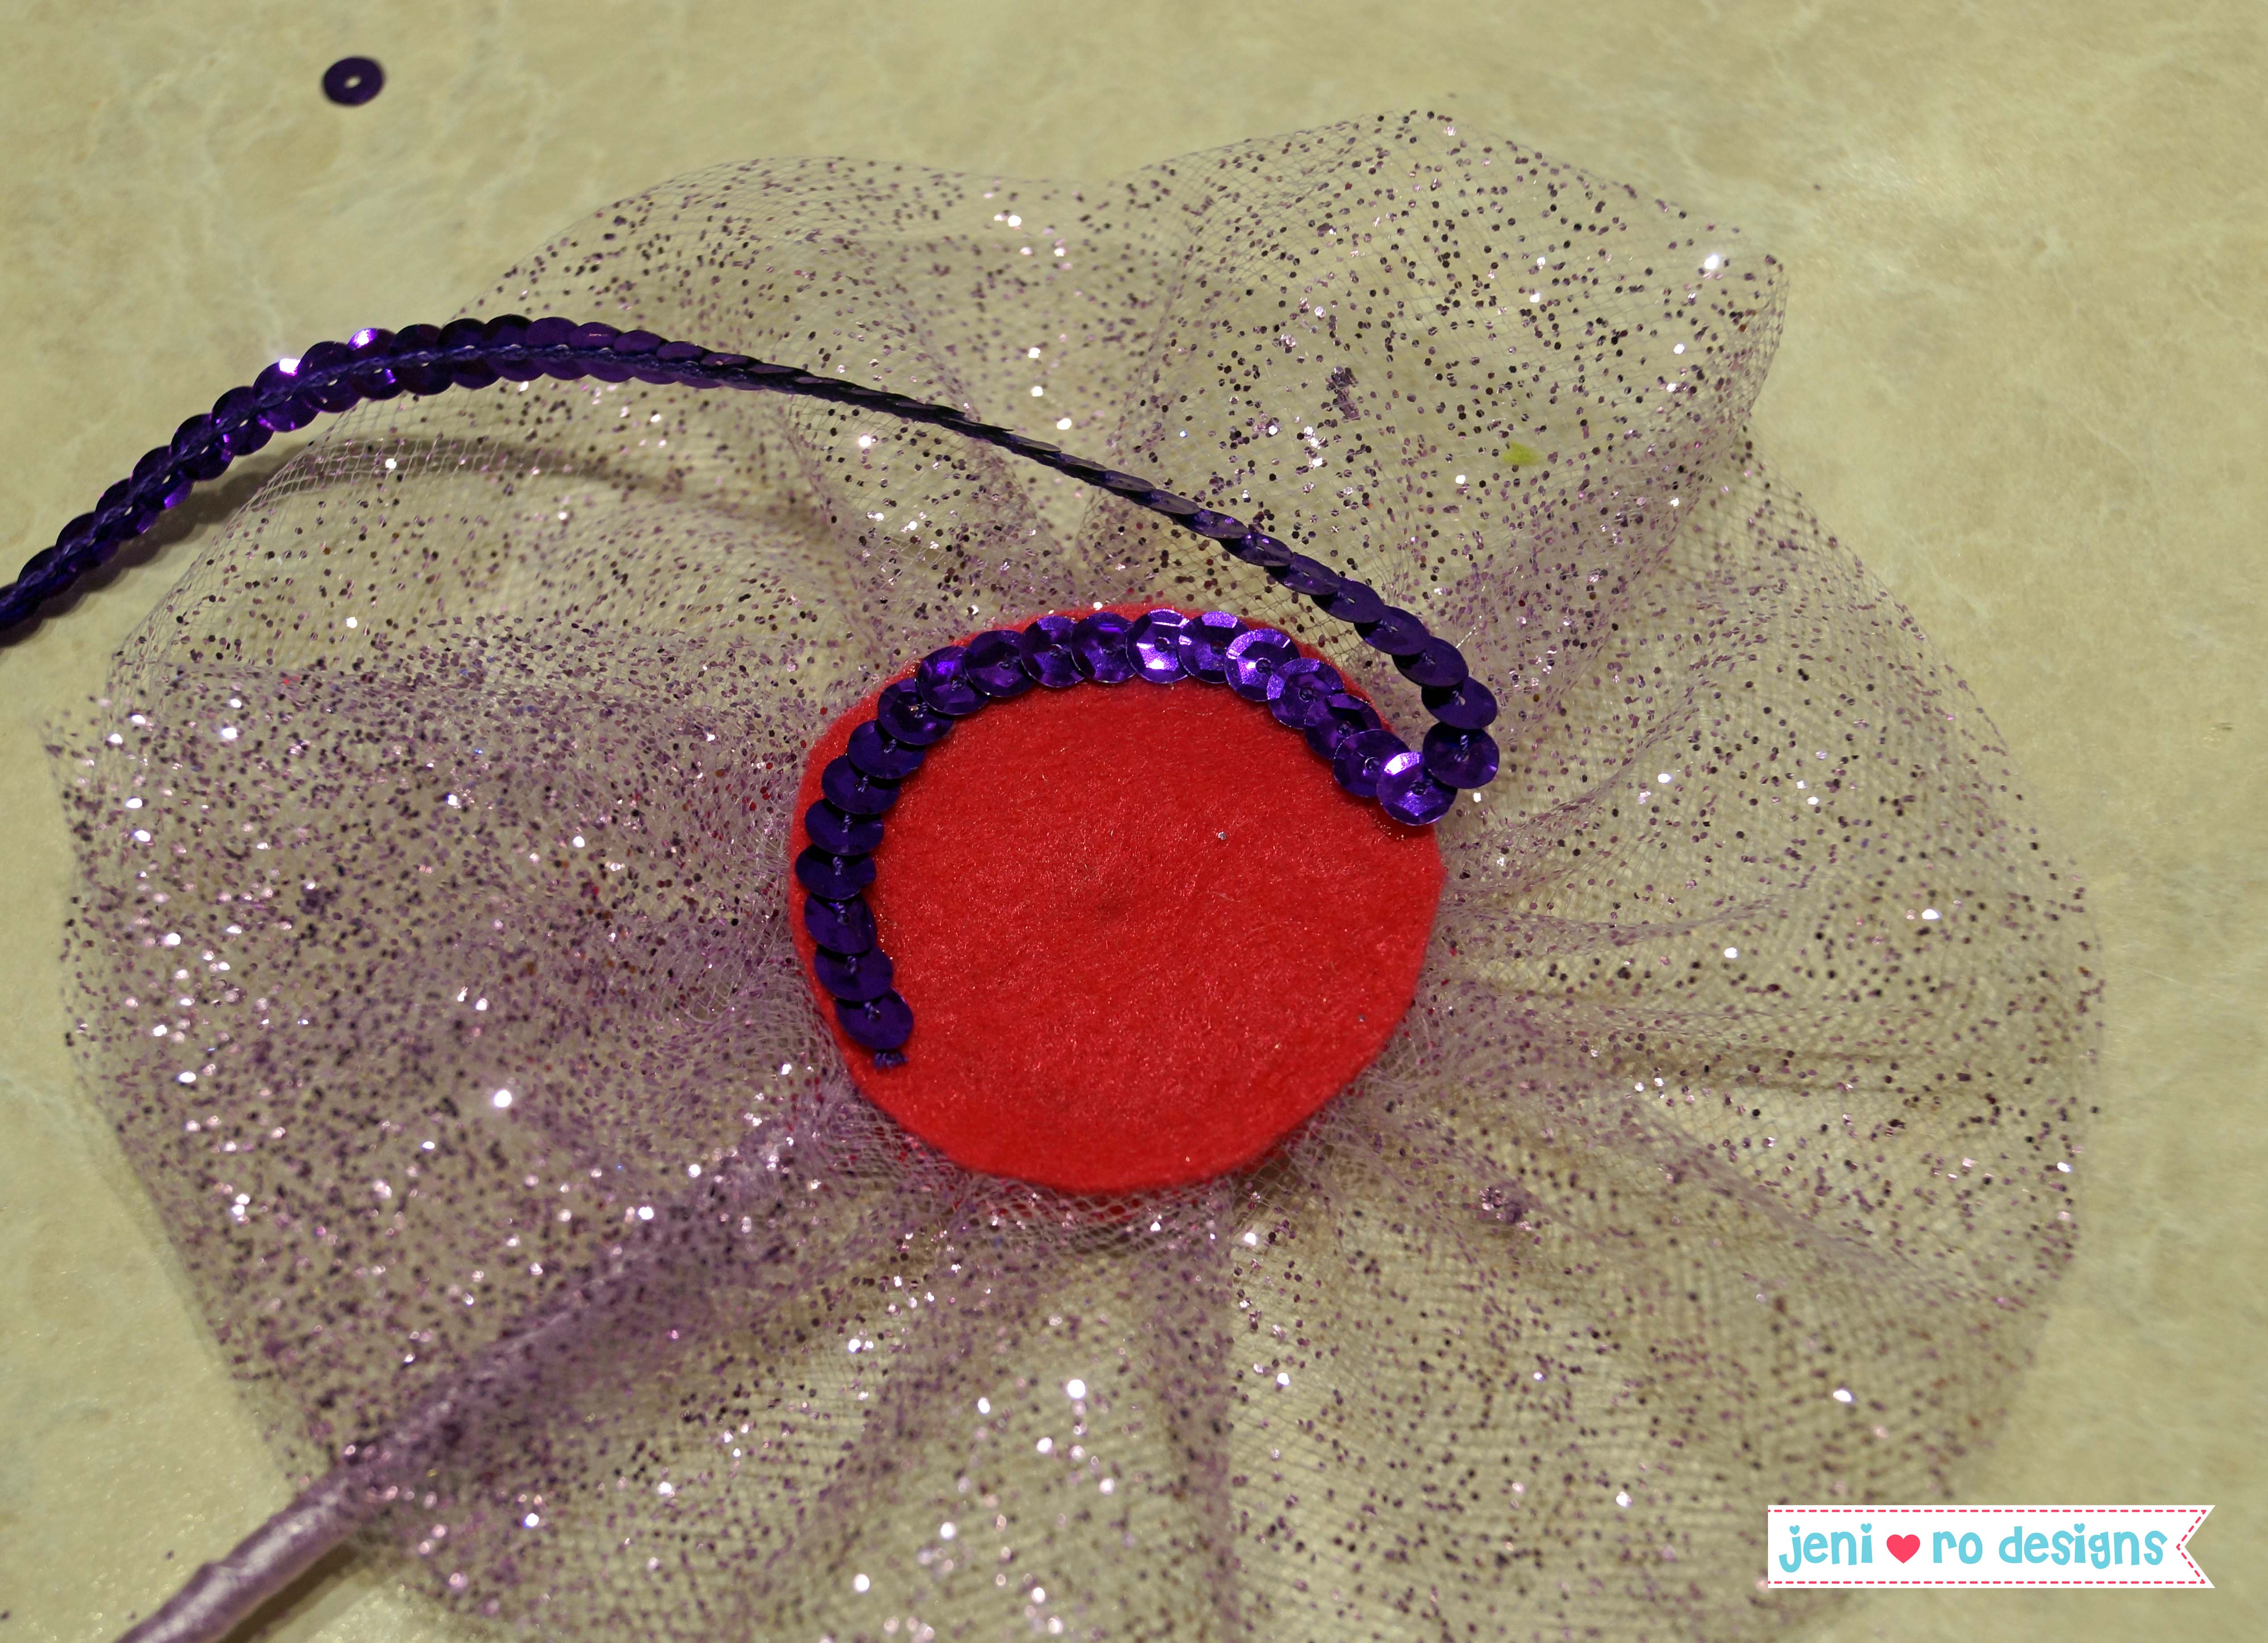
Step 3: Glue the wand together.
Heat up your hot glue gun. When its nice and hot, put a bead of glue on the edges of one of the felt circles. No hot glue gun? Fabric glue (like Fabric-Tac) would work as well.
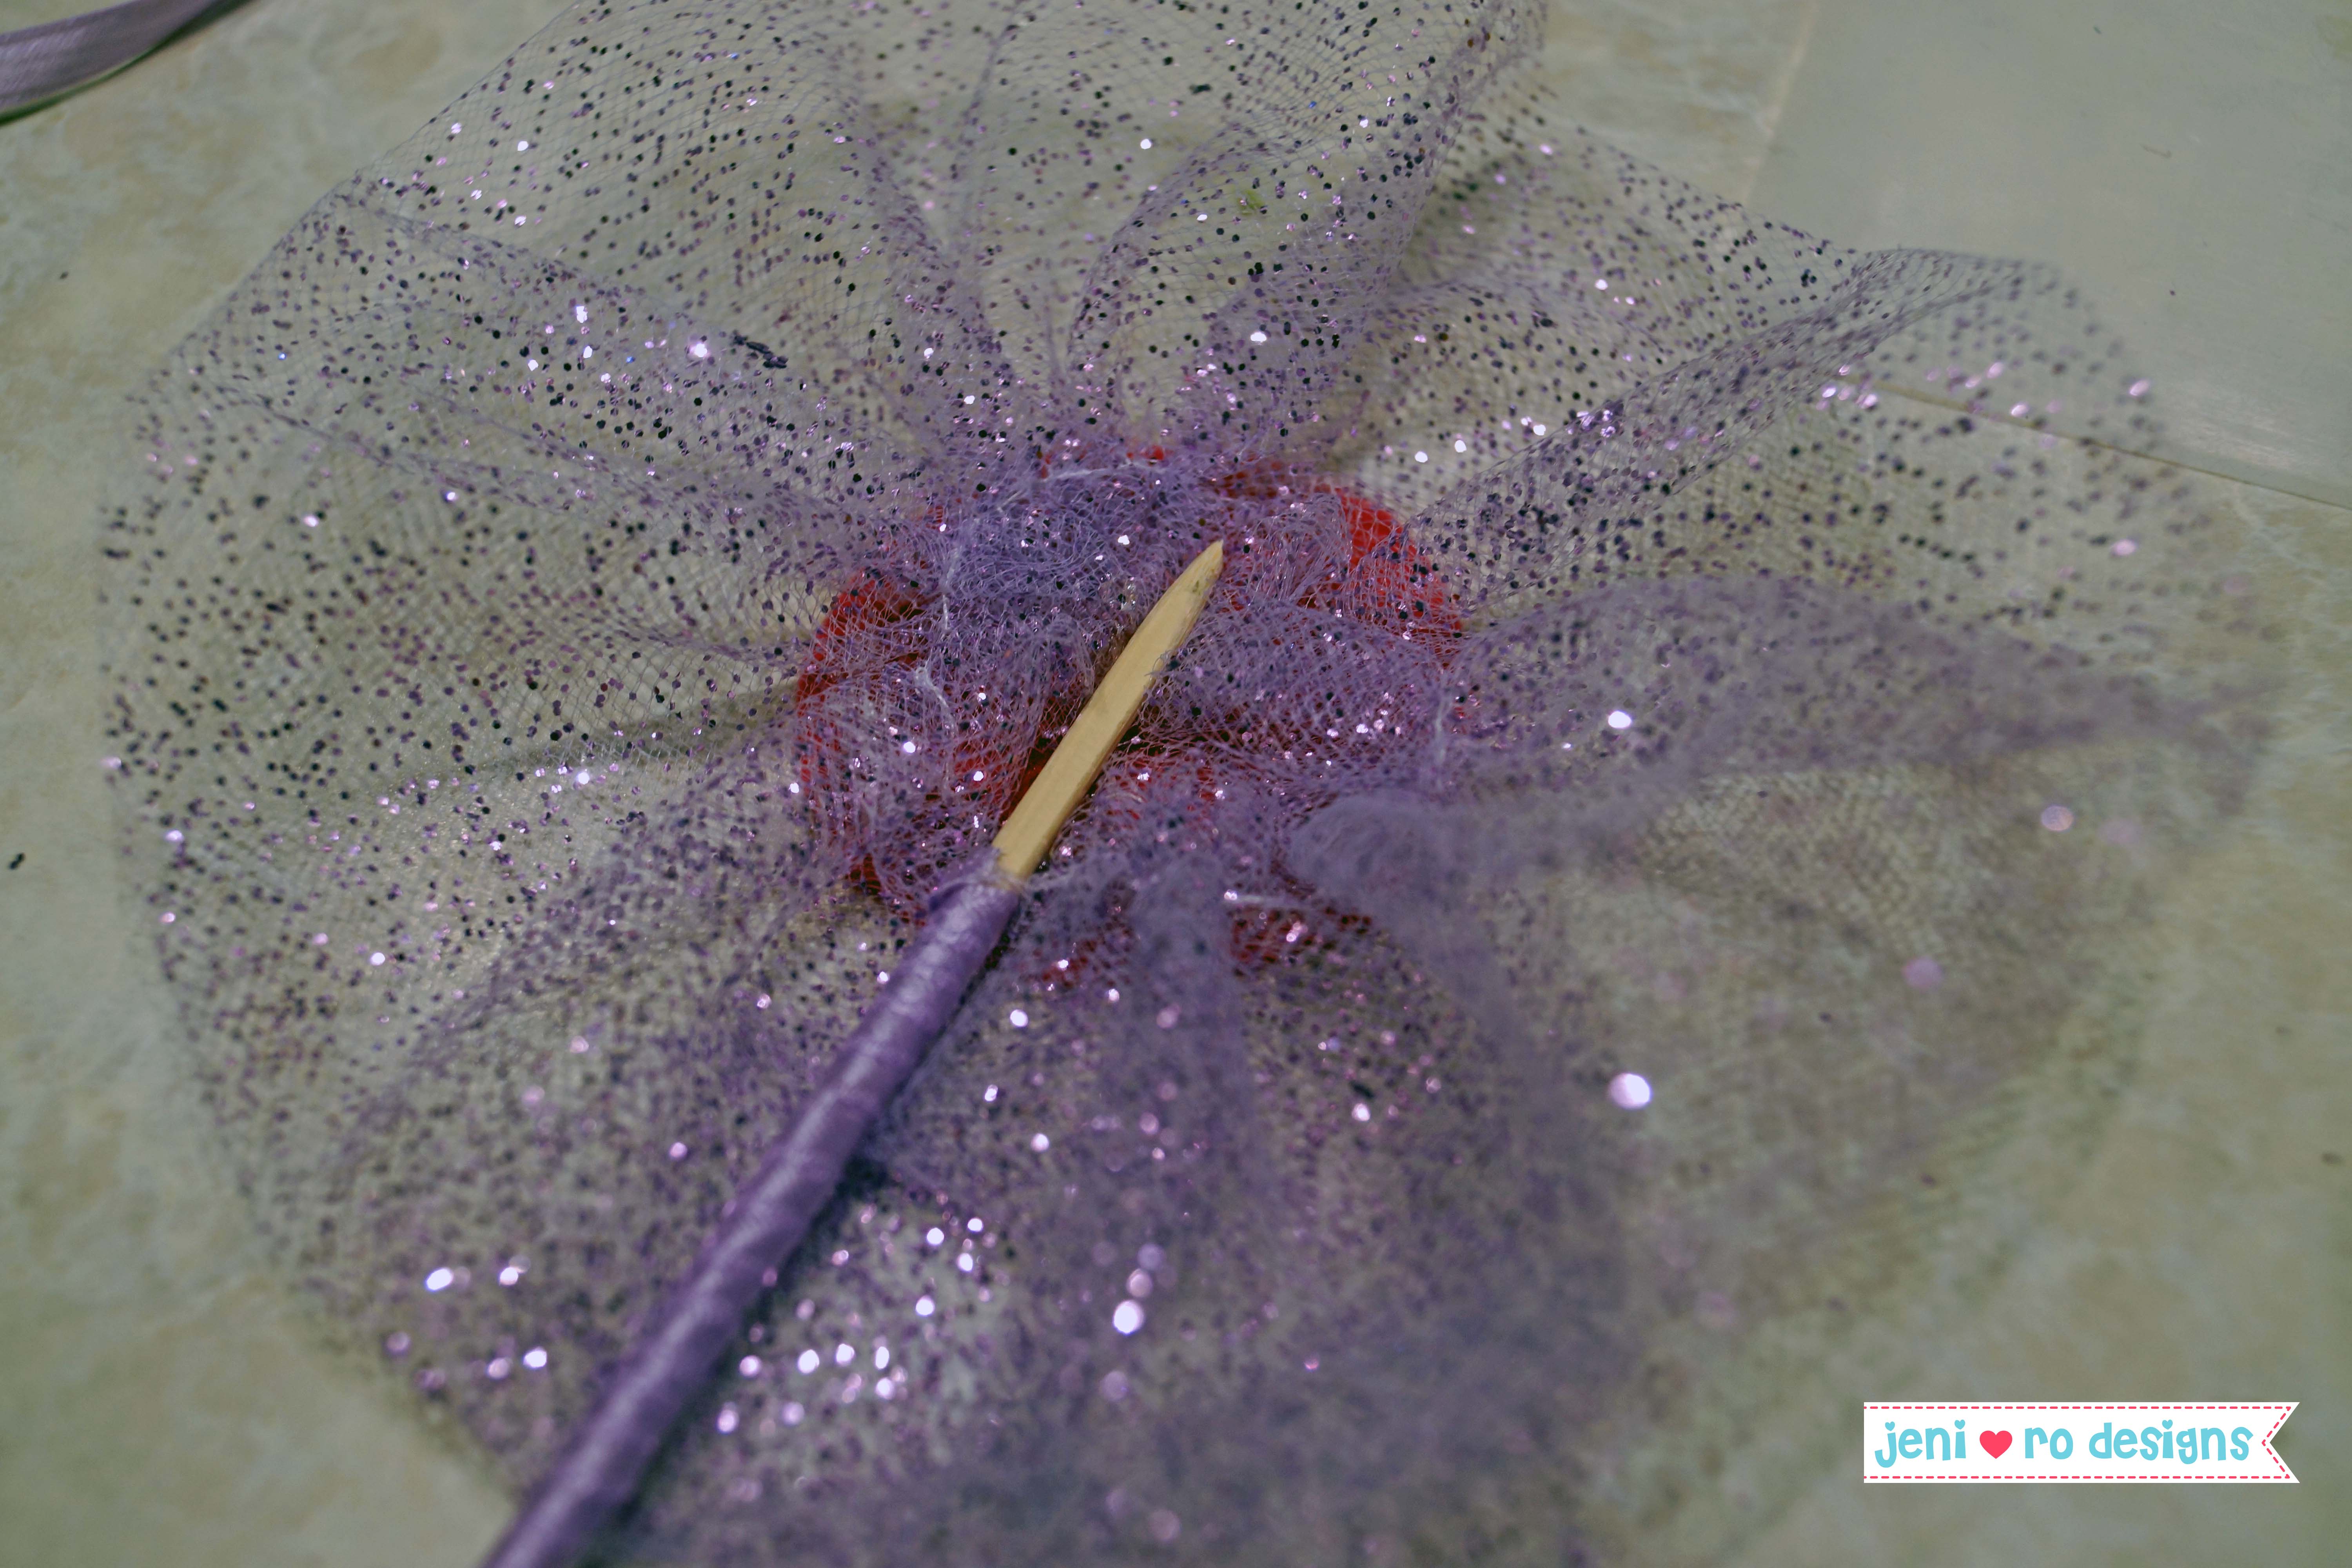
Overlap the ends of the tulle circle. If the tulle circle is not tight enough – pull on the bobbin threads to tighten up the circle. Place the glued up felt circle on the middle of the tulle circle, making sure all of the inside edge is covered.

When you turn the tulle circle over, it should look like this.

Put a line of glue in the middle of the tulle side of the pouf. Put the ribbon wrapped skewer in the middle of the pouf, into your line of glue to secure.
Run a line of glue around the 2nd felt circle. Place that circle on top of the pouf and skewer – lining it up with the first felt circle.
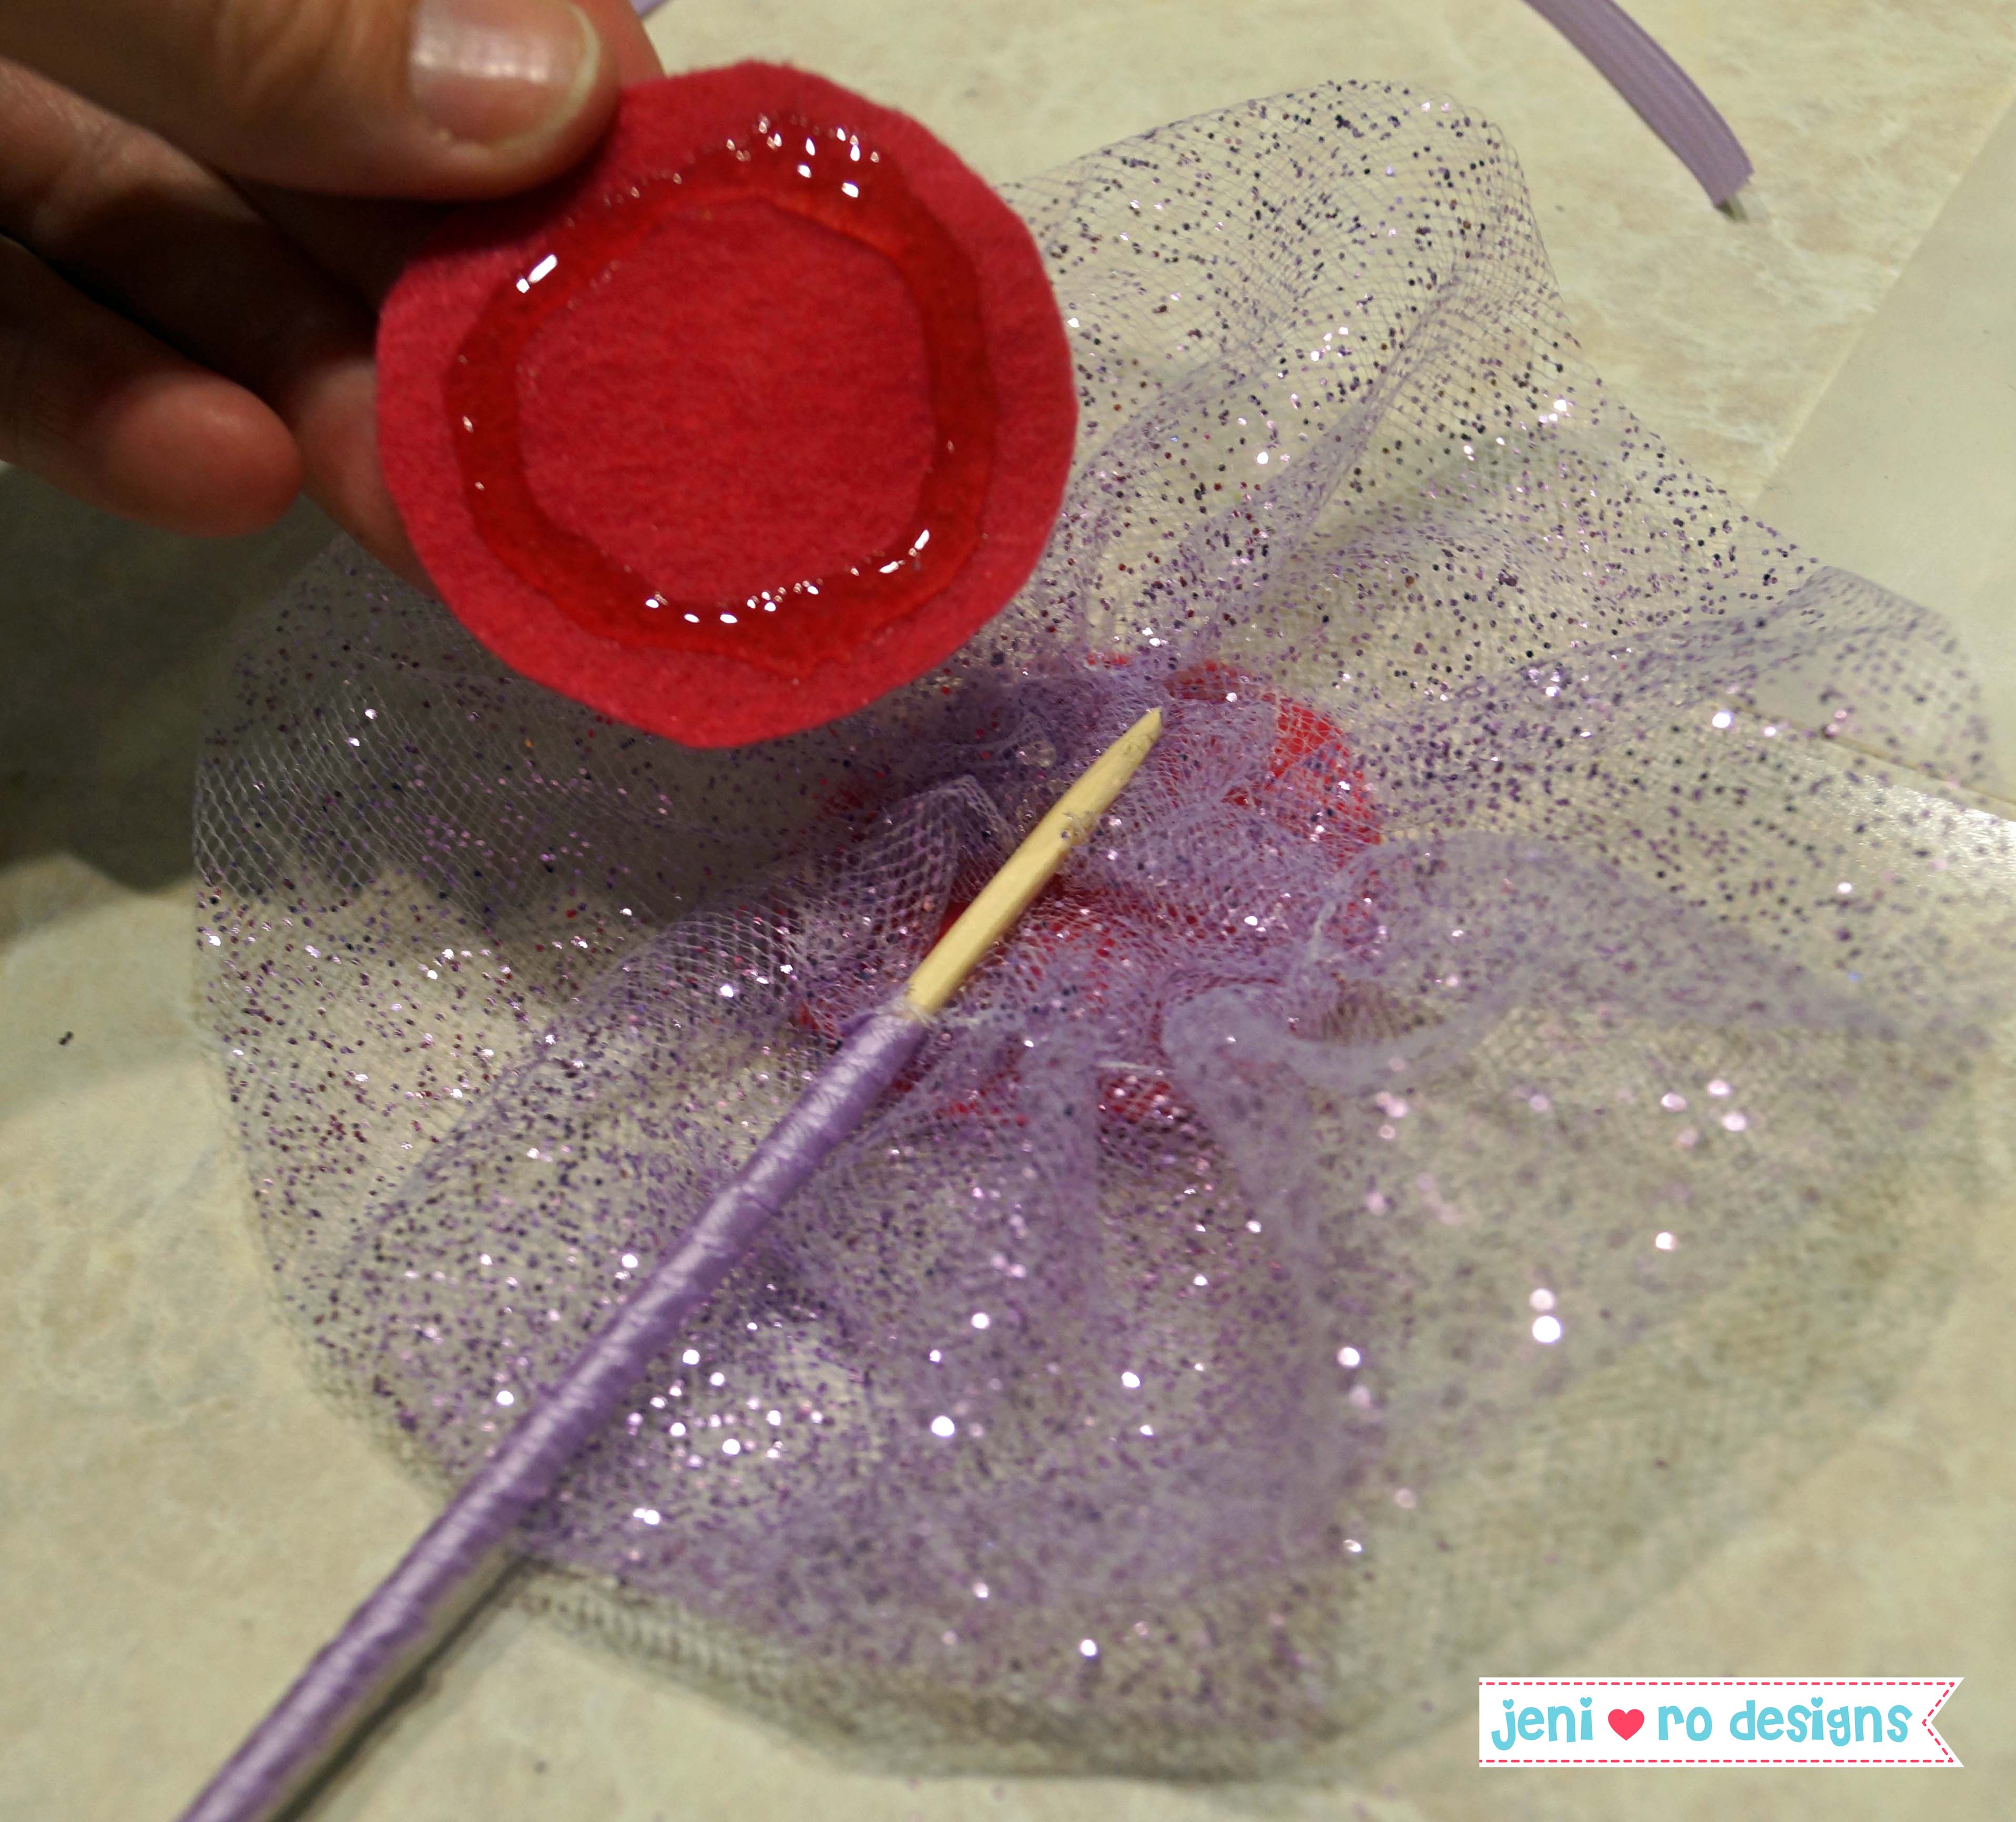
Push down on the circle making sure the glue adheres.

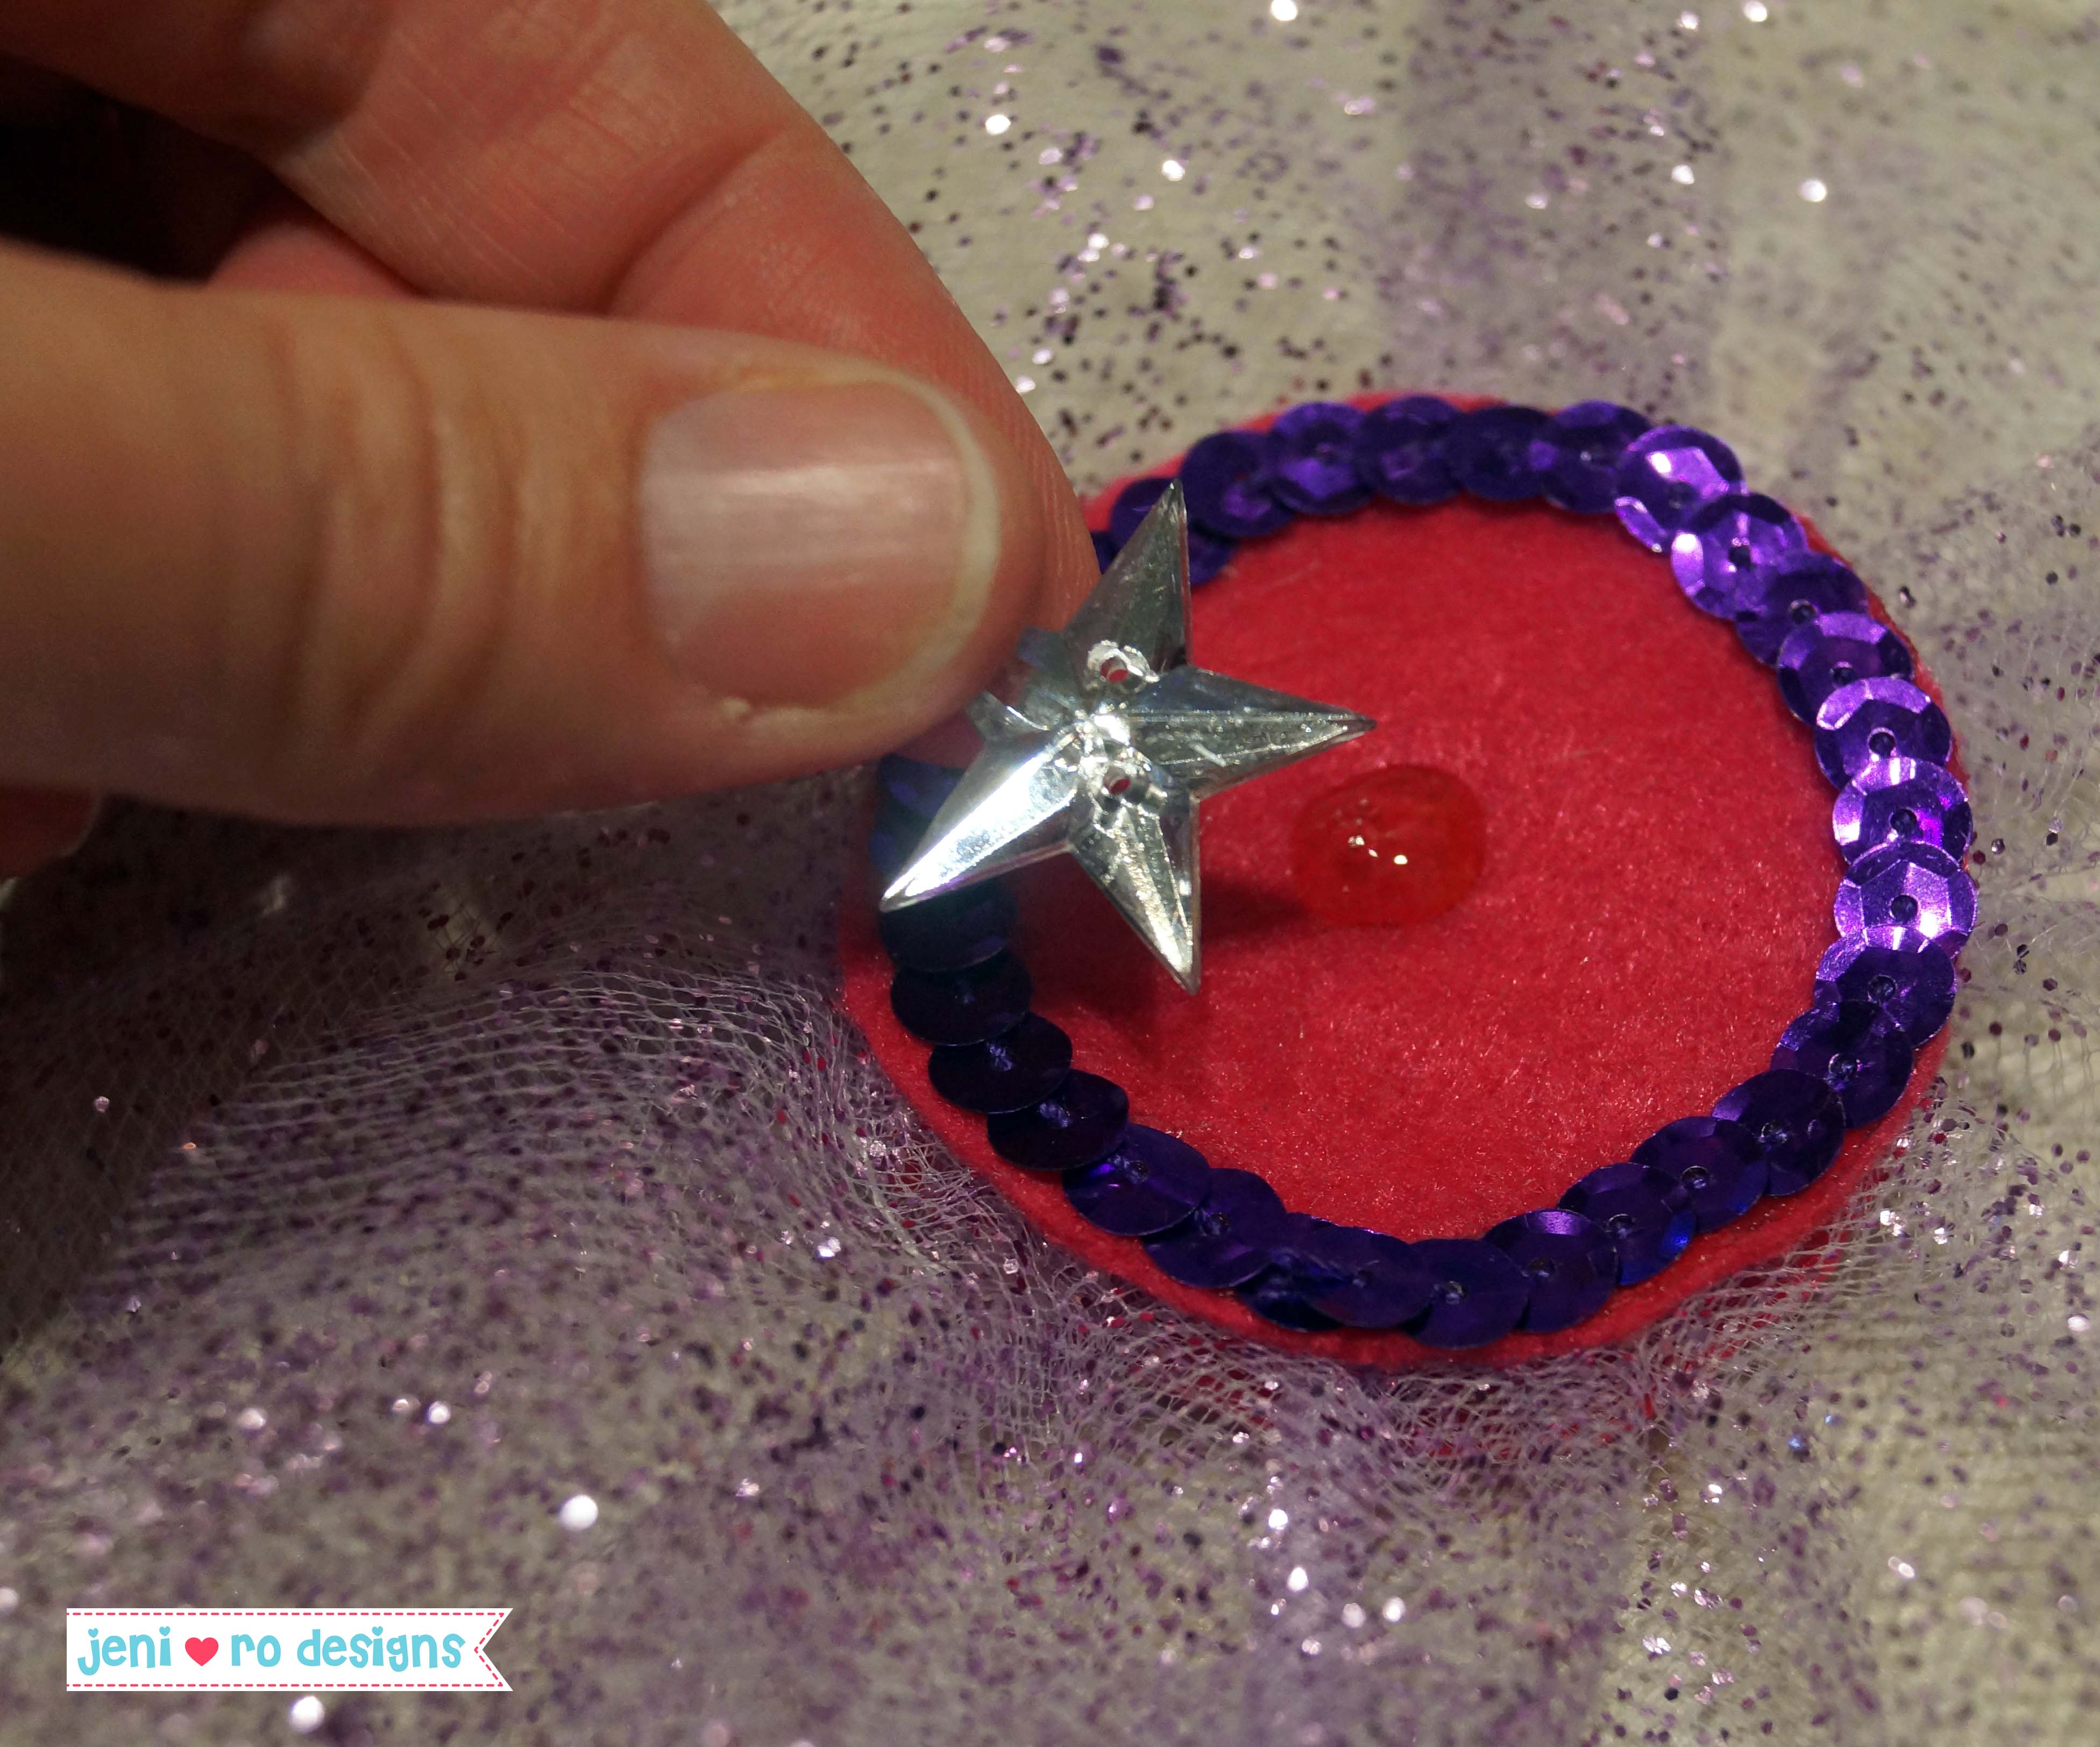
Step 4: Embellishments!
Time to make the wand extra sparkly! Run a line of glue around the edge of the felt circle on one side of the wand, lay the sequins into the glue all the way around the circle. Repeat on the other side.
For the final touch, add a drop of glue in the middle of one side of the wand and add a sparkly button or jewel.
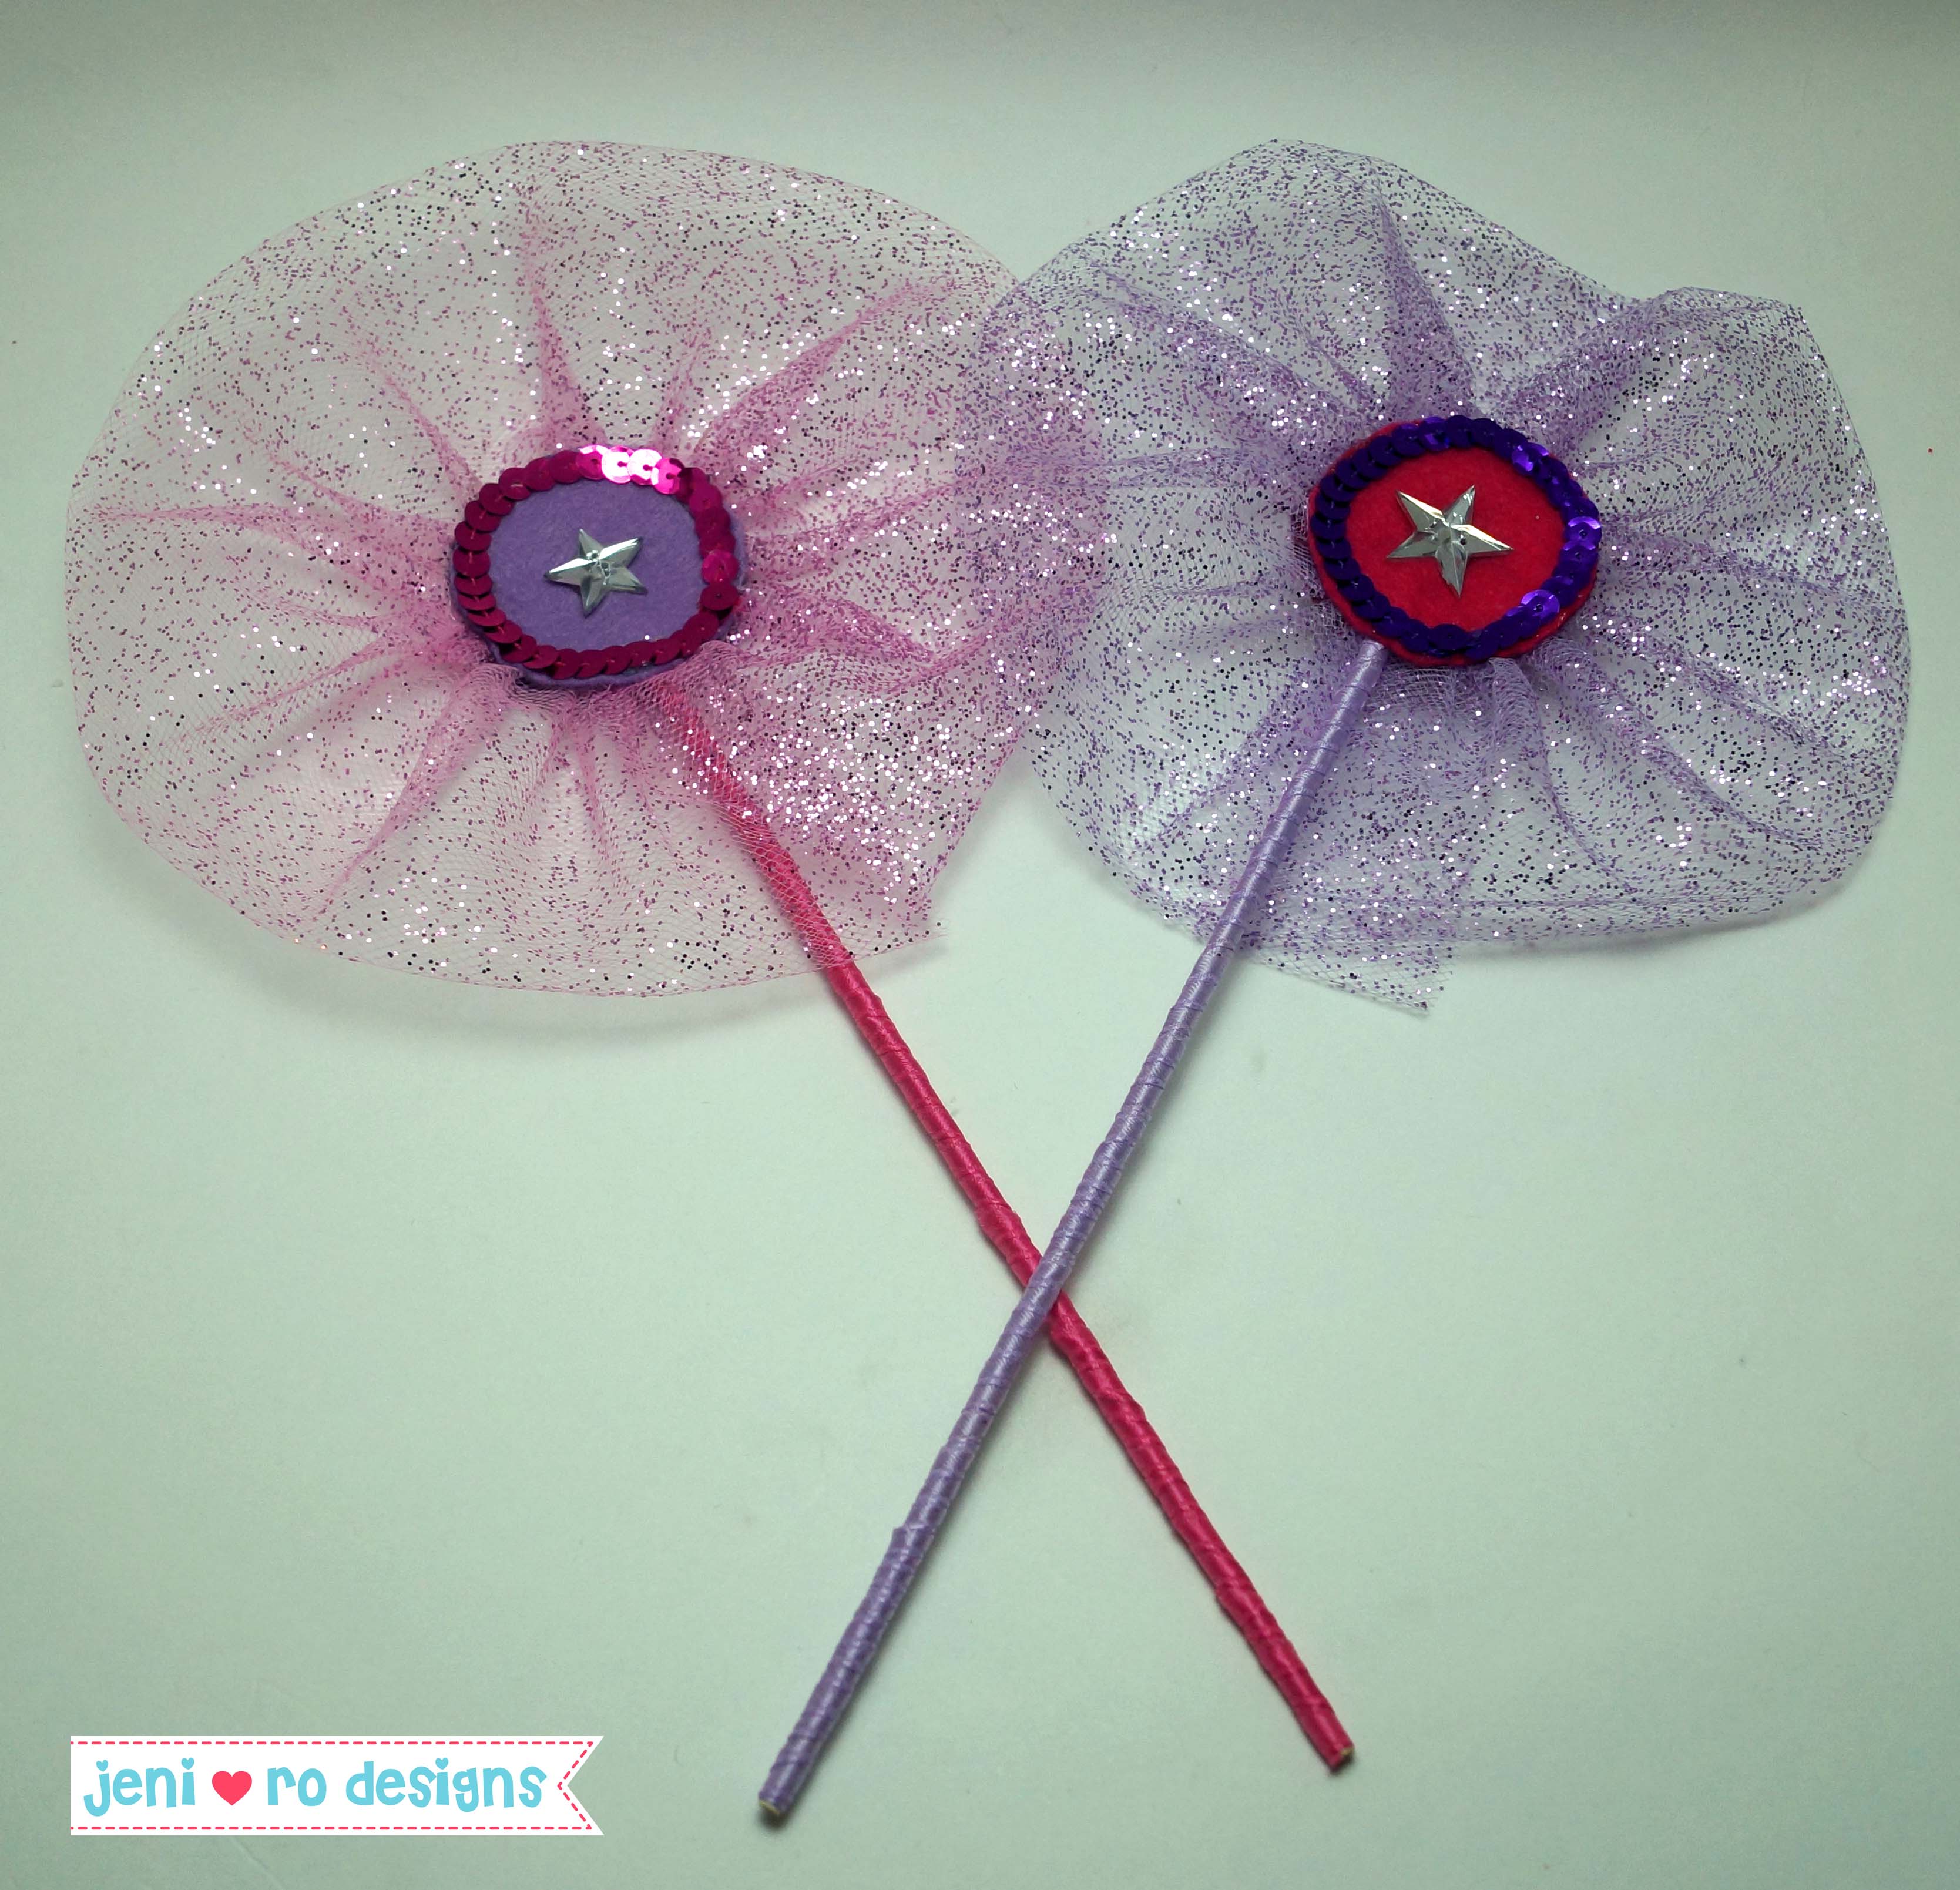
Now your princess wand is complete!

Perfect for princess party favors or just for dress up/imaginary play time!
Thanks for letting me share these fun Princess Wands! I think Miss O and her friends will love them! Check back for more fun party sneak peeks and finally the big party itself!! I can’t believe she is going to be 5!