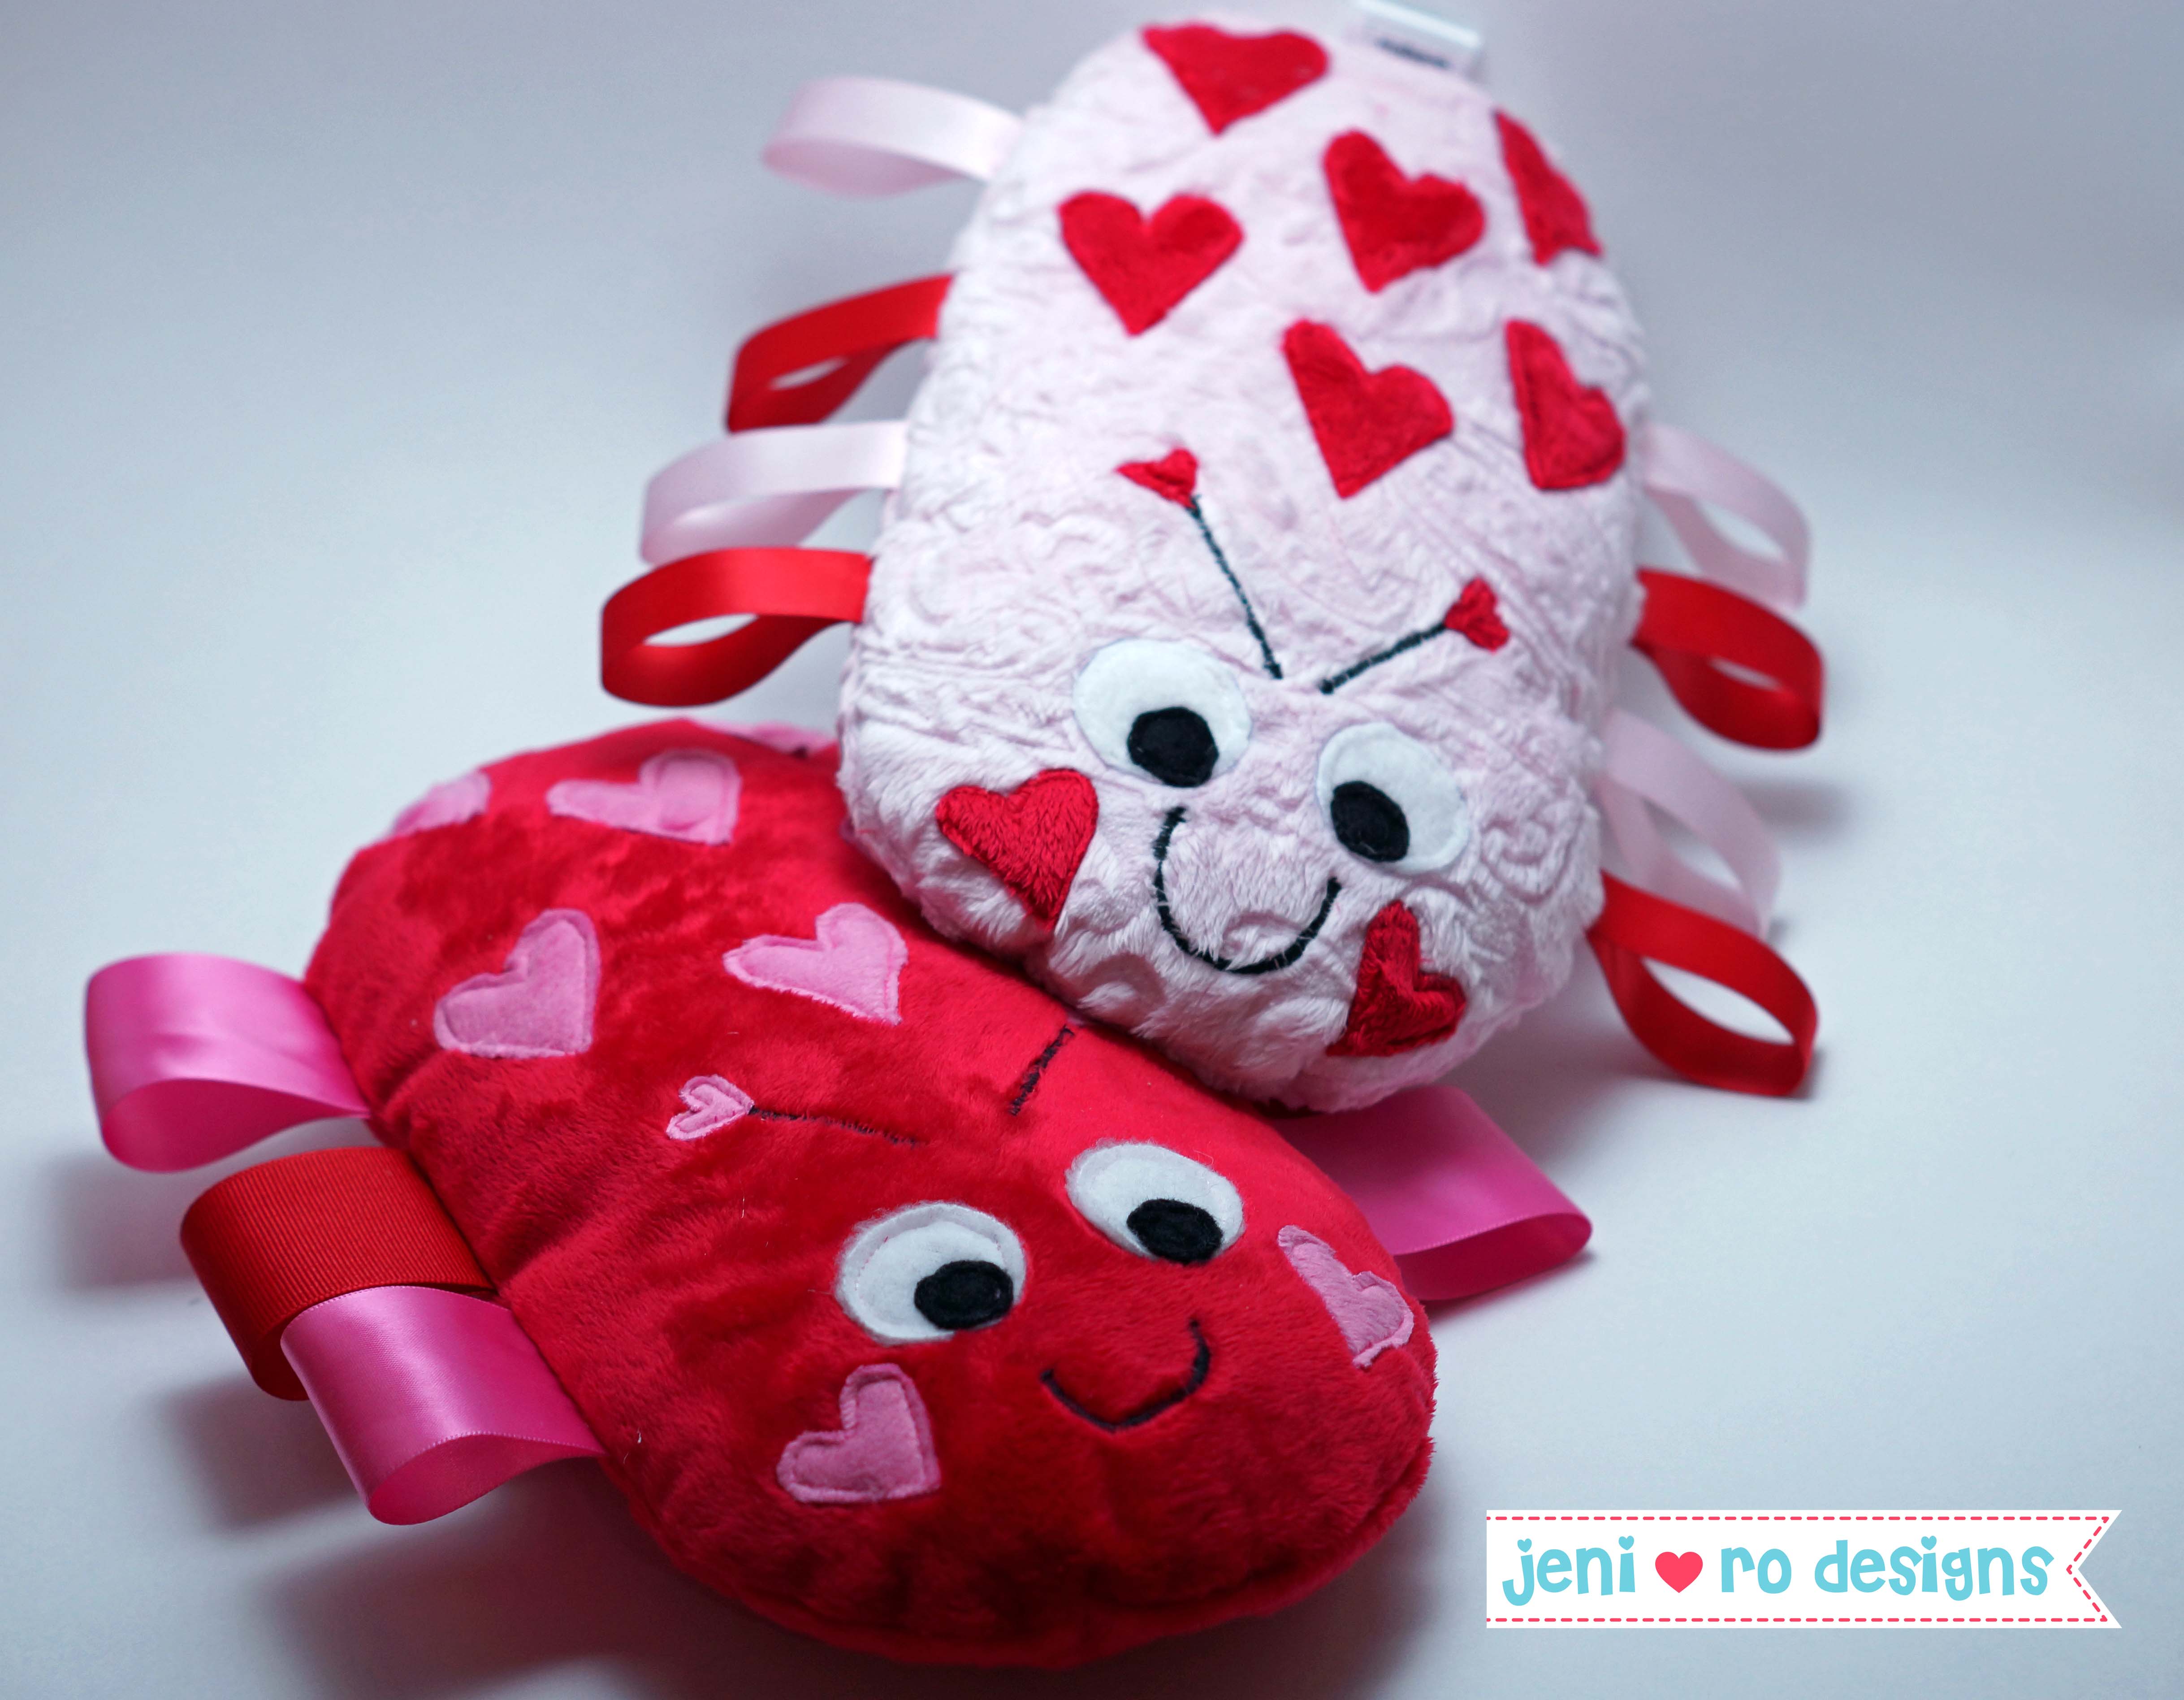
This was originally posted on Shannon Fabrics blog My Cuddle Corner, but its just too cute not to share again for Valentine’s Day!! There is still plenty of time to sew up one or a bunch of these cuties!! This is an easy and quick project that can be made from Shannon Fabrics Cuddle™ scraps for that special Valentine – big or small! Here is how to make it!
Materials needed:
- Pattern pieces (Download Luv Bug Pattern by jeni ro designs)
- 1/4 yard (or a large scrap, or fat quarter) of red or pink Cuddle (I used Shannon Fabrics Pink Paisley Cuddle)
- Small scraps of red & pink Cuddle
- Small scraps of black & white Cuddle or fleece
- Small pieces of lightweight fusible interfacing (1-1/2″ – 2″ square and 1-1/2″ x 4″ rectangle)
- Ribbon in pink & red (any size – I used 1-1/2″ and 5/8″ satin or grosgrain)
- Matching thread
- Poly-fil stuffing (I use Poly-fil from Fairfield)
- Sewing machine with a new 90/14 Microtex needle from Schmetz
- Sewing notions (I used flat flower head pins from Dritz and Clover Wonder Clips)
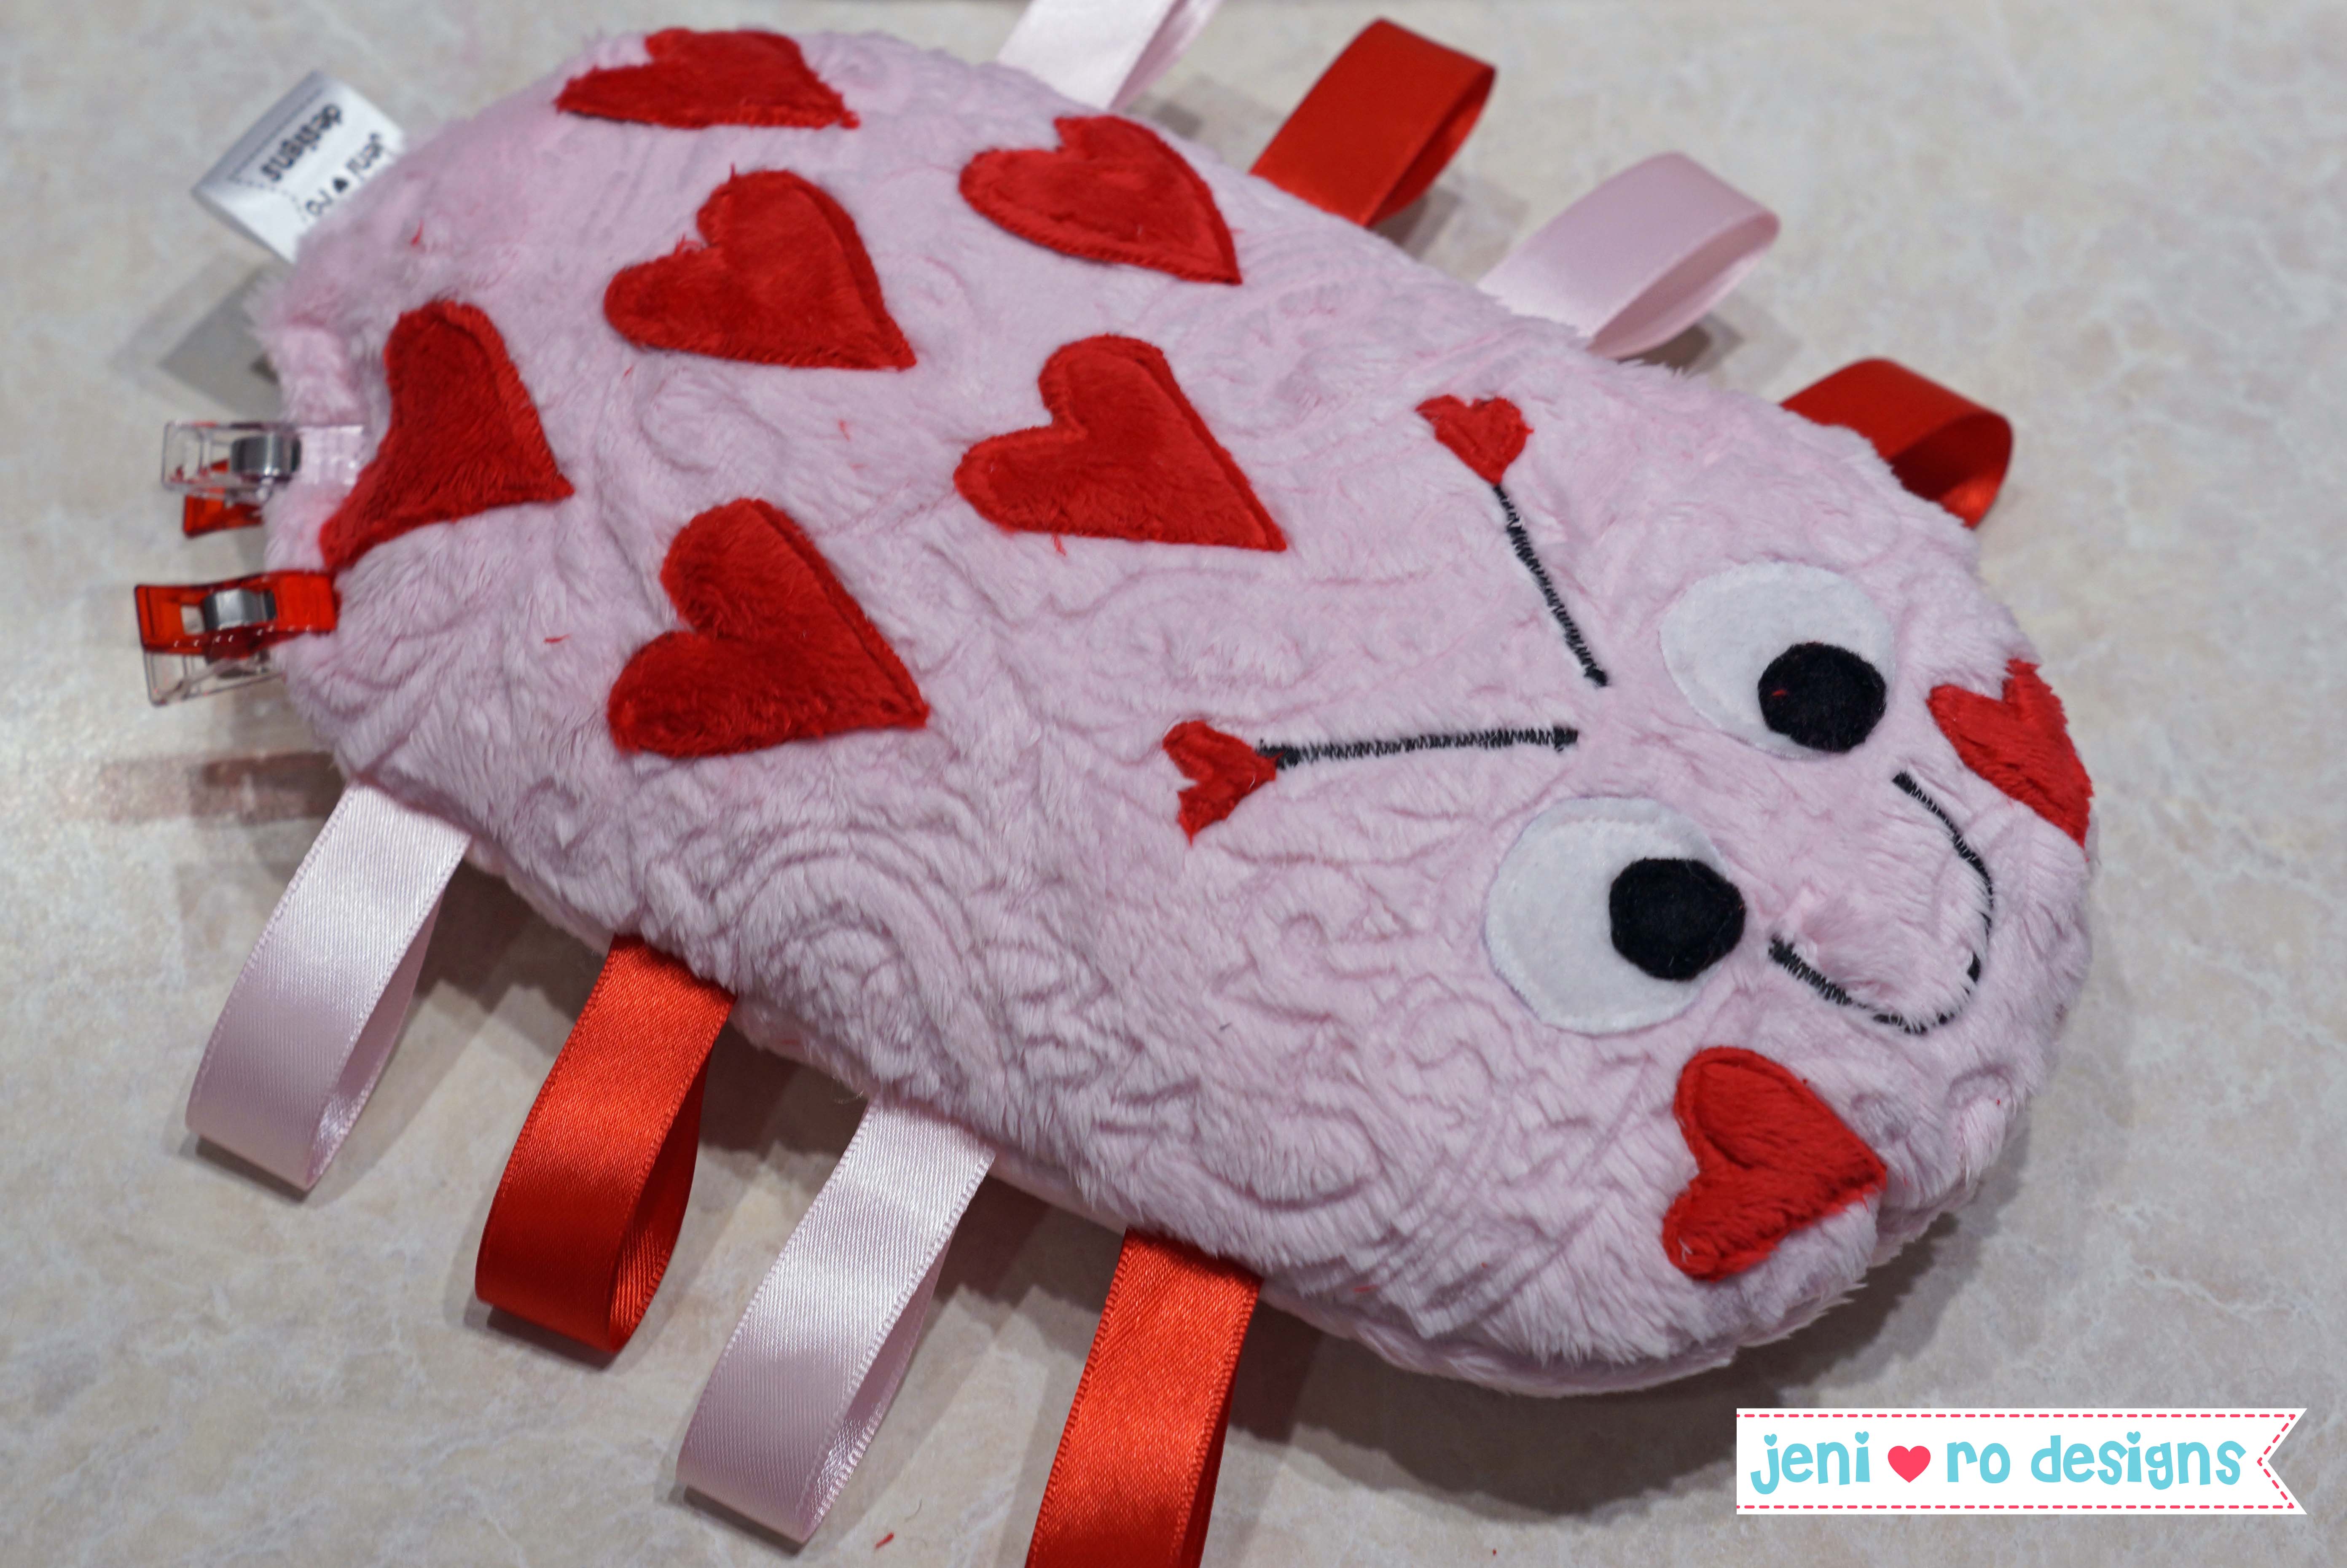
The finished size of the luv bug is approx. 5″ wide by 9-1/2″ long.
Step 1: Gather Materials (listed above, not all shown in picture)
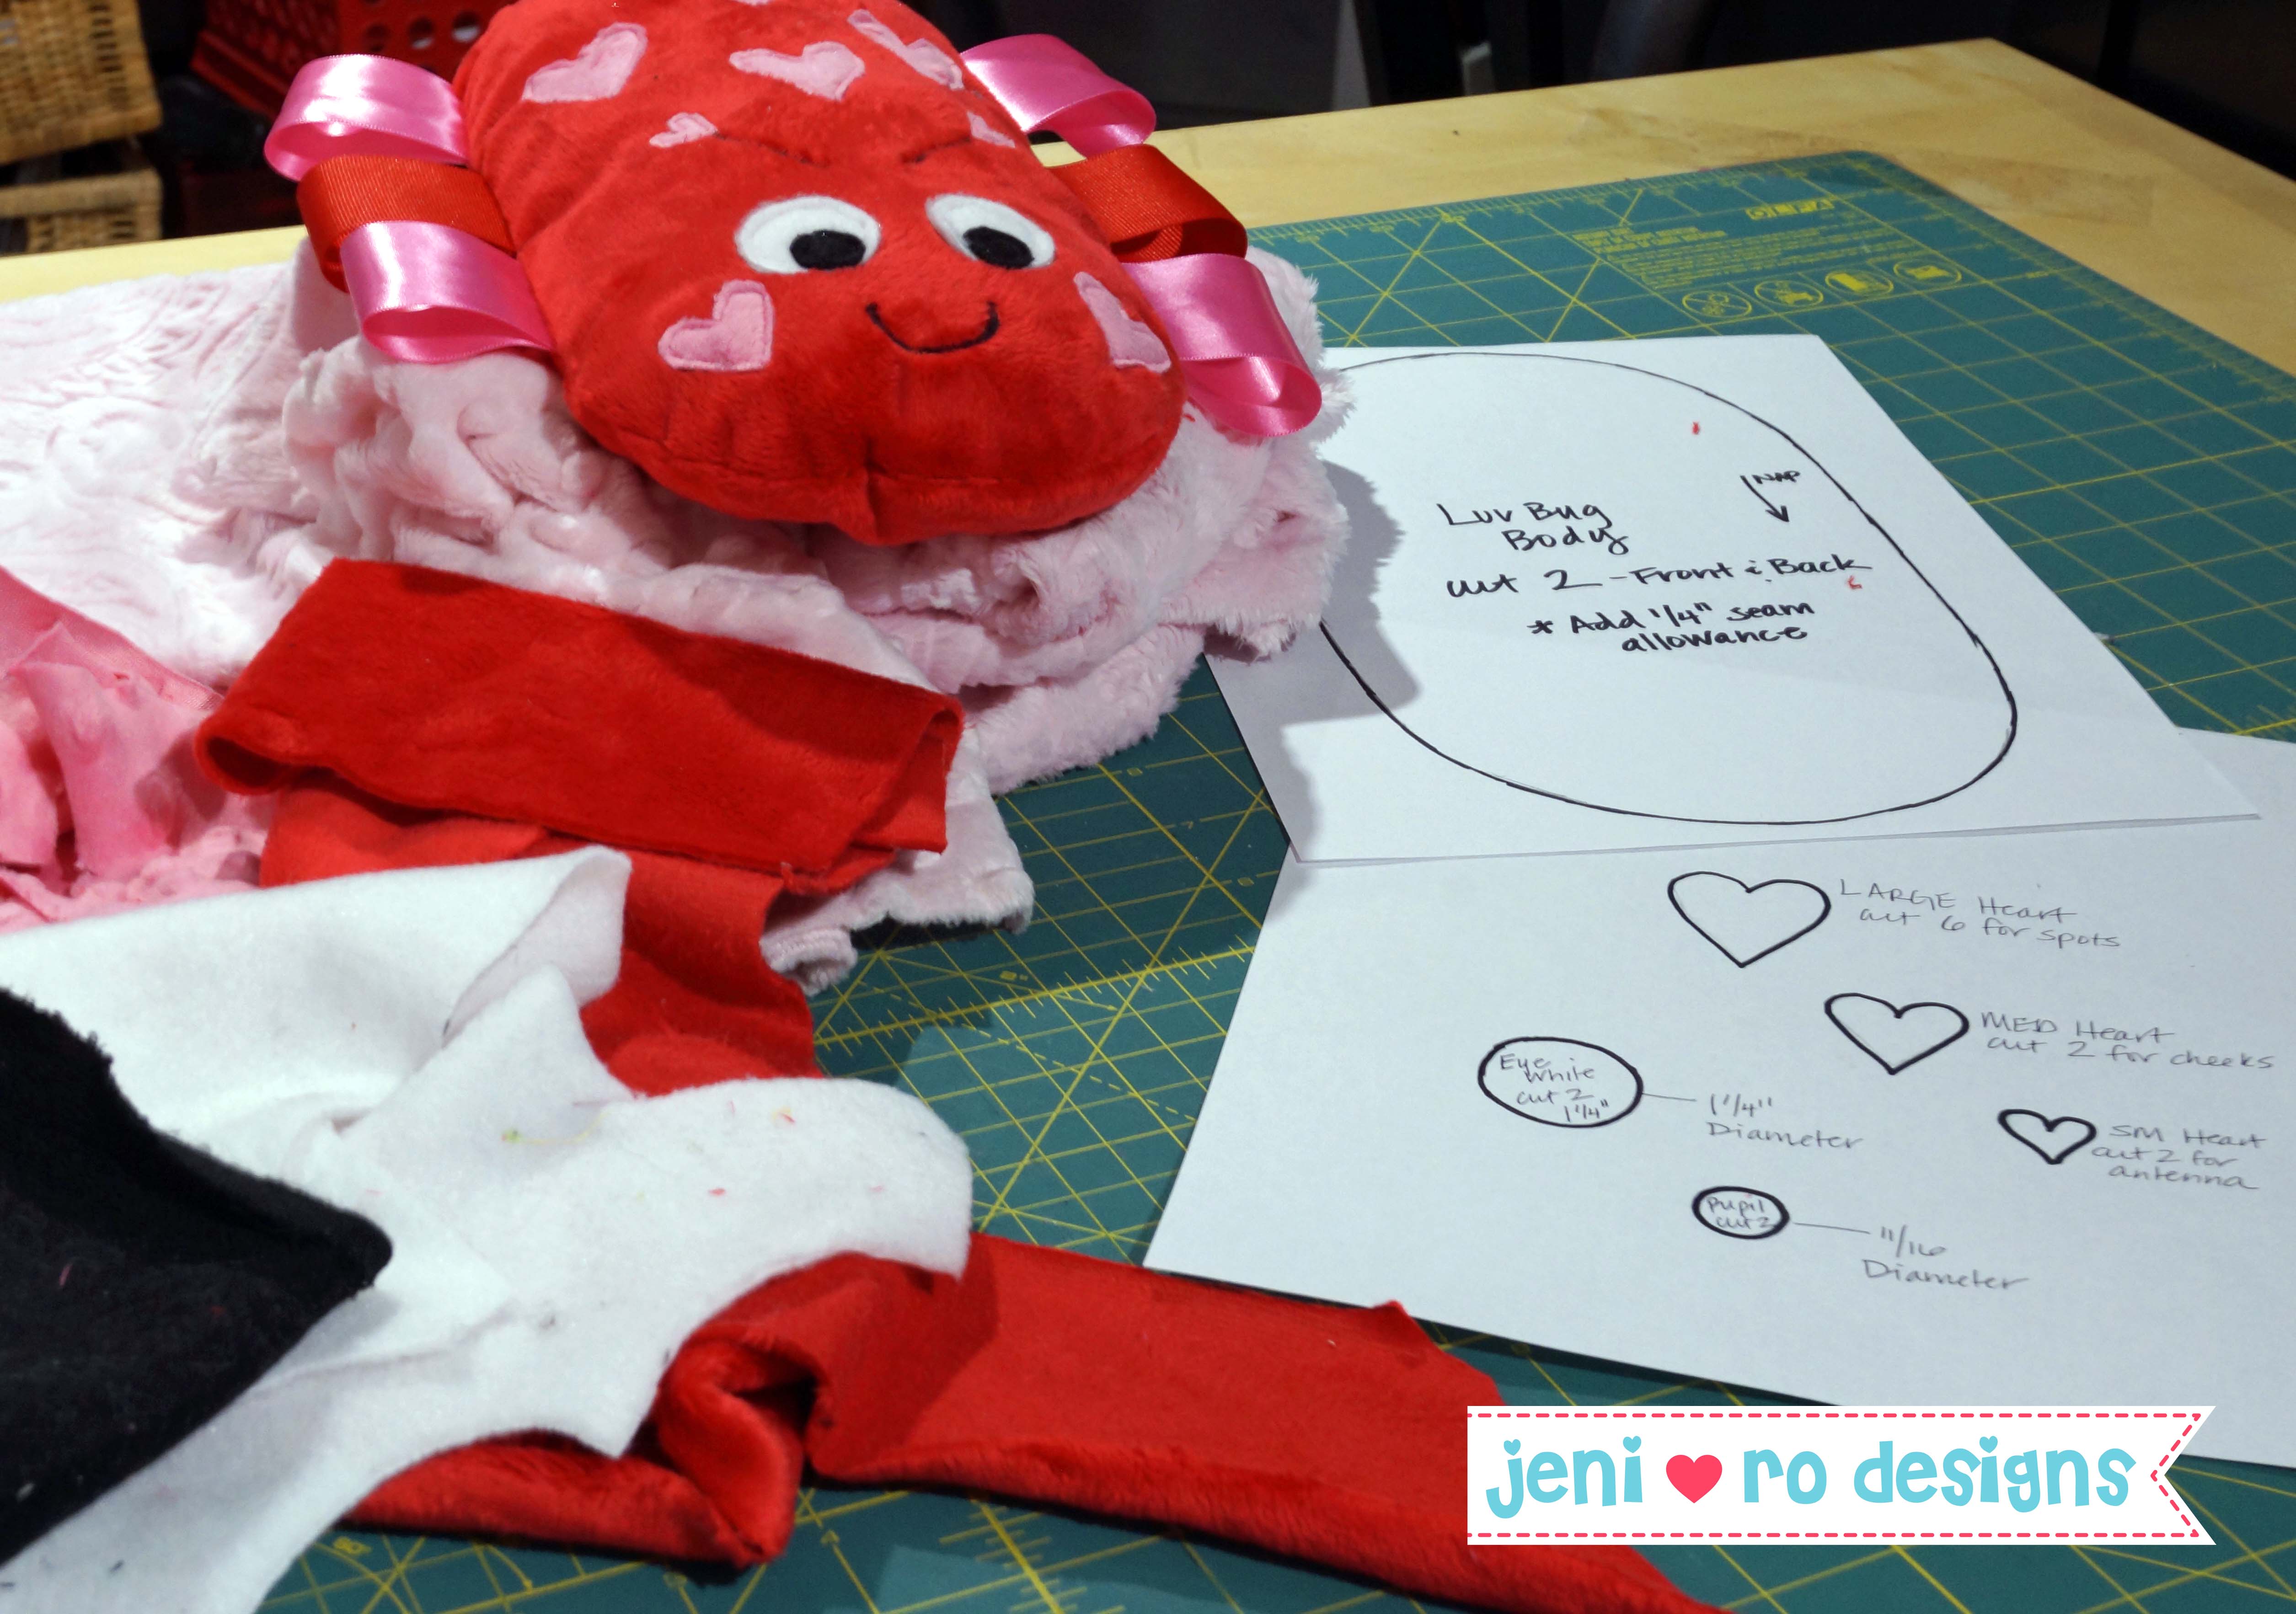
Step 2: Cut out the pieces using the pattern you downloaded above.
- Cut 2 of the body pattern from pink or red Cuddle. *IMPORTANT* Add 1/4″ all the way around the pattern for a seam allowance, it is NOT included in the pattern.
- Cut 2 large circles from white fabric
- Cut 2 small circles from black fabric
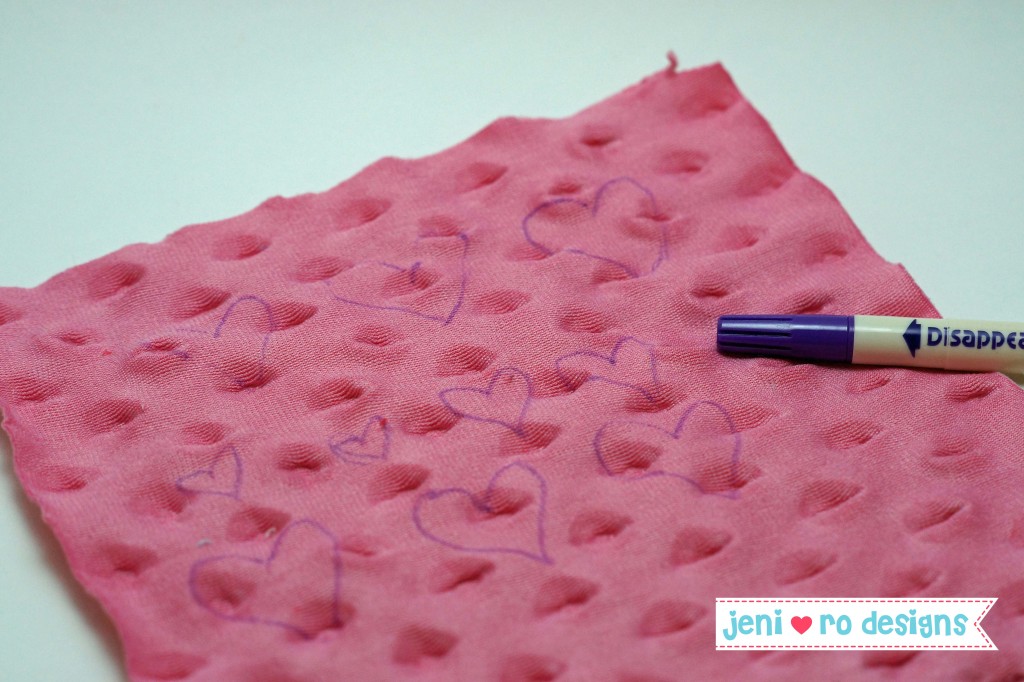
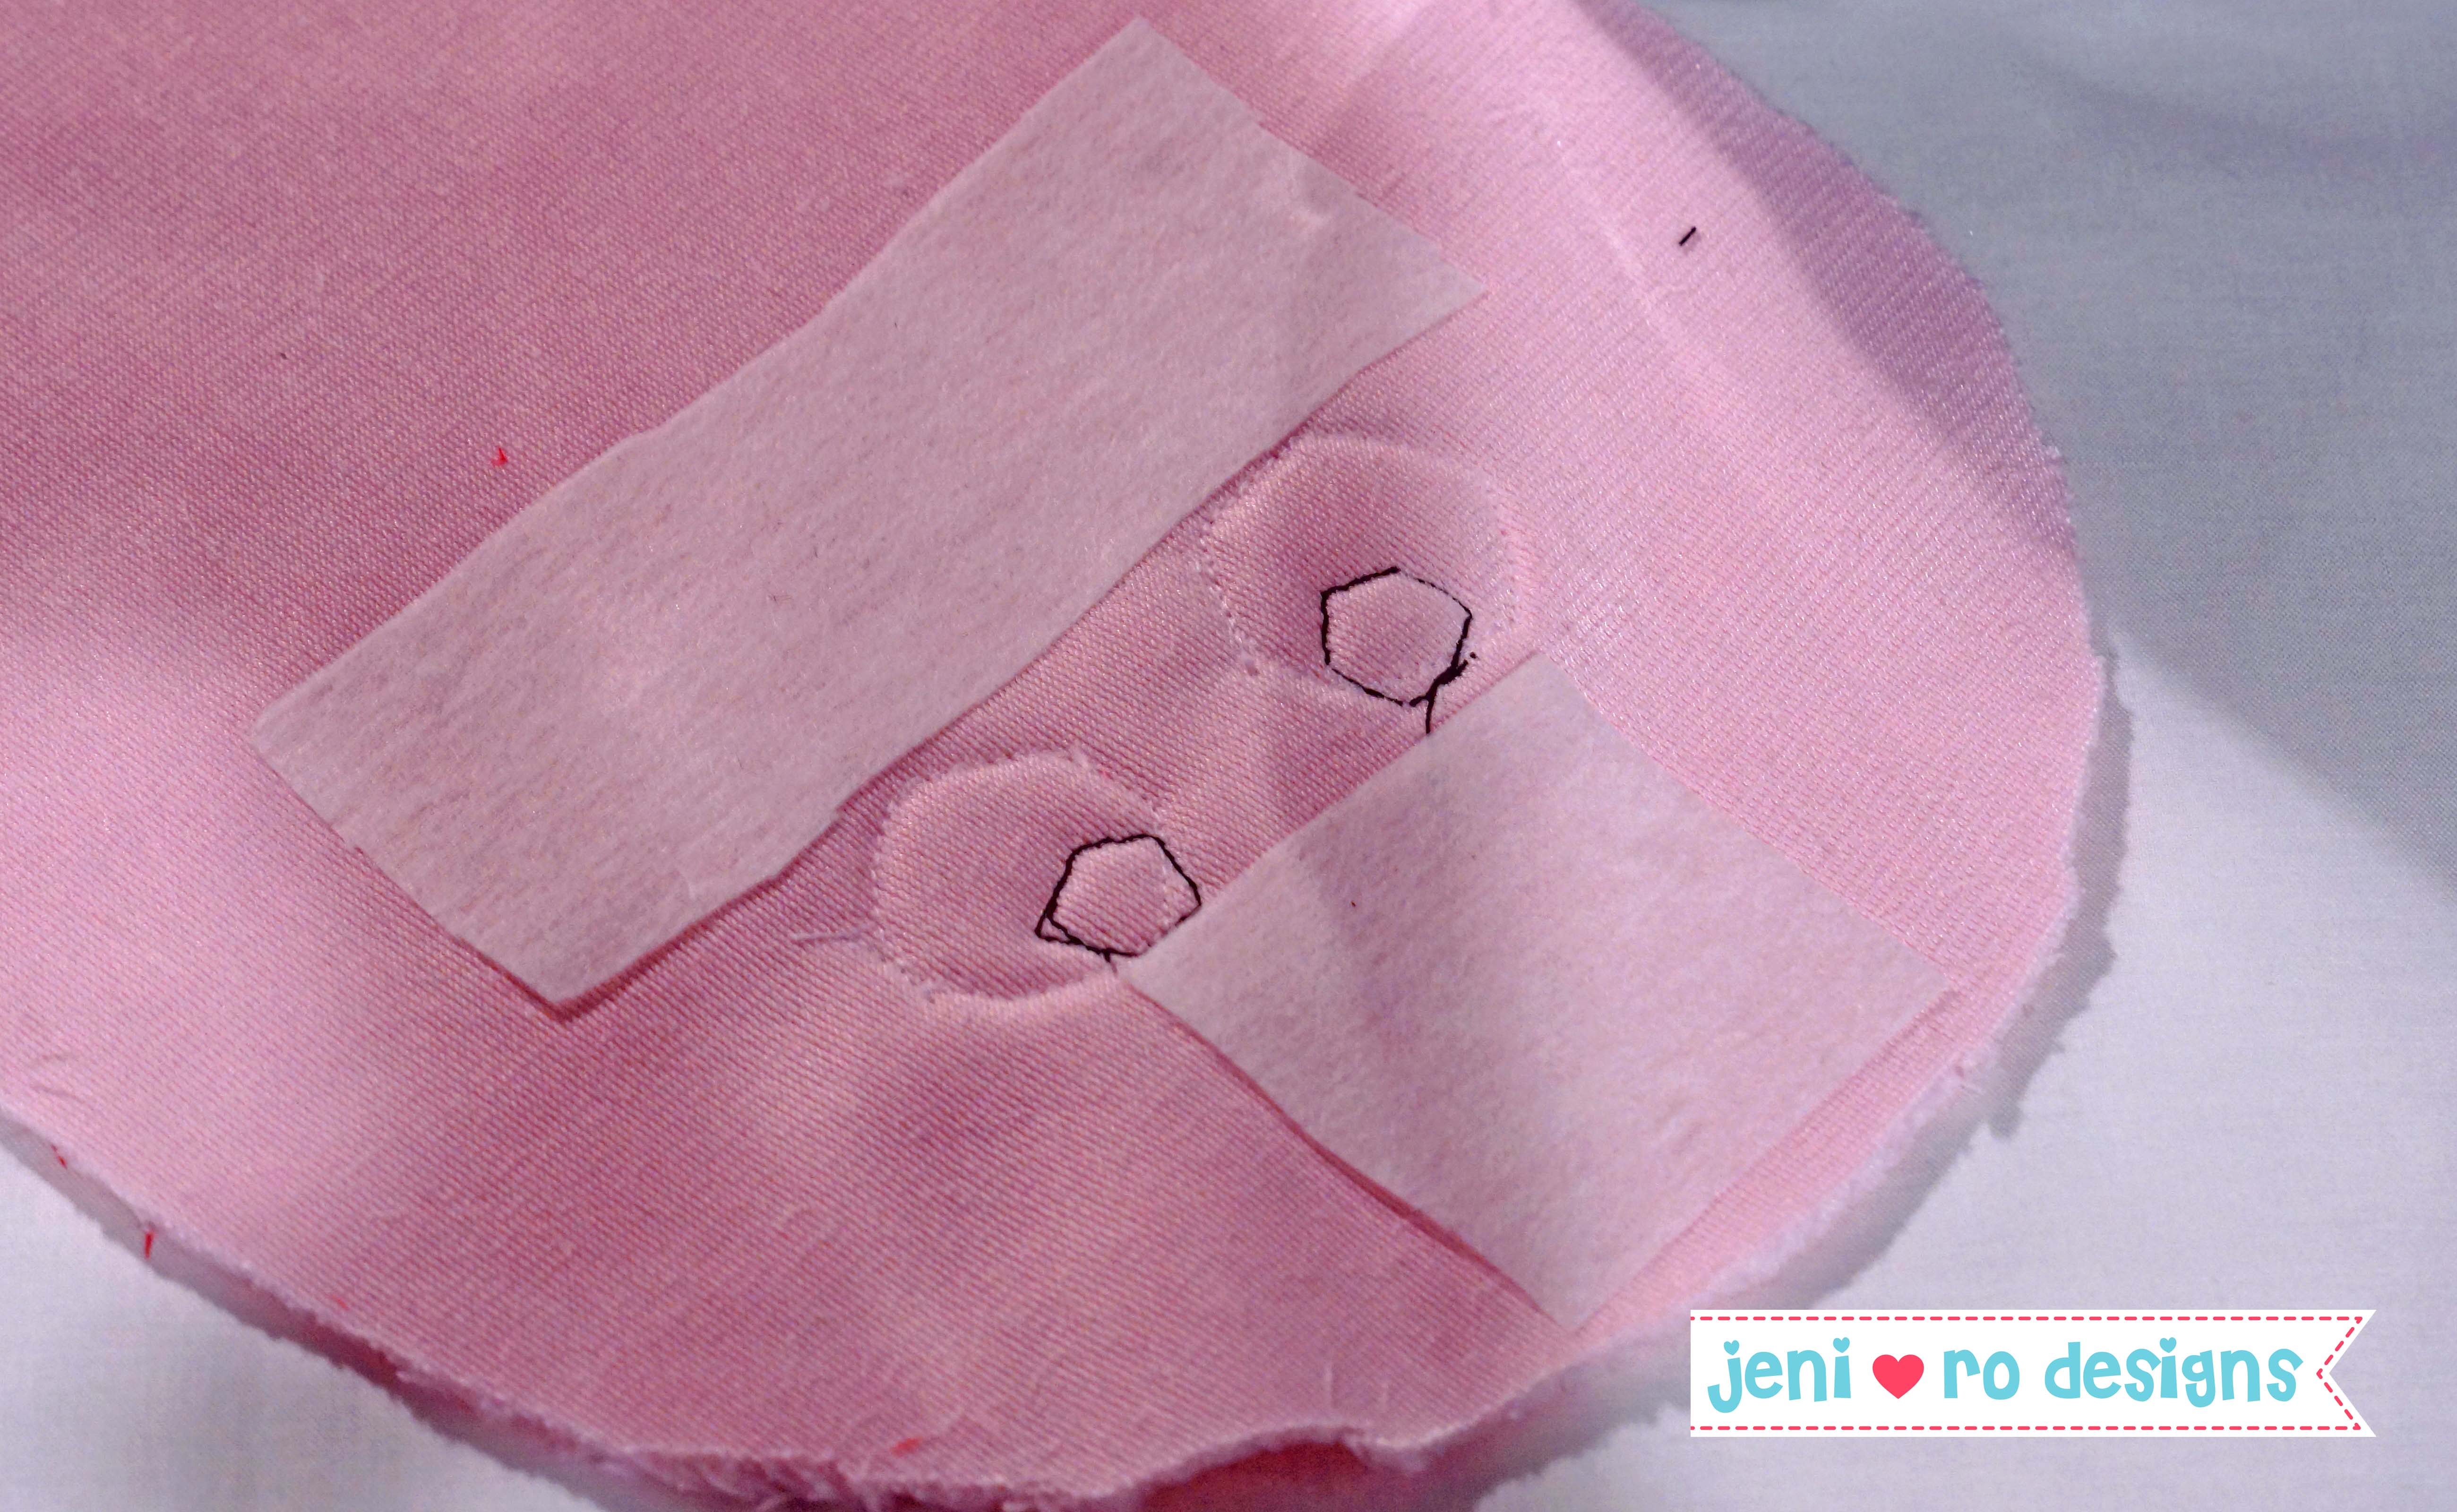
- Cut 2 small, 2 medium and 6 large hearts from pink or red Cuddle.
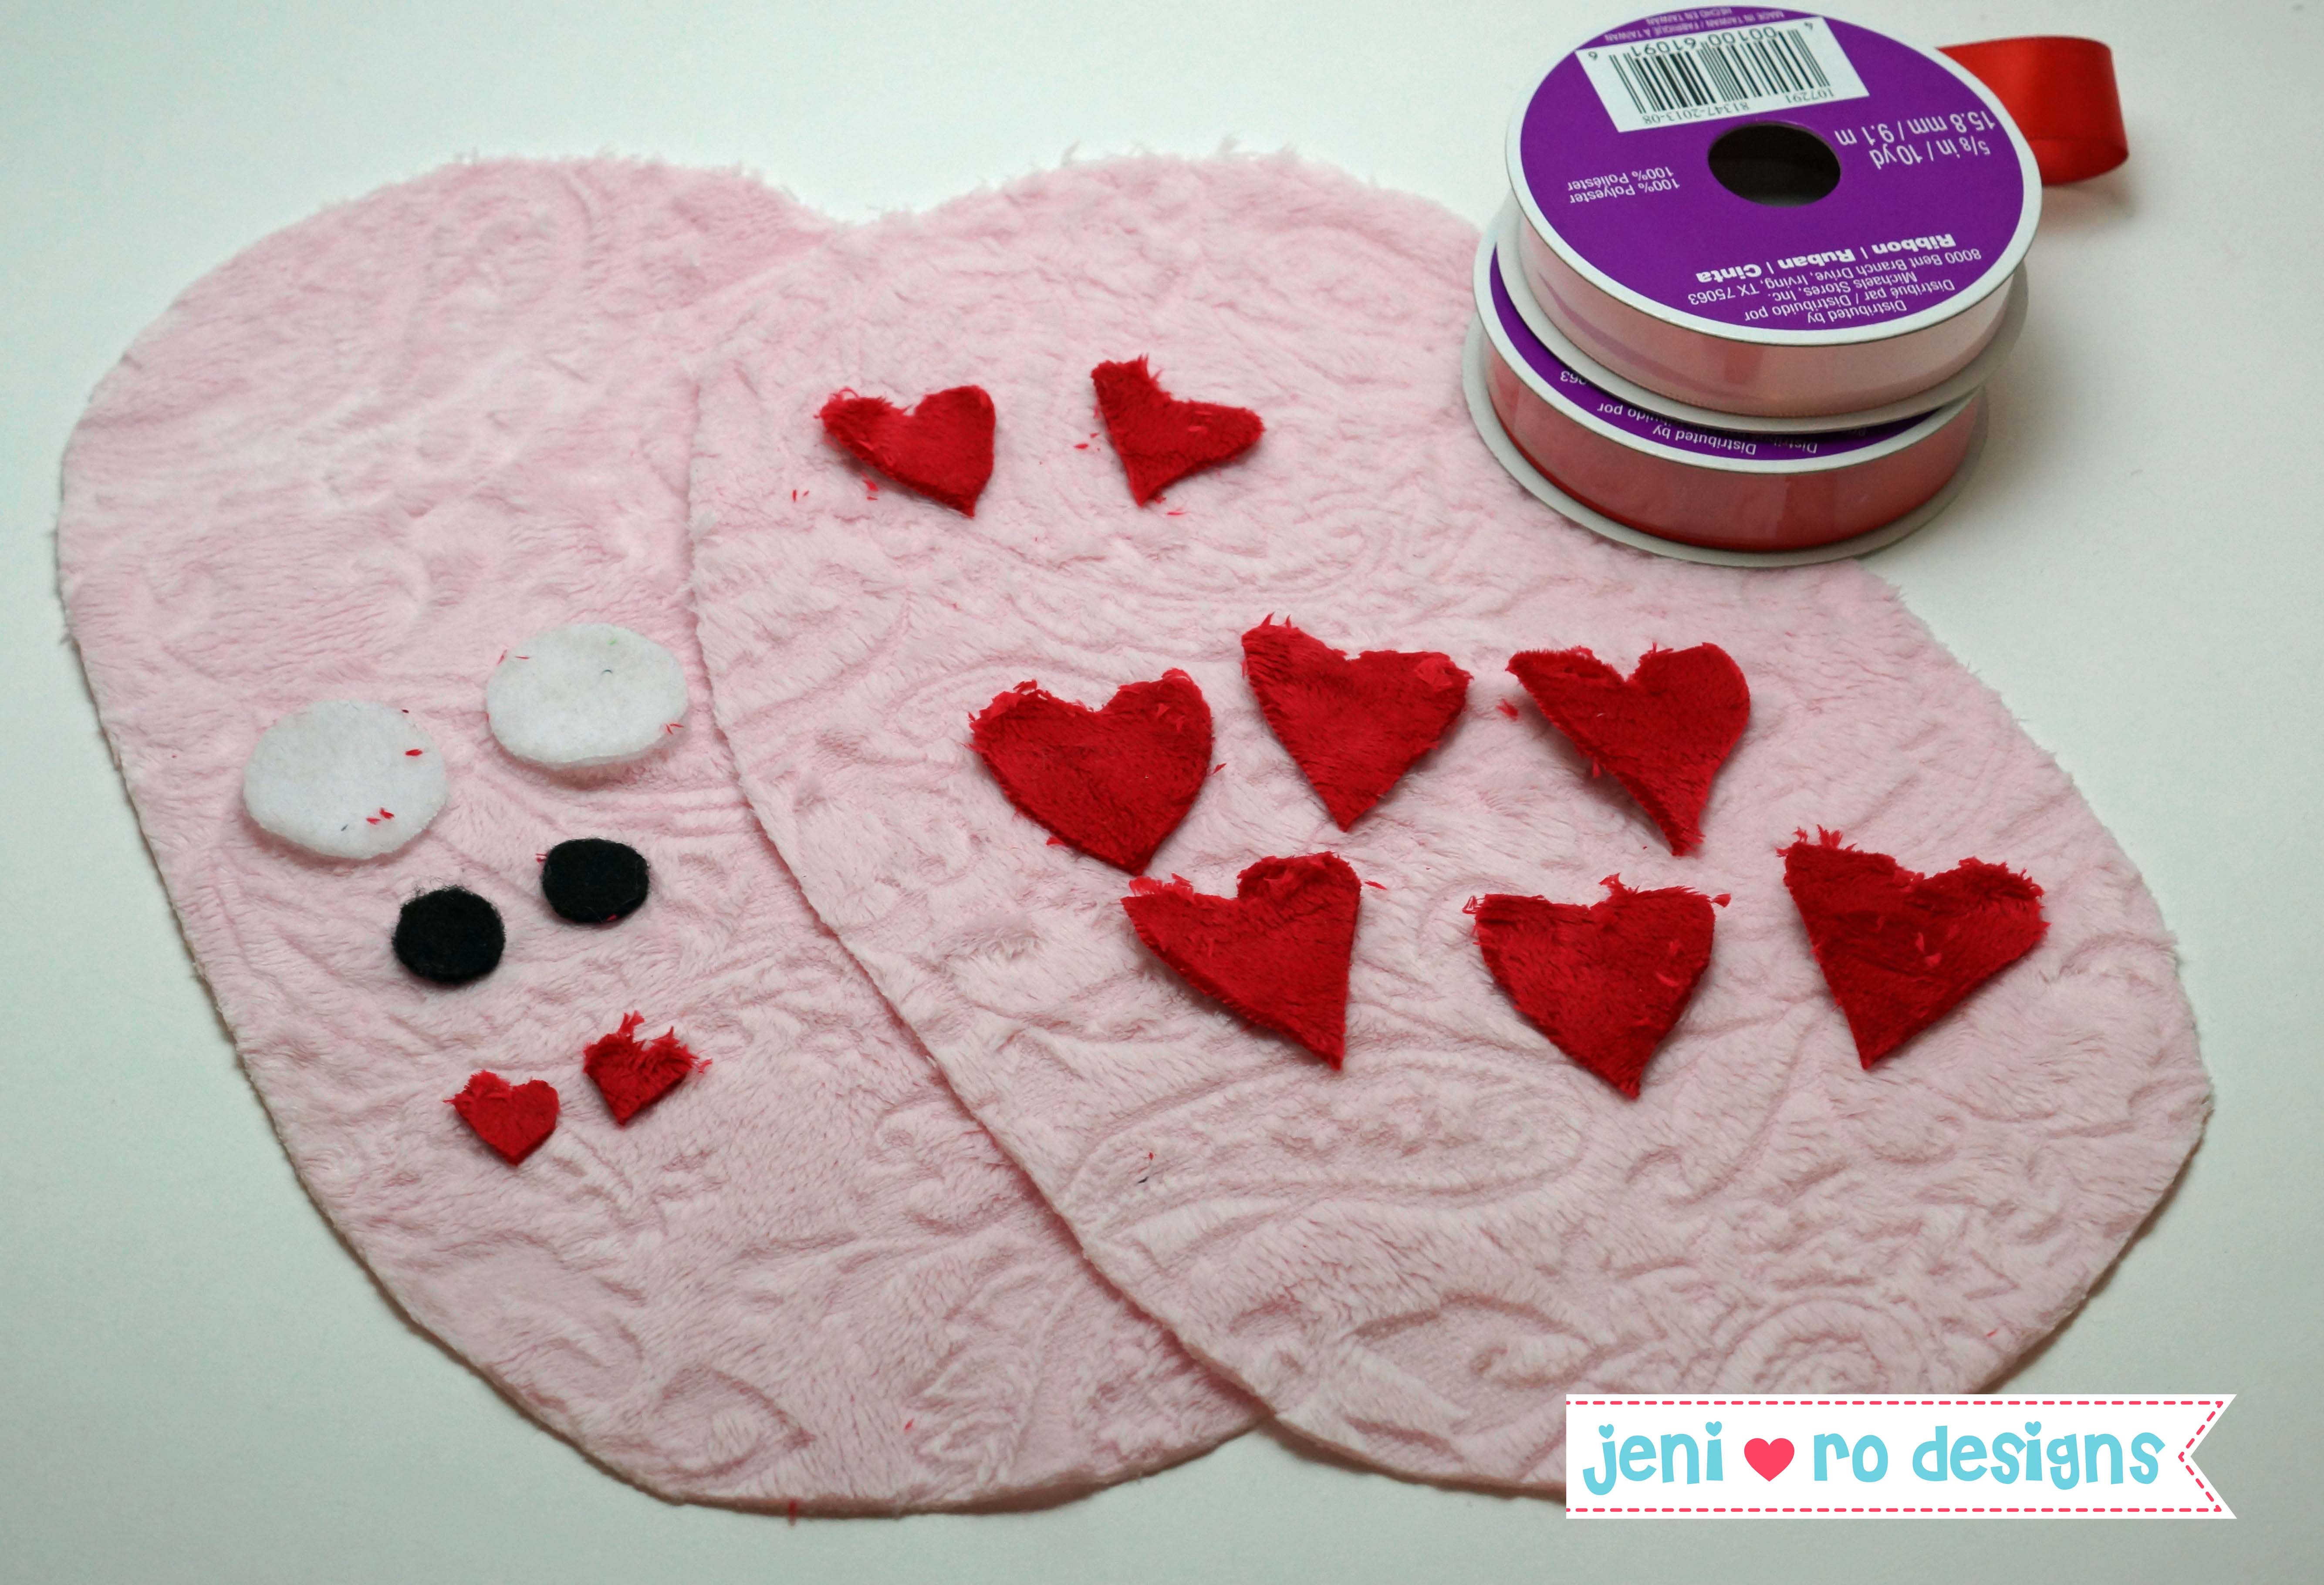
*NOTE: You can use the patterns provided for the hearts or just draw your own hearts onto the back of the fabric in 3 different sizes. They don’t need to be exact, hearts are always cute! See picture below.
Step 3: Applique the face
Pin the white circles to the front piece in the eye position (refer to the 3rd page of the pattern pdf for applique placements). Sew close to the edge of each circle with white thread. Clip threads
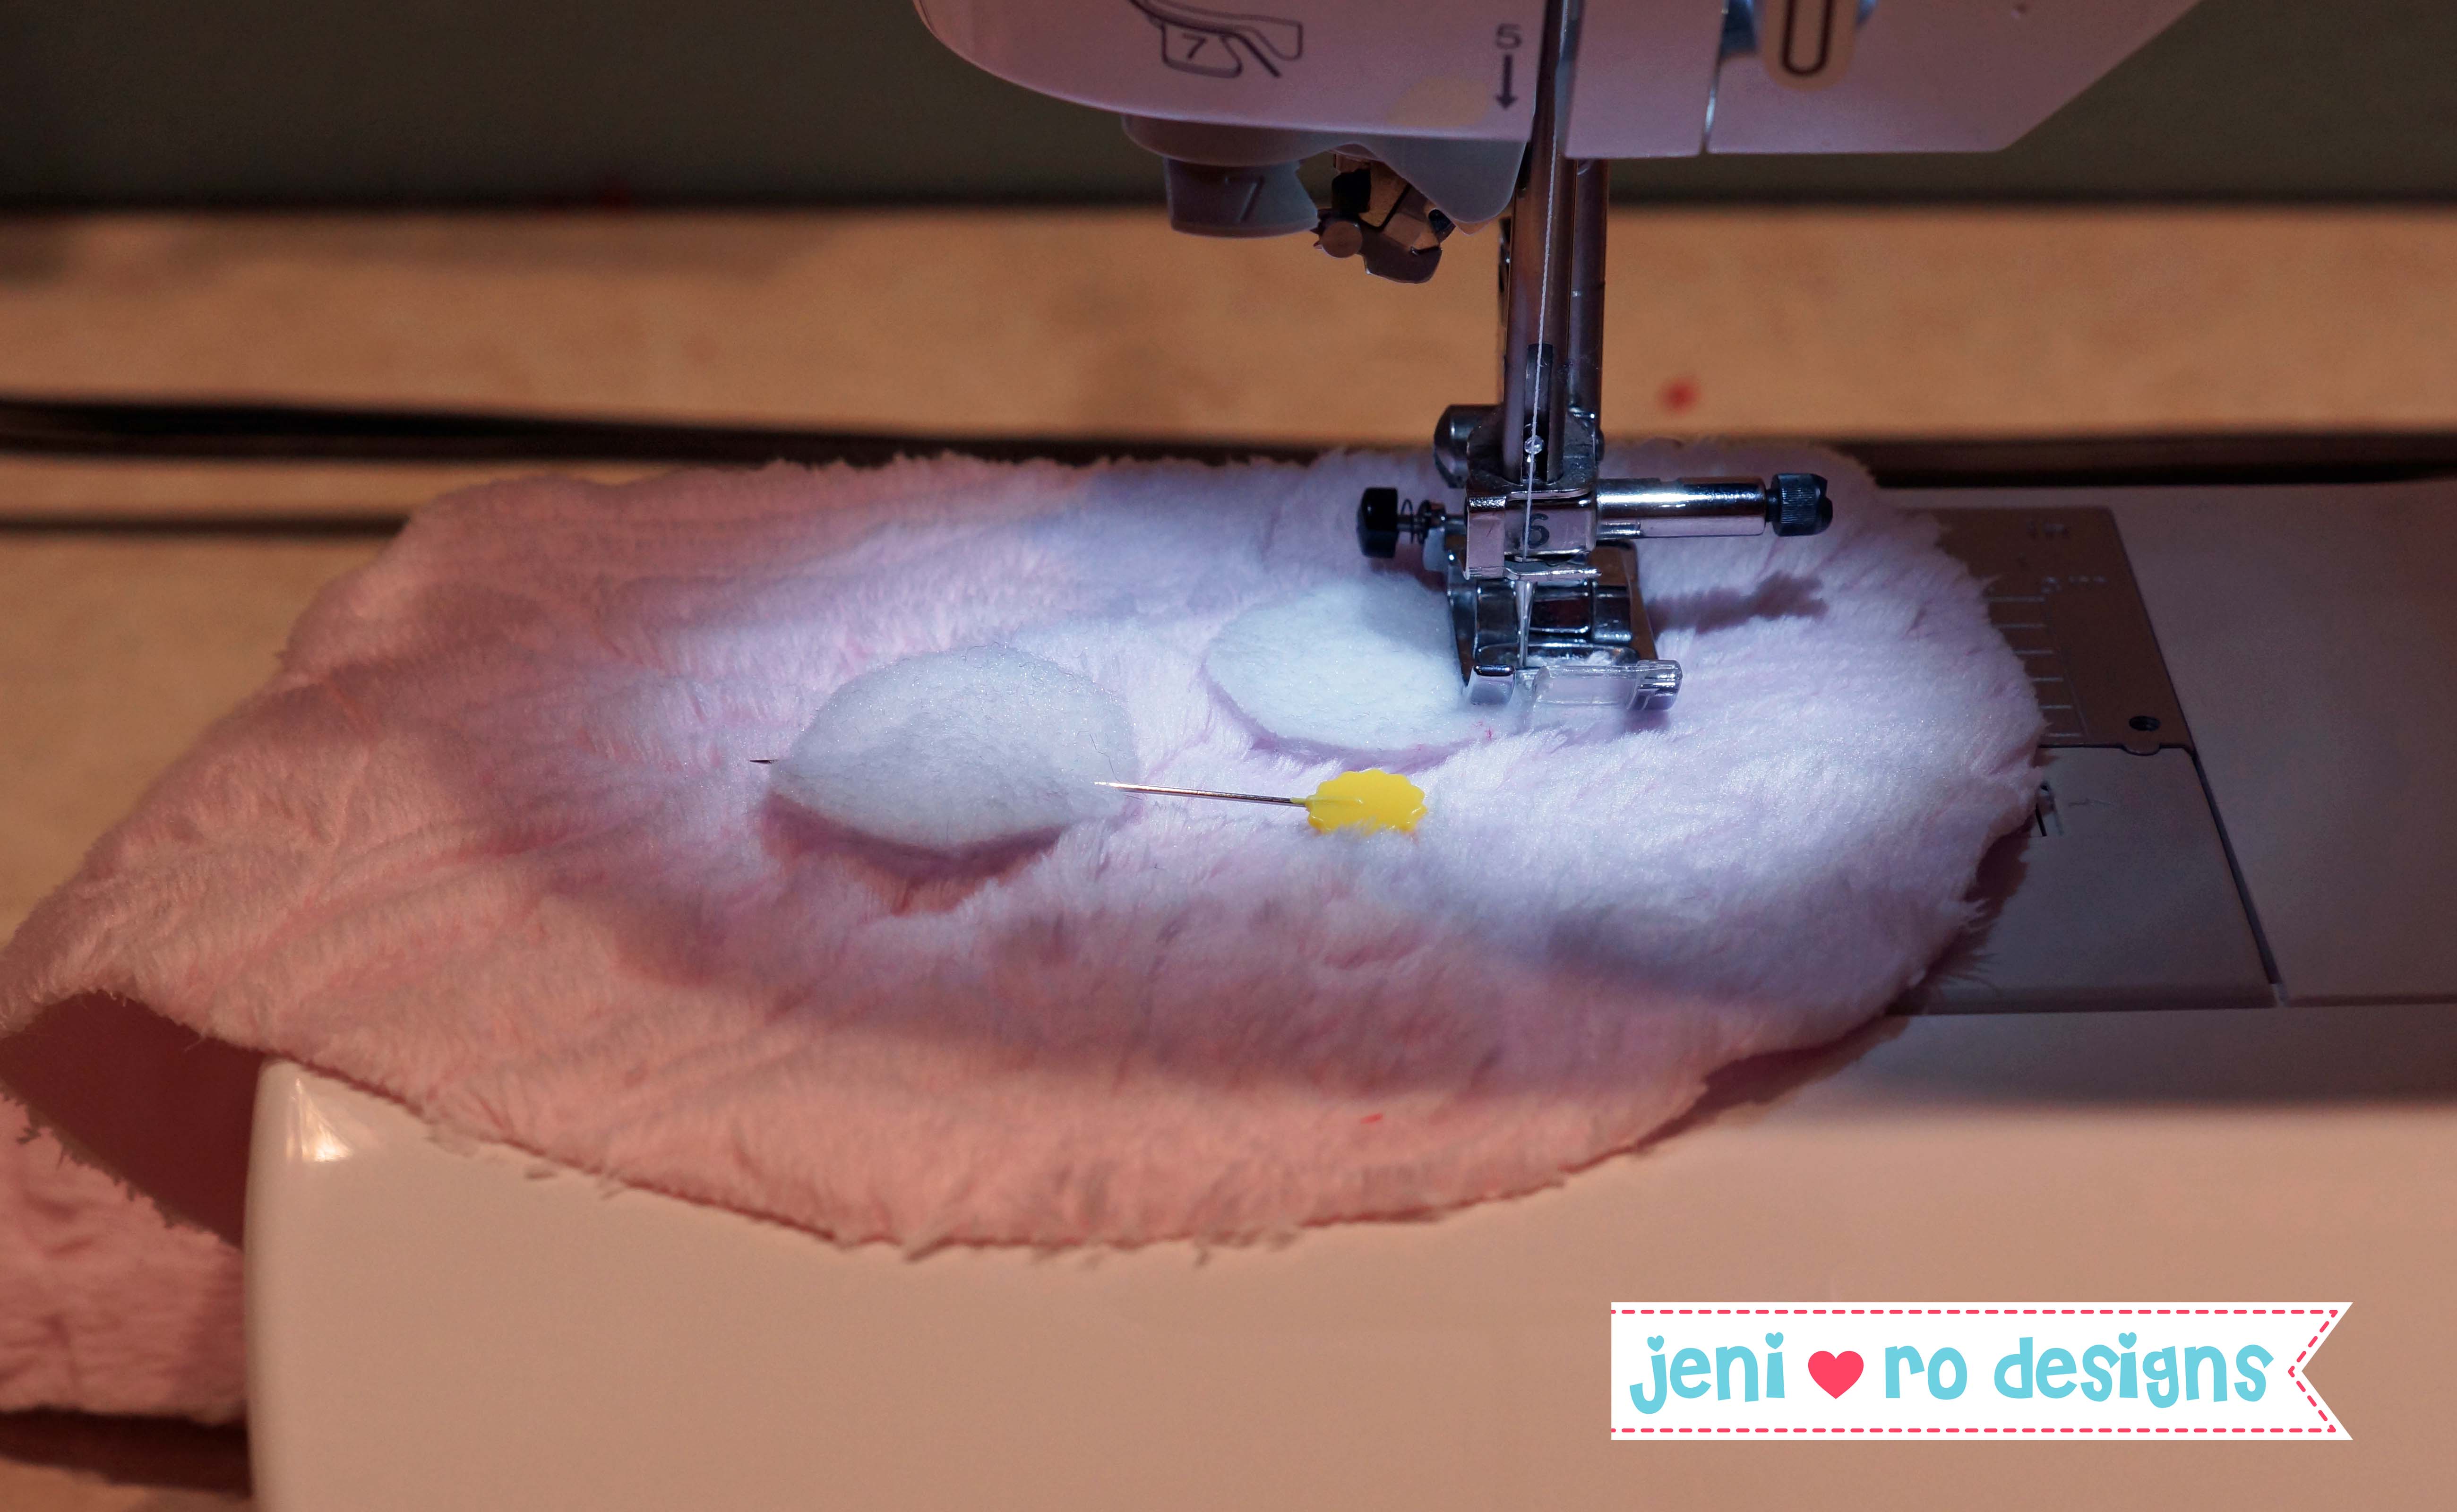
Pin the small black circles to the white circles and sew close to the edge with black thread. Clip threads.
Iron on pieces of fusible interfacing to the back of the front piece. Iron using a low setting the 1-1/2″-2″ square below the eyes, and the 1-1/2″ x 4″ rectangle above the eyes.
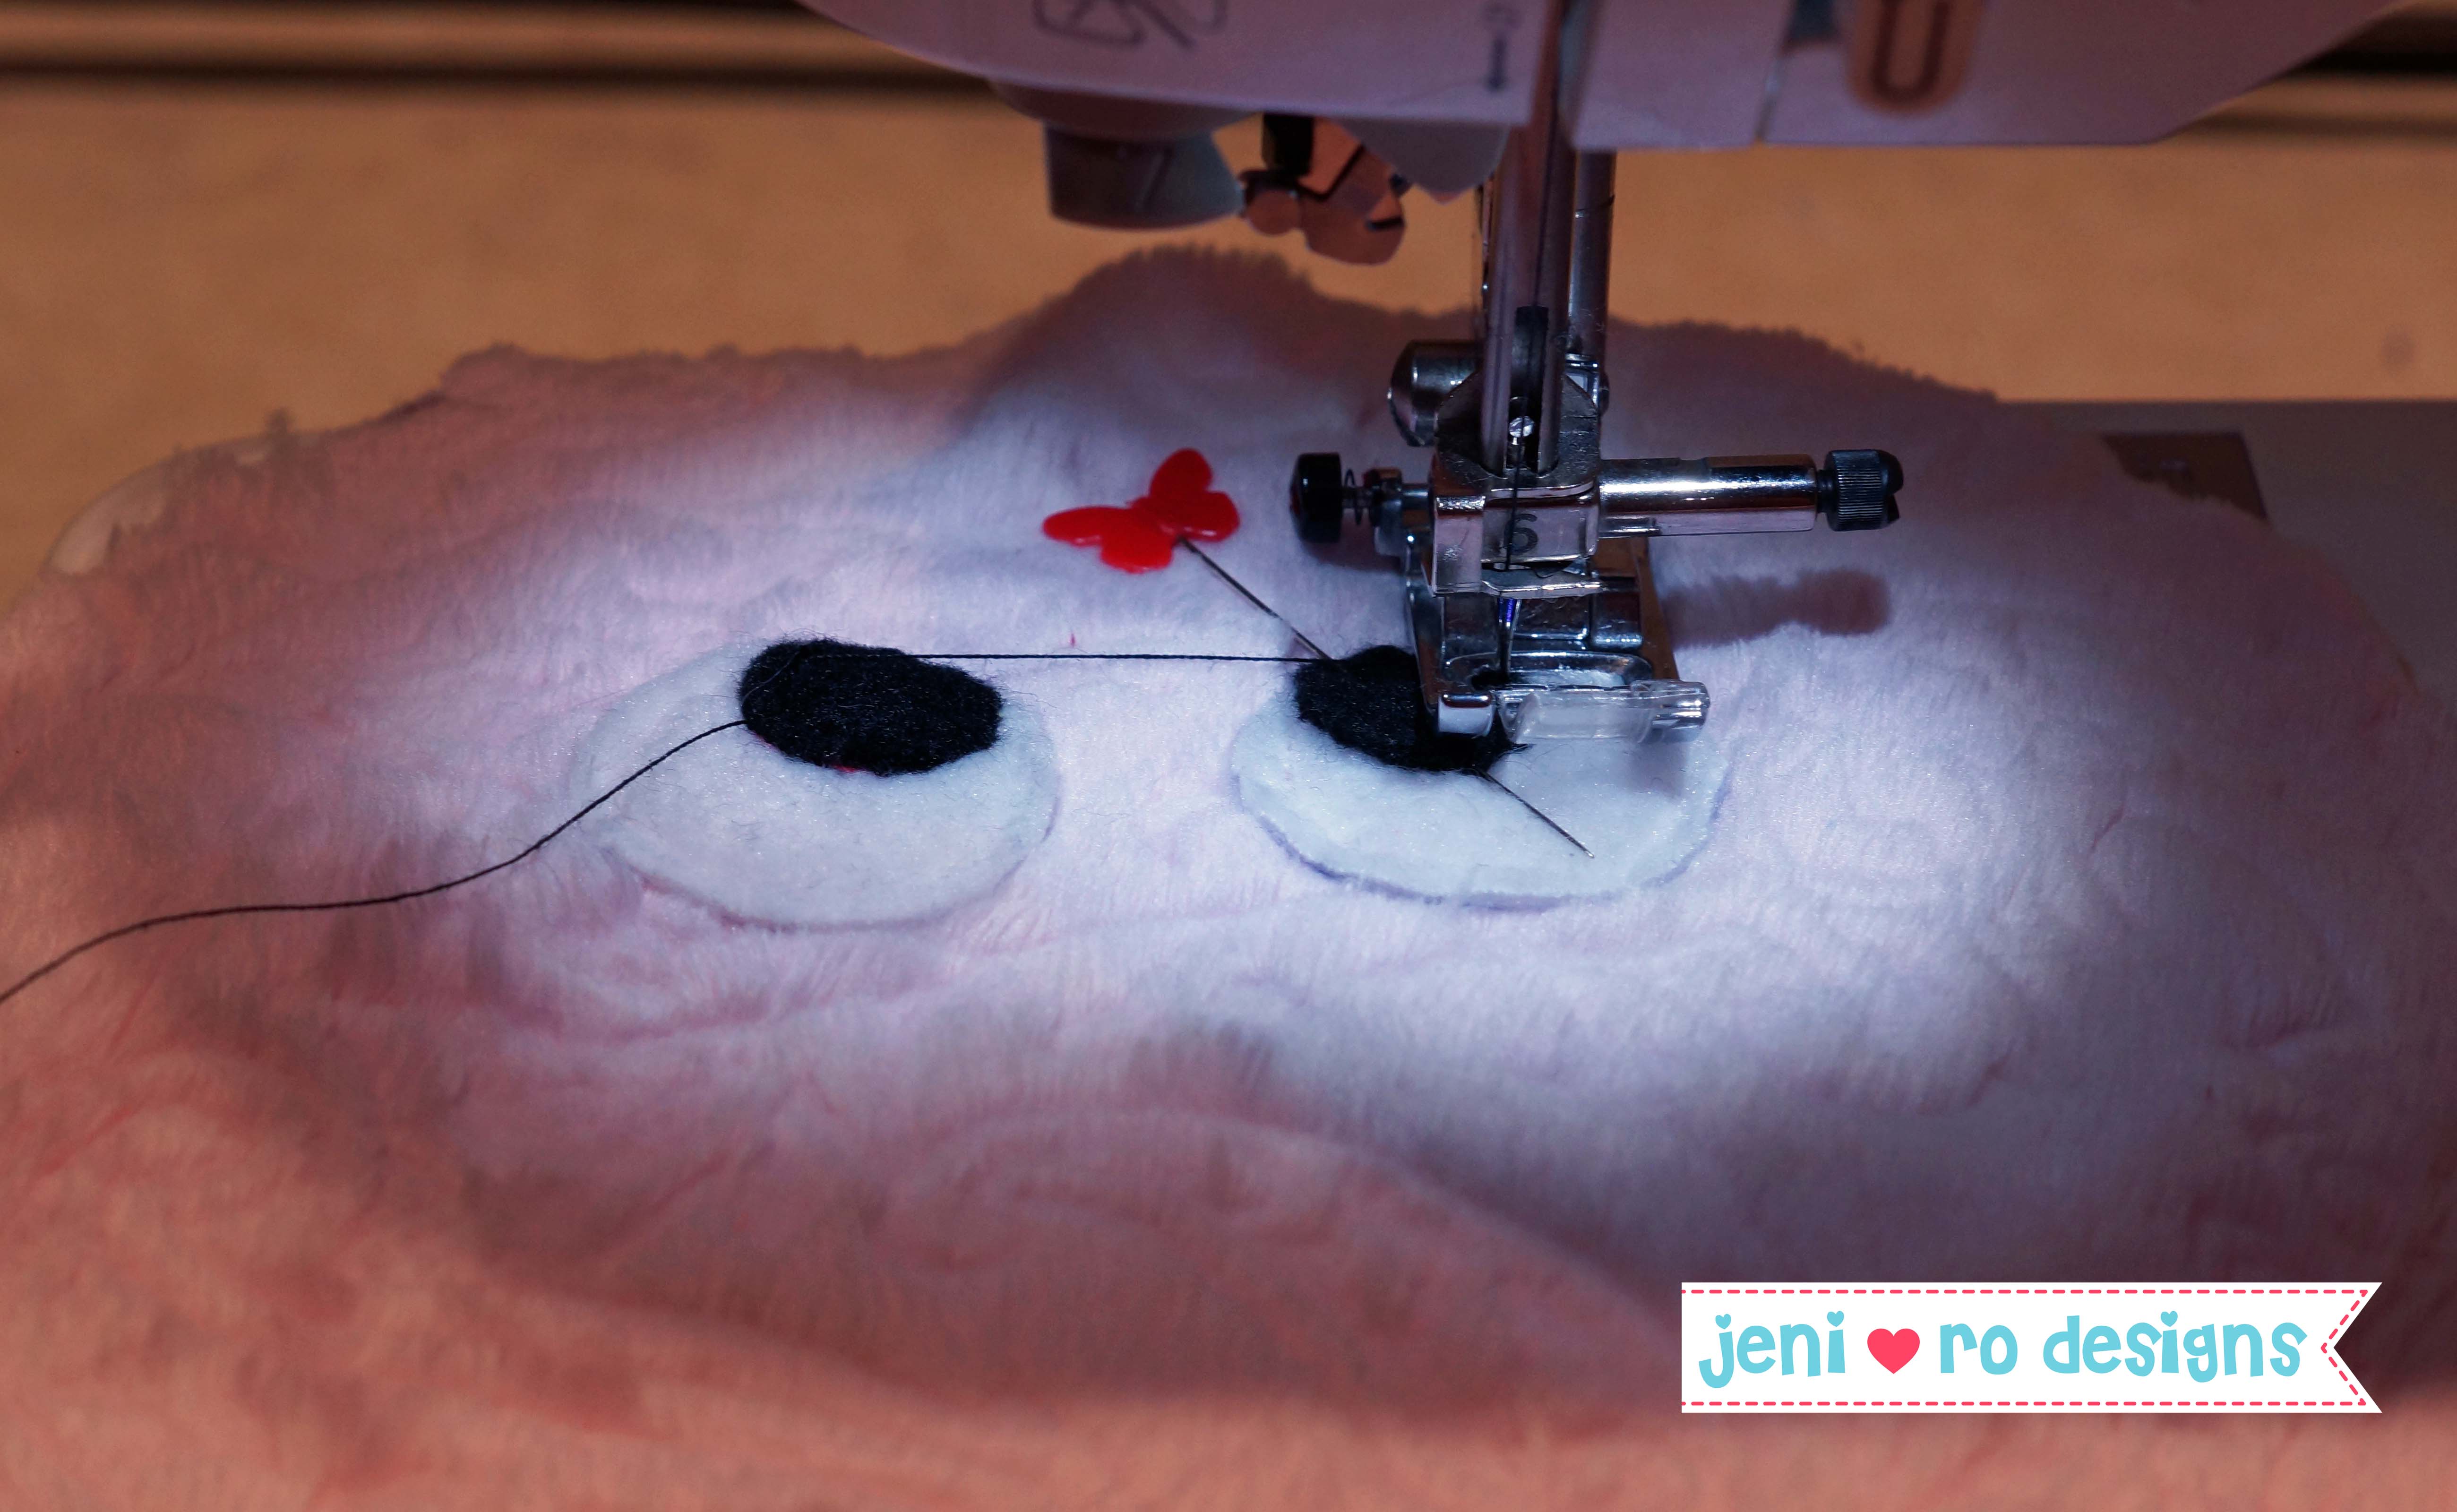
Set your machine to a tight zig zag stitch. .5 Length and 3.5 Width.
With black thread zig zag a wide U shaped mouth and antenna (see finished picture and page 3 of the pattern for placement). Make sure to zig zag on the places where the interfacing was ironed on the back, this will help stabilize the fabric so the zig zag is even. Remember to backstitch at the beginning and end of the zig zag.
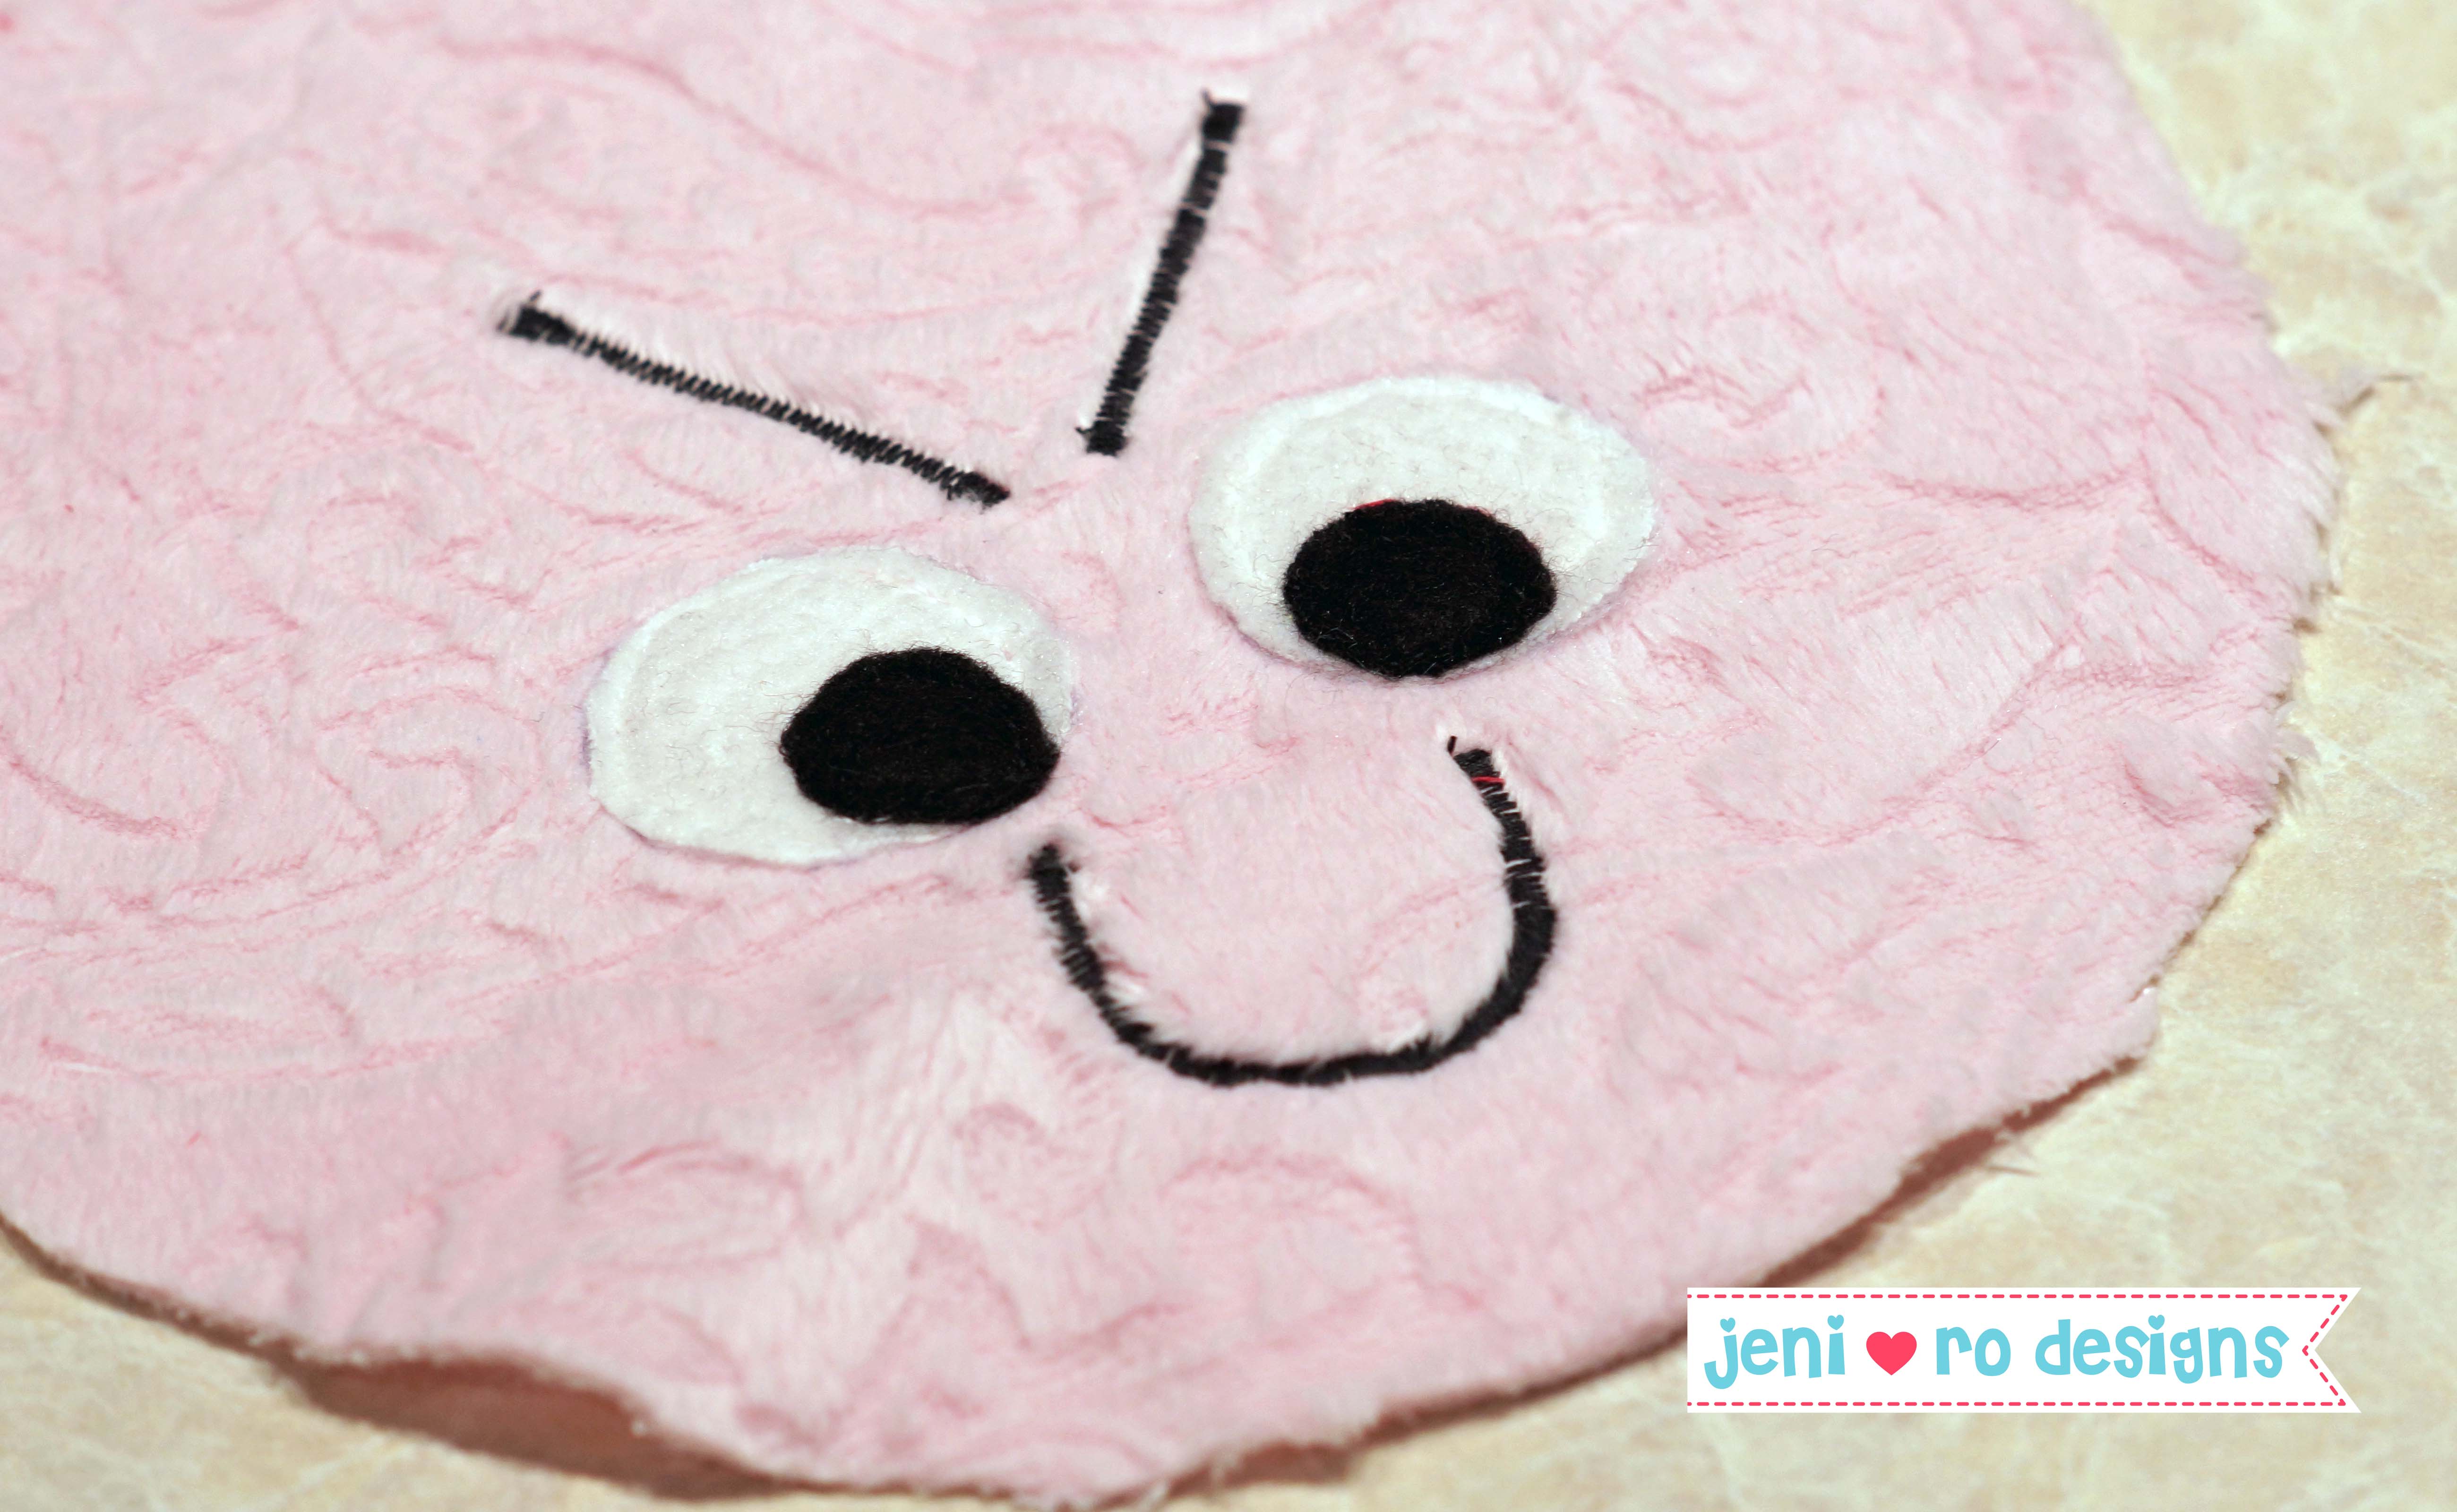
Step 4: Applique the hearts
*Set your machine back to a regular straight stitch!
Pin the small hearts to the top of the antenna. Sew with matching thread close to the edge of the hearts. It doesn’t have to be perfect, but make sure the heart is secure all the way around.

Repeat the instruction above with the medium hearts on the cheeks and the large hearts on the body. *You can sew on less hearts if you like, and/or arrange them to your liking. I like to offset the rows of hearts to fit all 6 (see page 3 of pattern for placement). Keep in mind the 1/4″ seam allowance, don’t put the hearts too close to the edge.

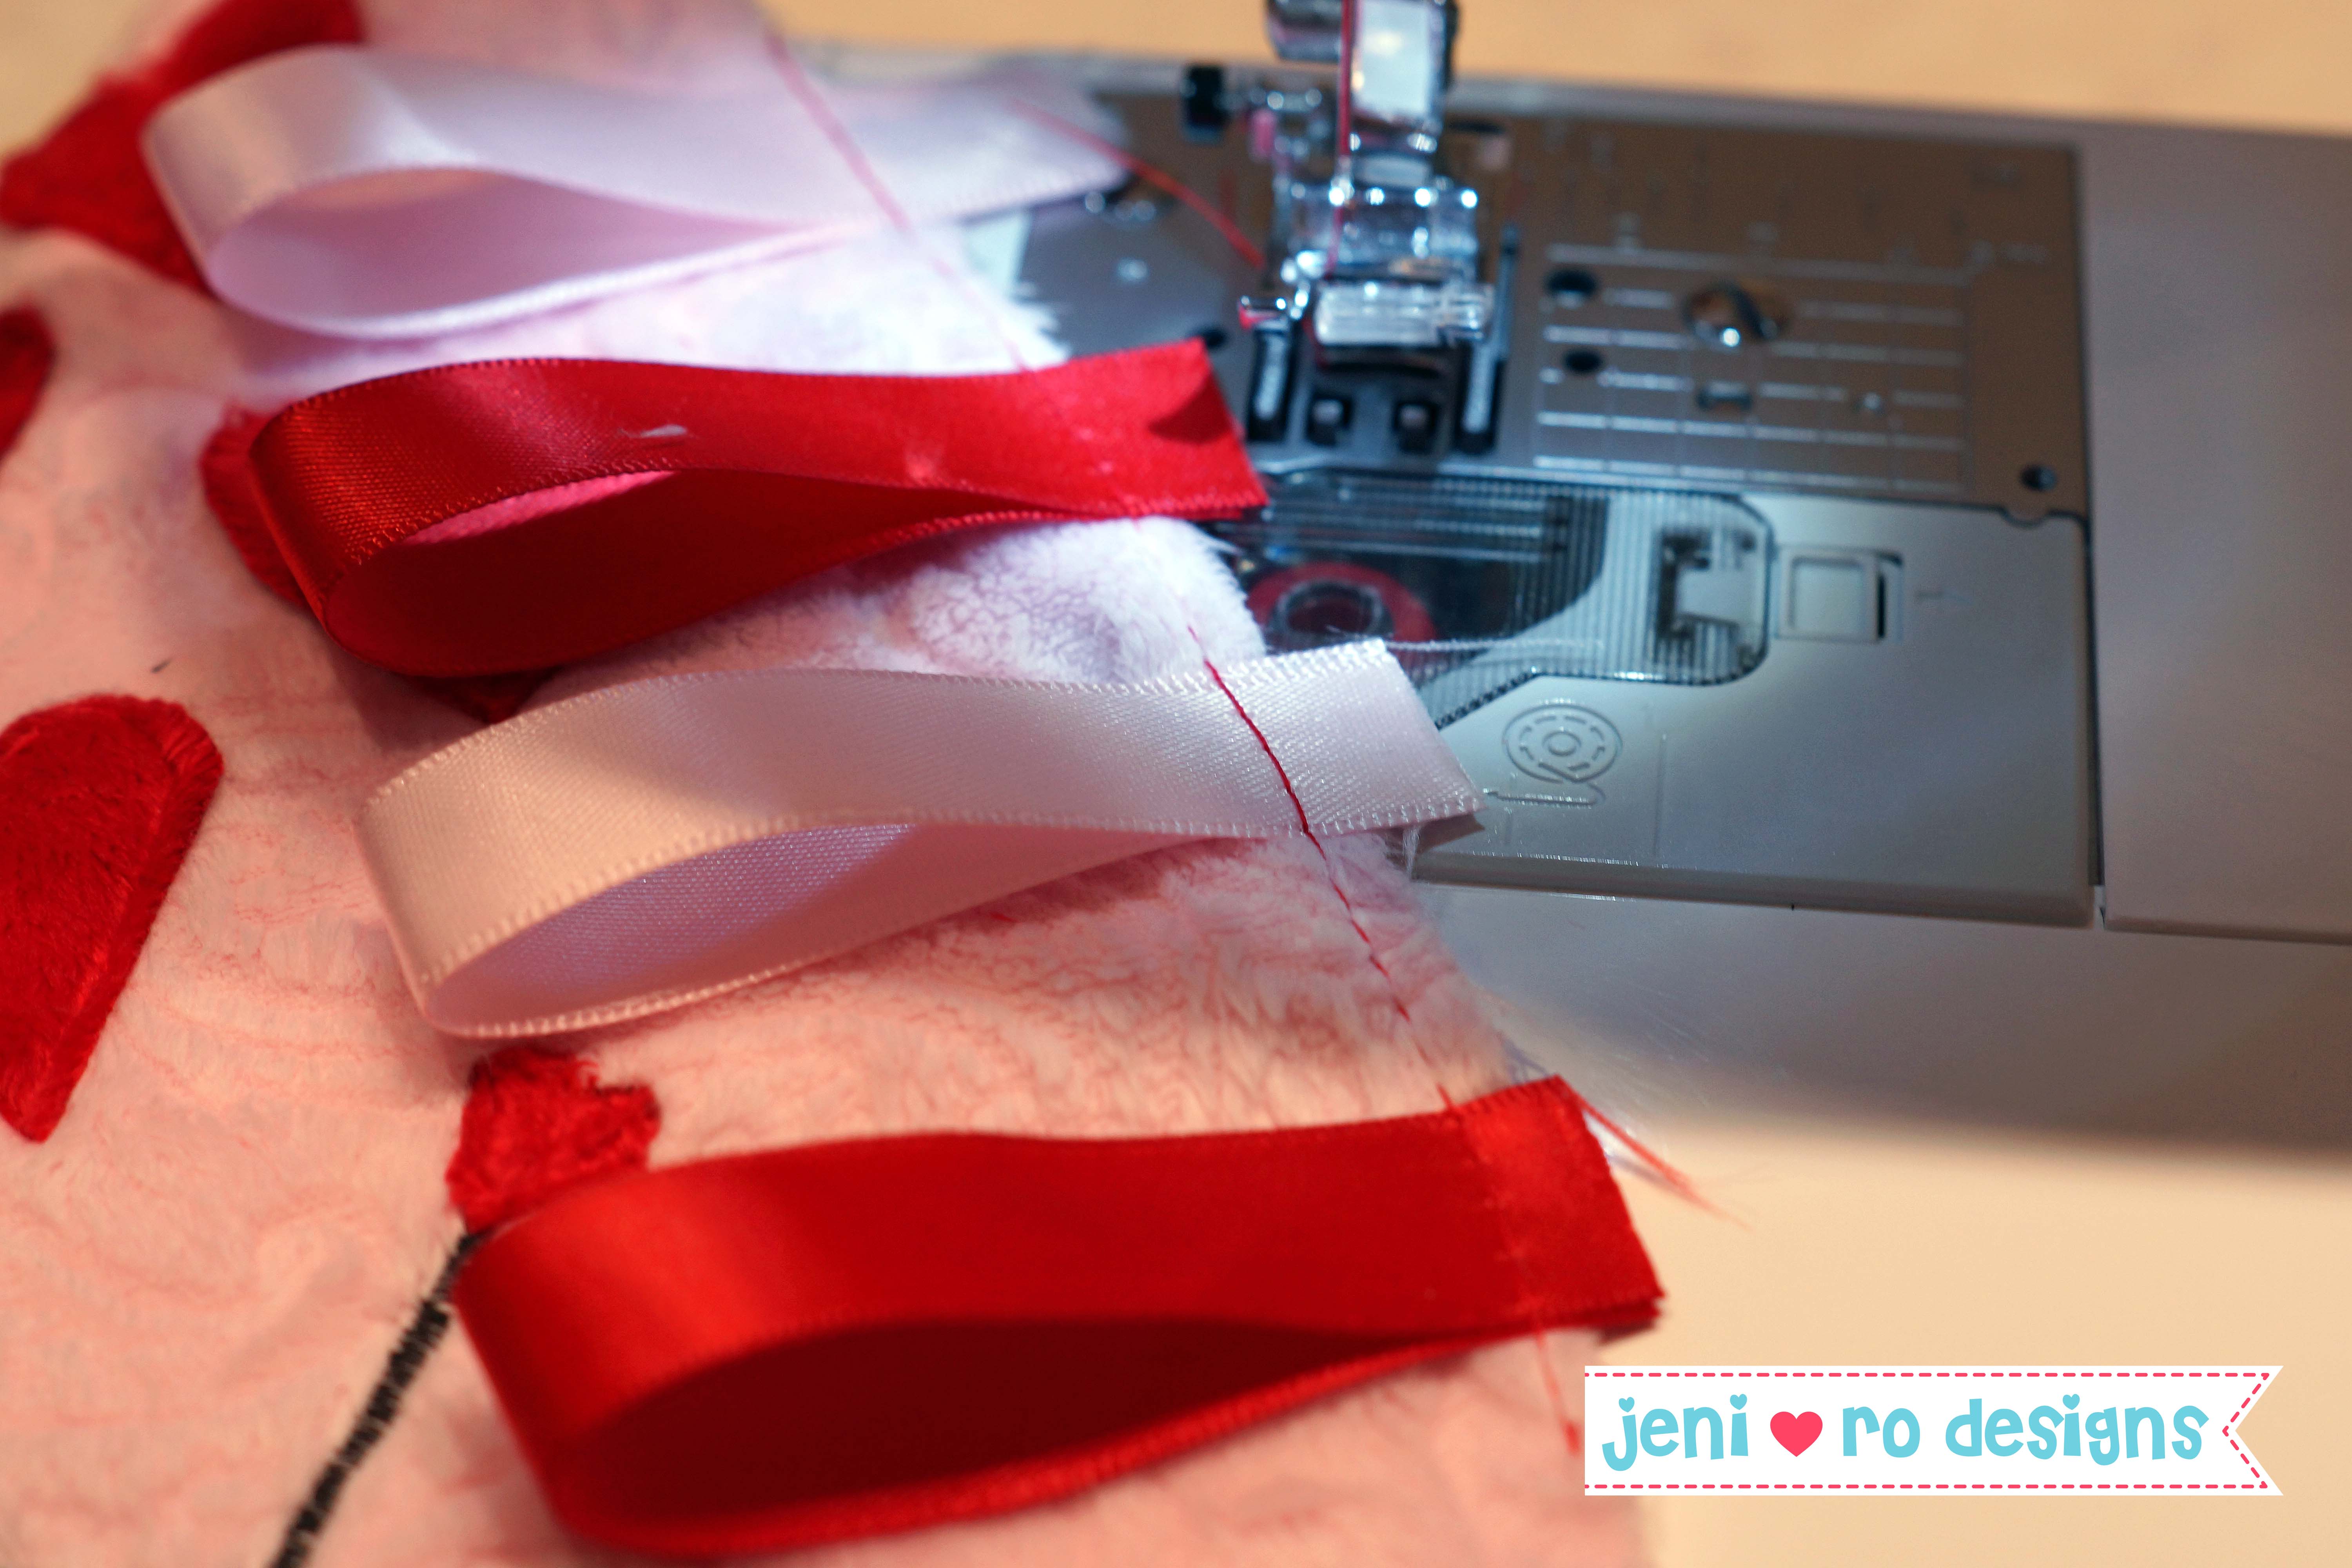
Step 5: Cut & Baste Ribbon “legs”
Cut ribbon into approx. 5″ strips. You can have as many “legs” as you want, but I used 6 pieces with the 1-1/2″ ribbon and 8 pieces with the 5/8″ ribbon.
Fold the ribbon in half and clip/pin it to the right side of the front piece.
You can use all one color or alternate (like I did), but try to keep the loops the same length on the bug.

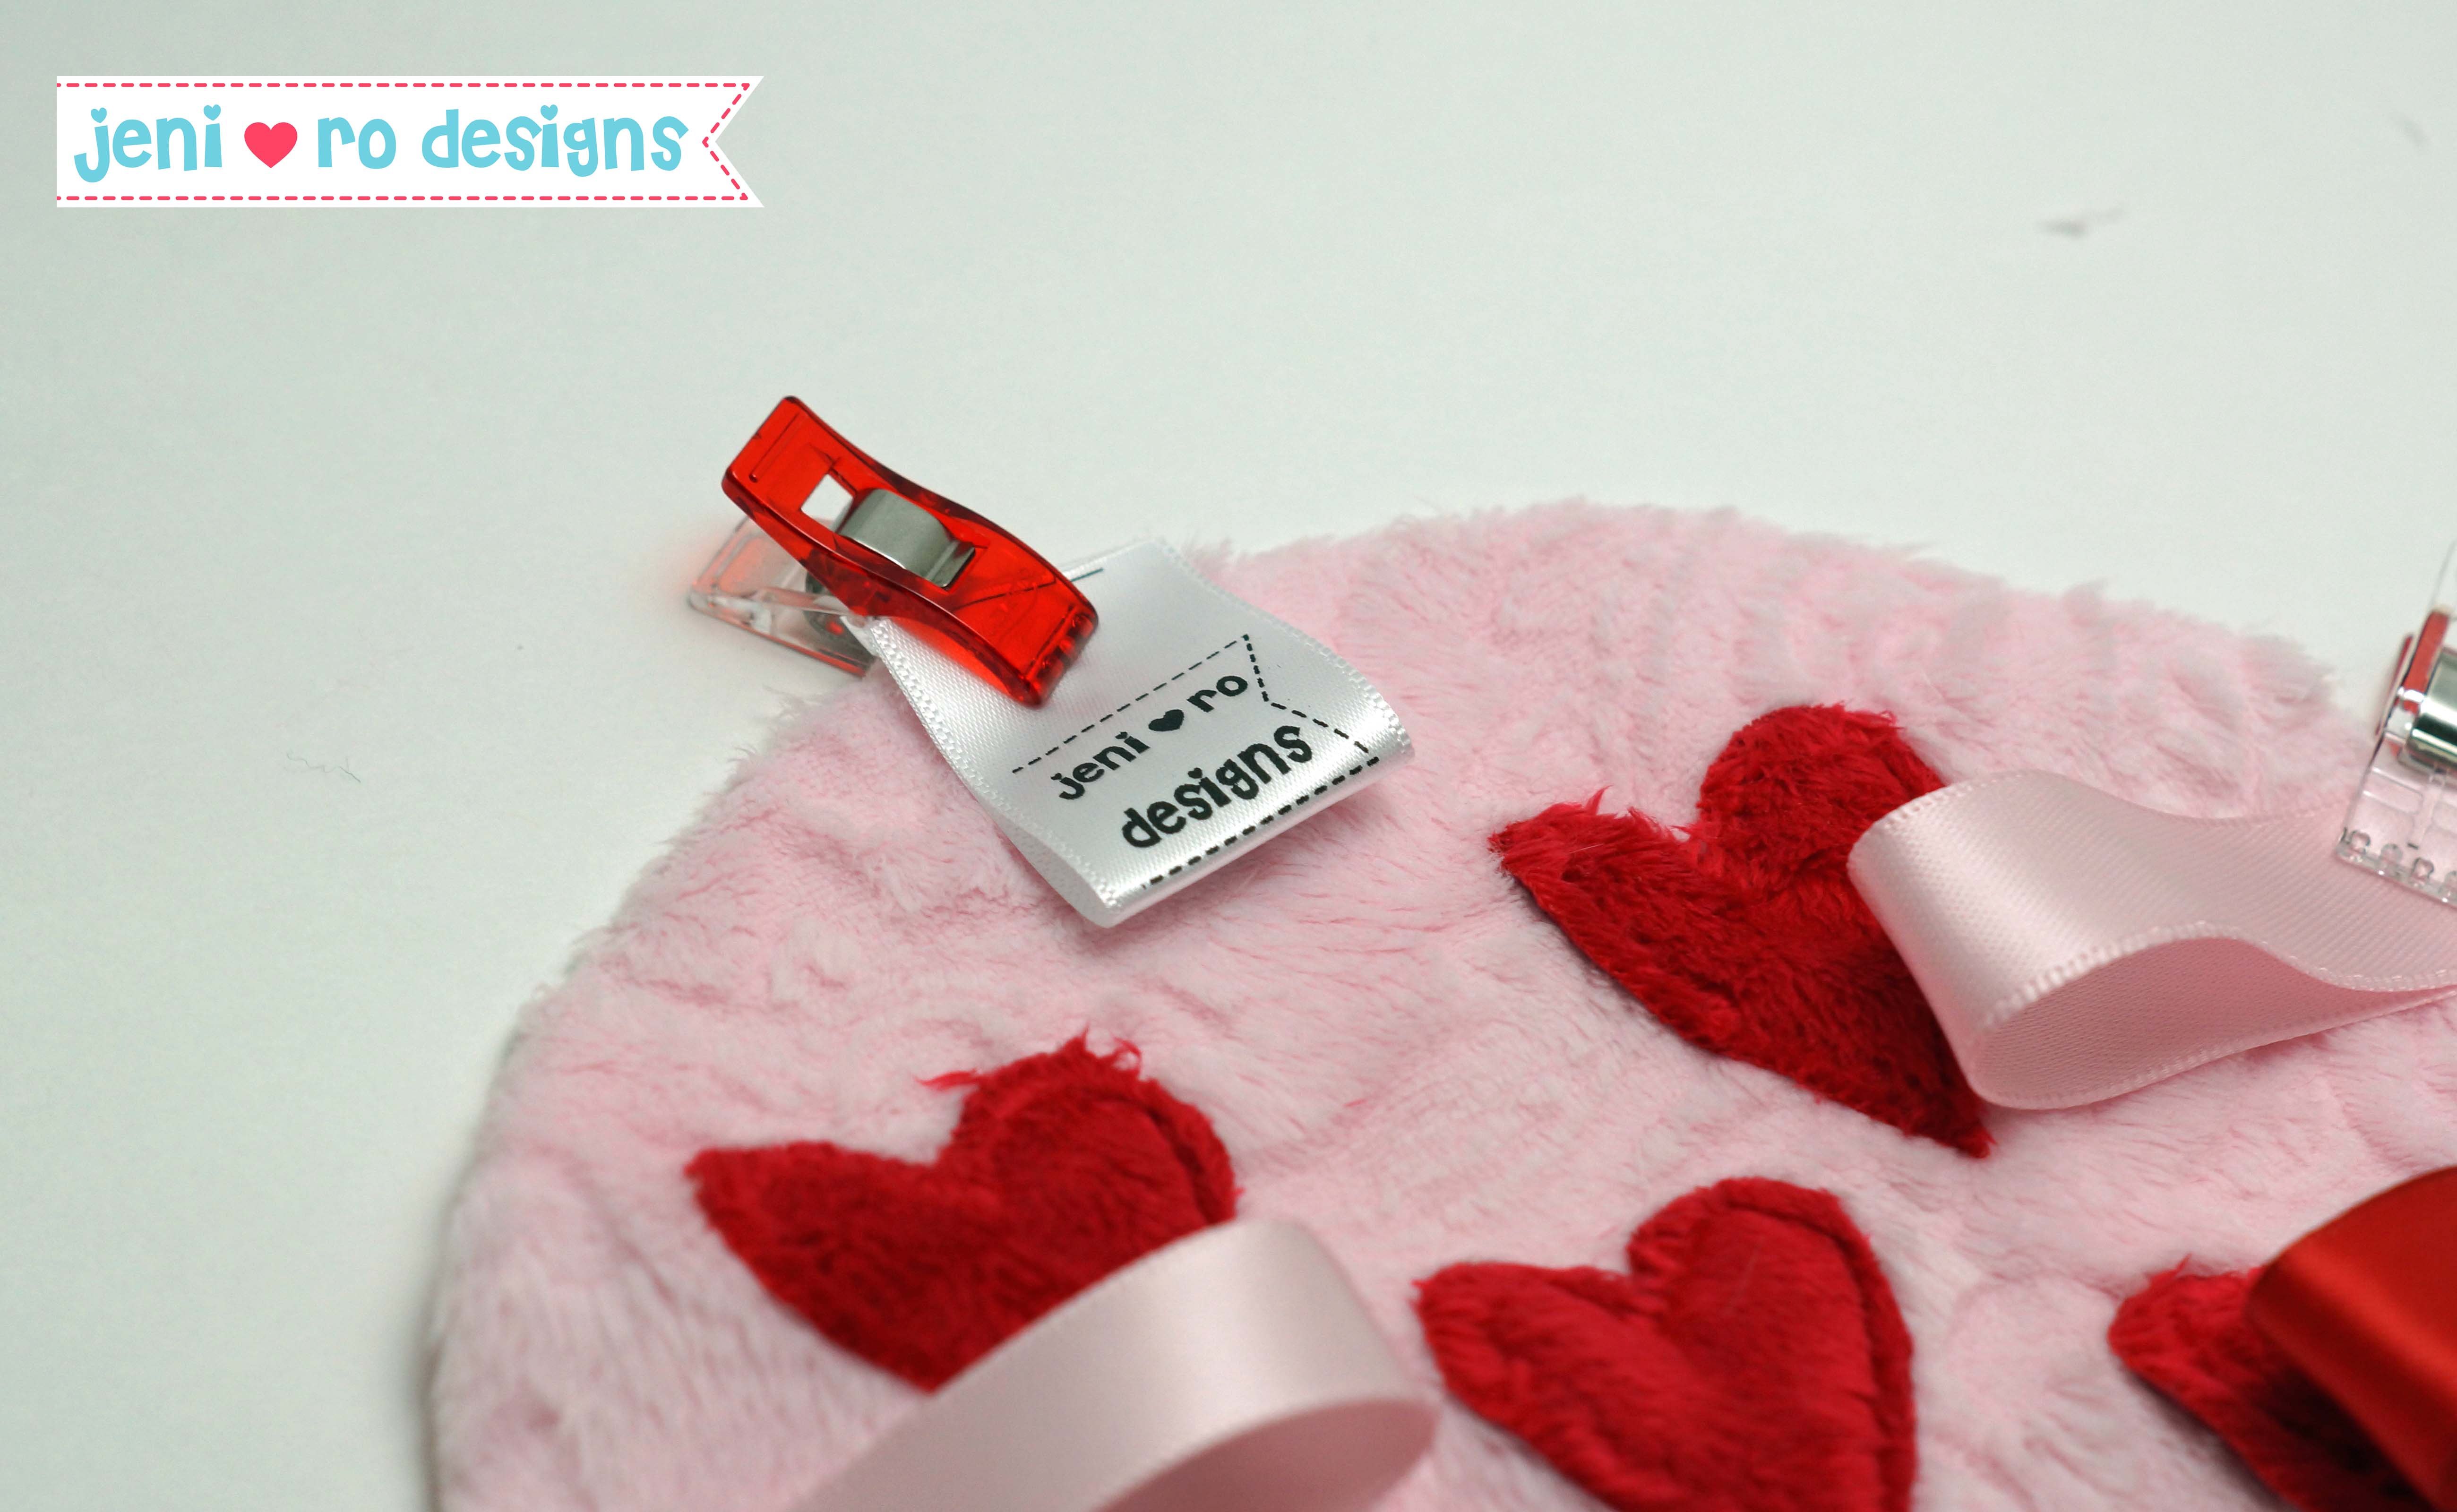
You can add your “tag” to the back as I did here.
I love my satin tags from Jennifer’s Jewels. If you have a sew on tag, sew that to the back piece now before finishing the luv bug.
Baste the ribbons on 1/8″ from the edge to secure the ribbons.
Step 6: Sew the front to the back.
*Set your machine back to a regular straight stitch.
Pin the front piece (with face, hearts and ribbons attached) and back piece right sides together. The ribbons will be sandwiched inside the pieces.
Sew around with a 1/4″ seam – leaving a 2″ hole at the back for turning and stuffing.
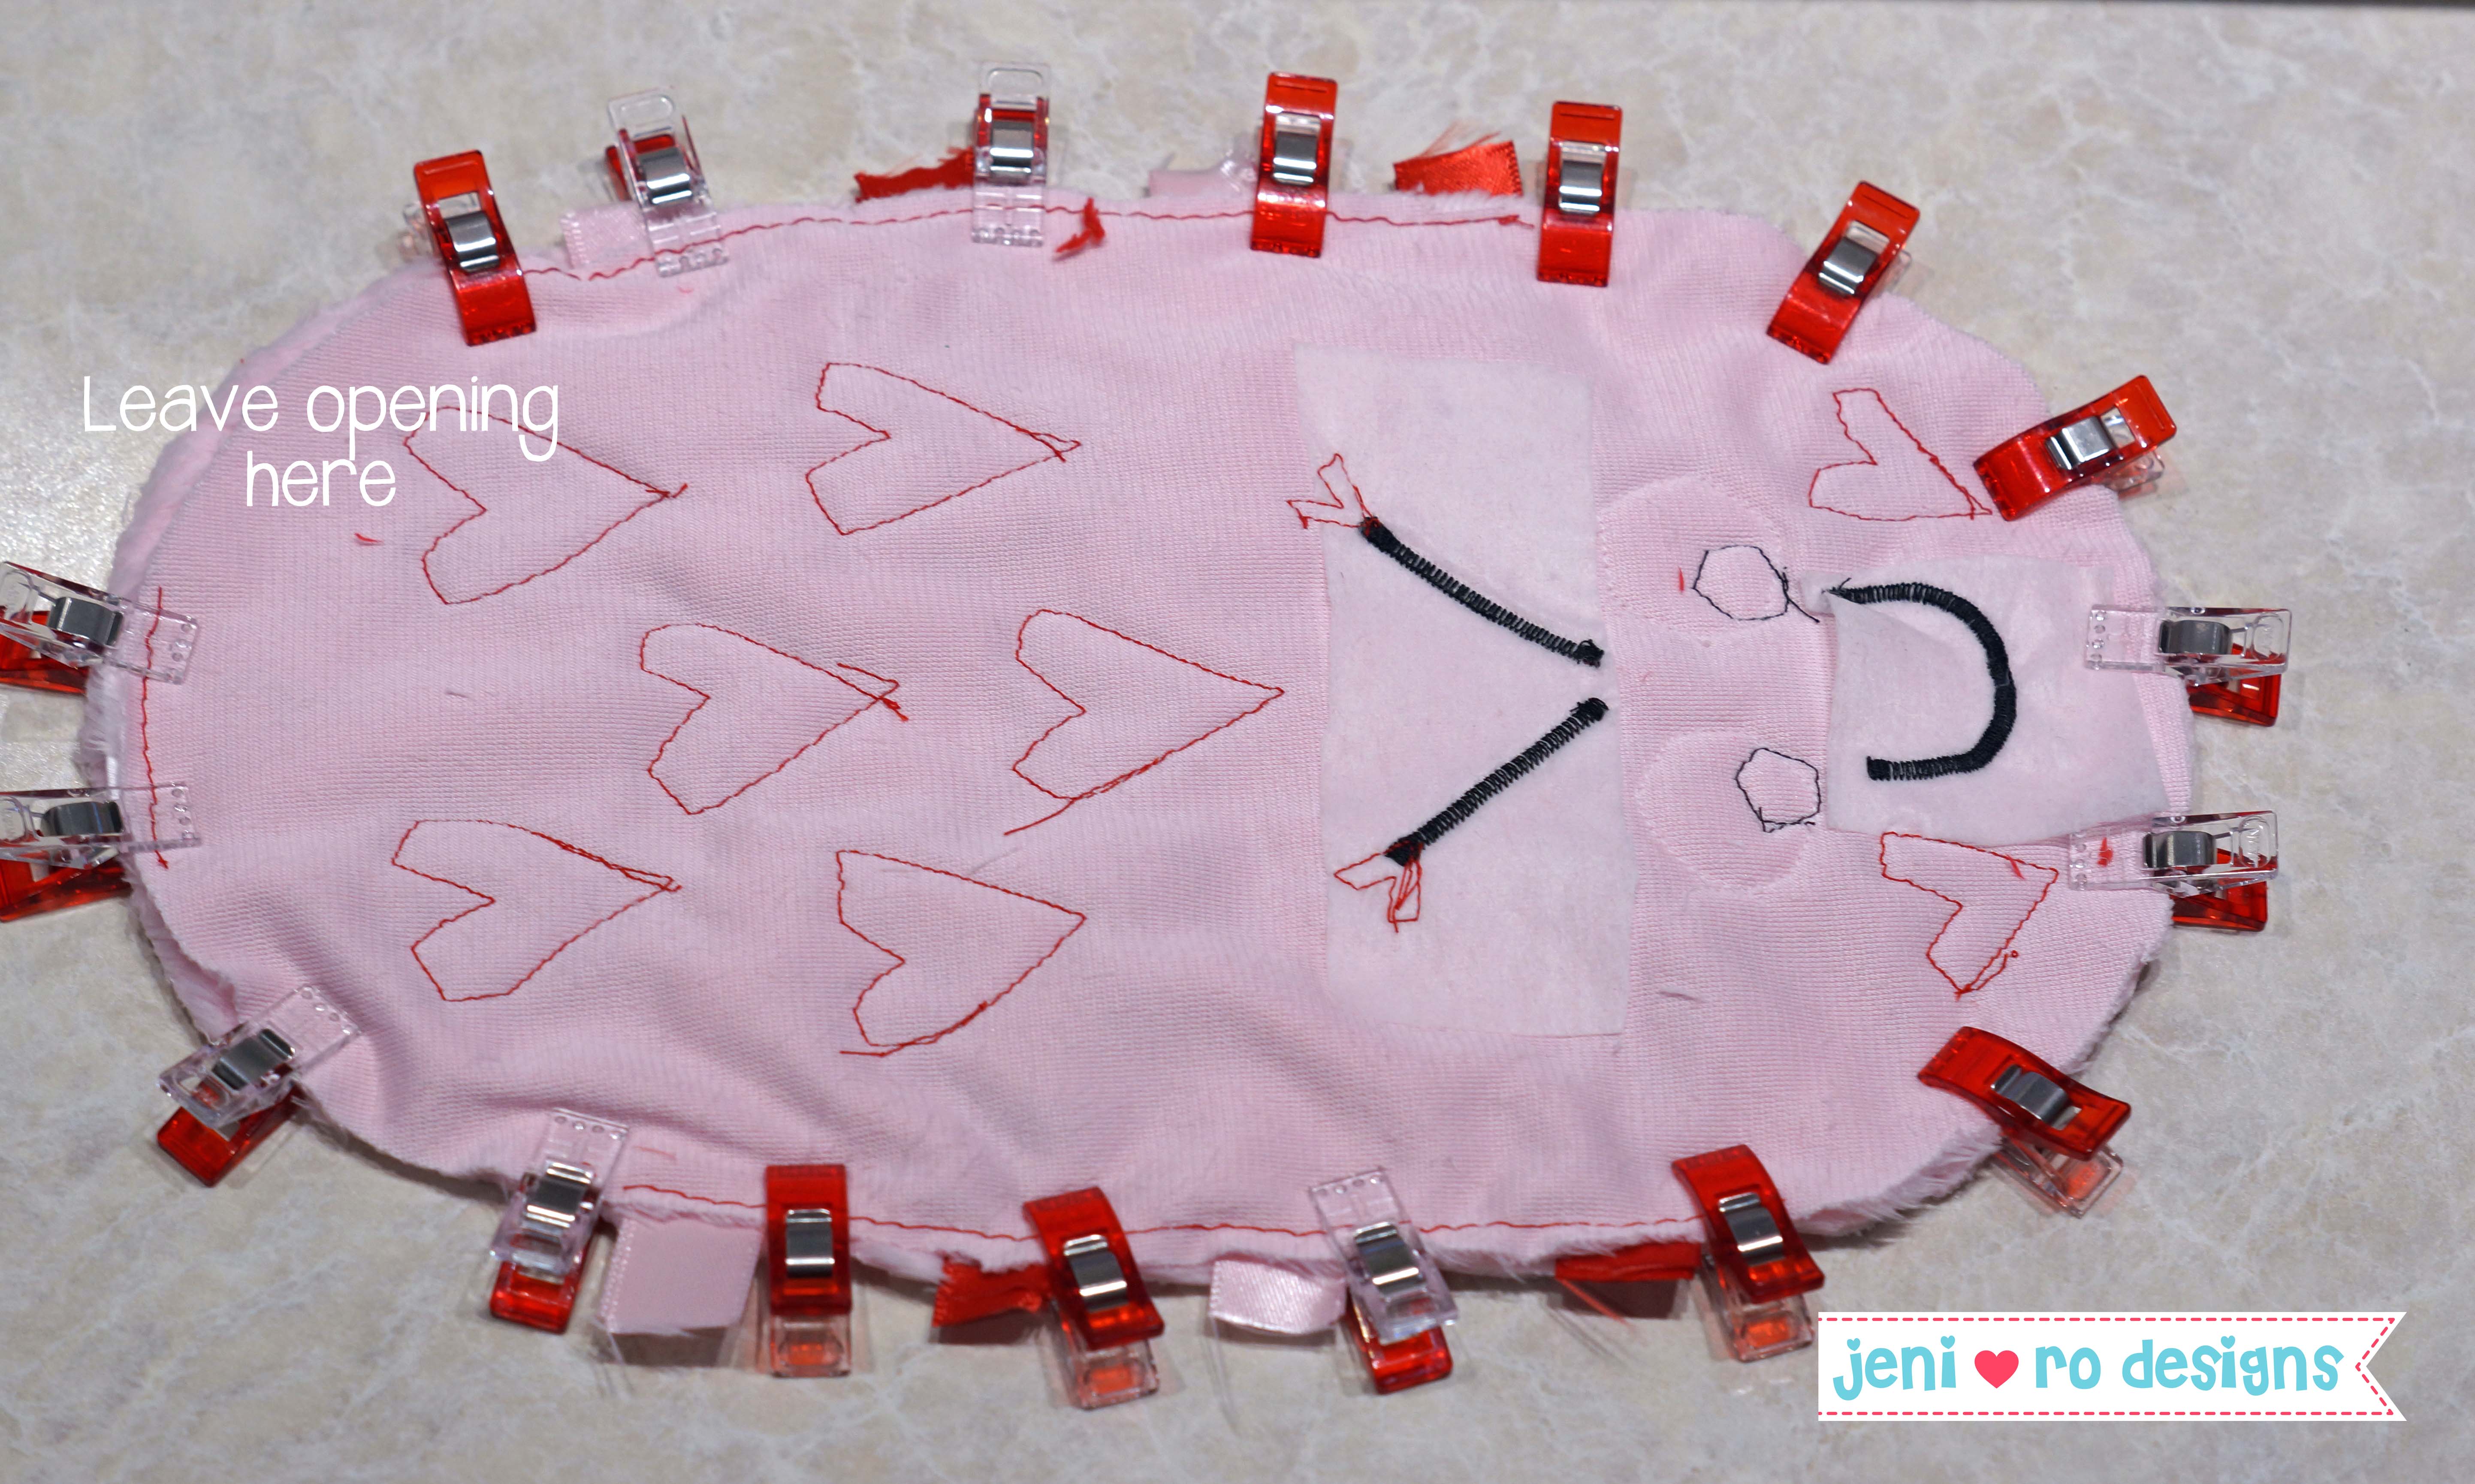
Trim ribbons and clip curves, and turn right side out.
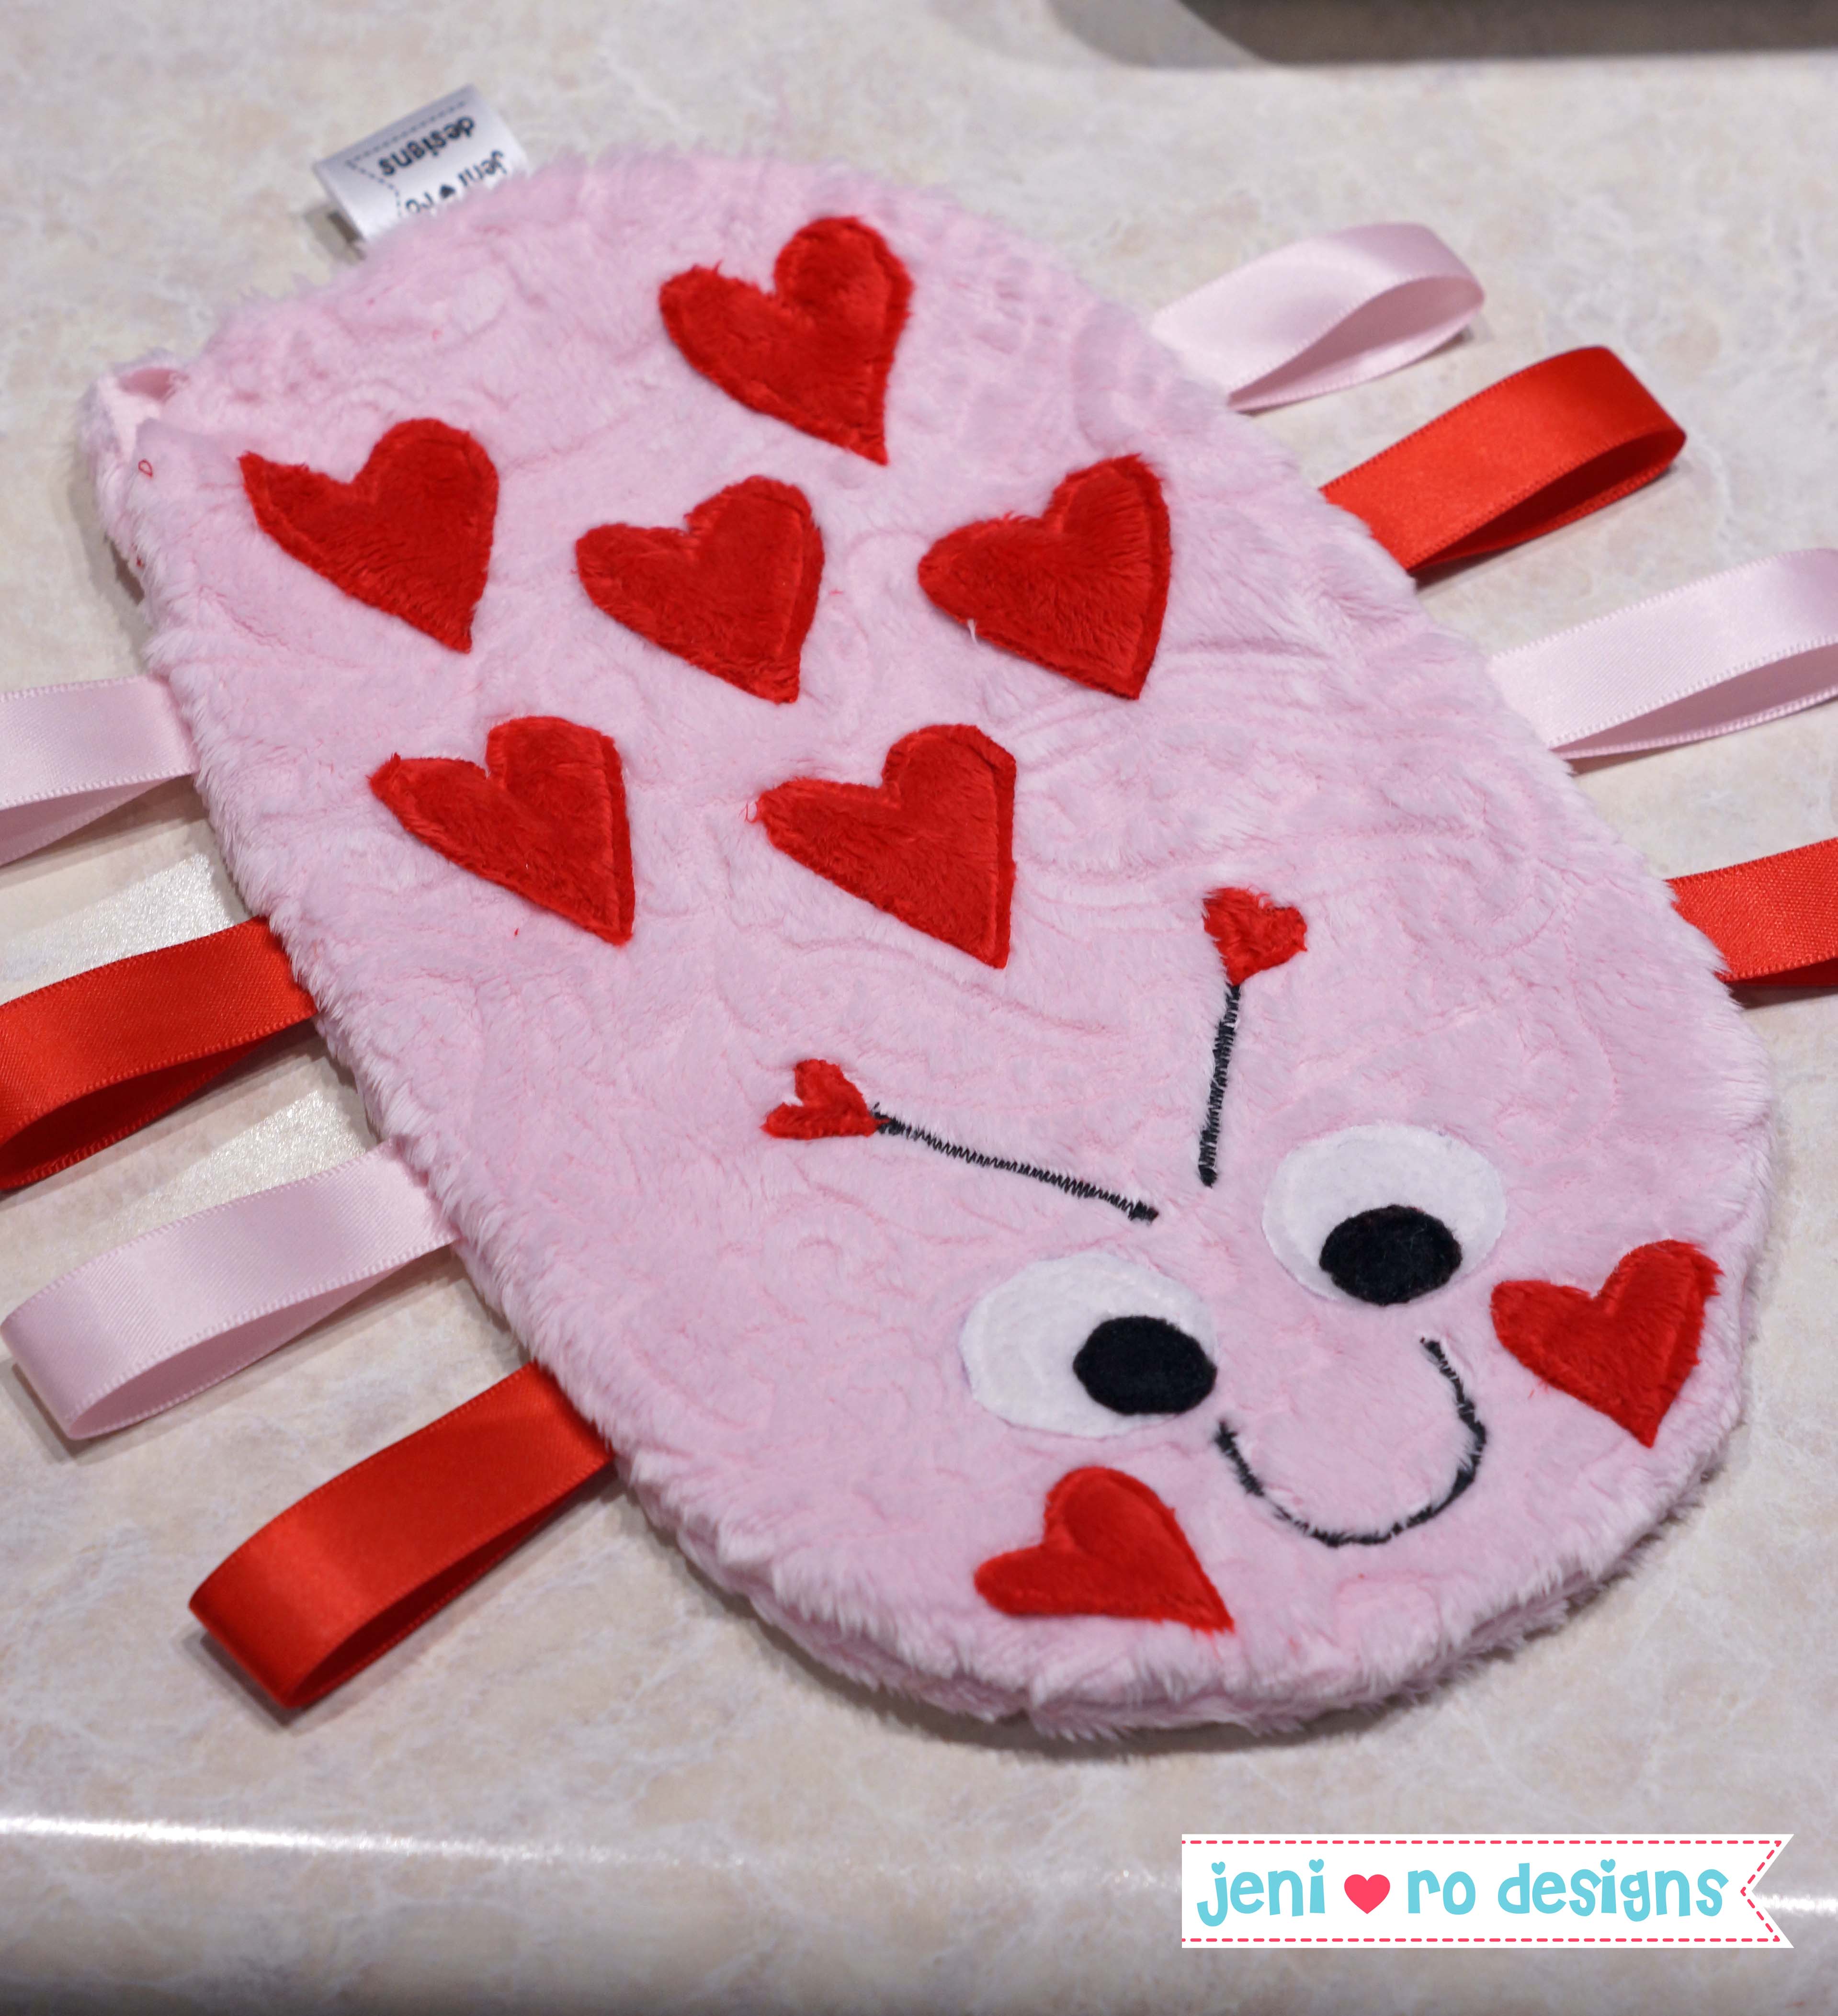
Step 7: Stuff and Finish your luv bug.
Stuff the luv bug to your liking, enough to give it dimension but not too much so it stays squishy and huggable.
Ladder stitch the opening closed with the same color thread.
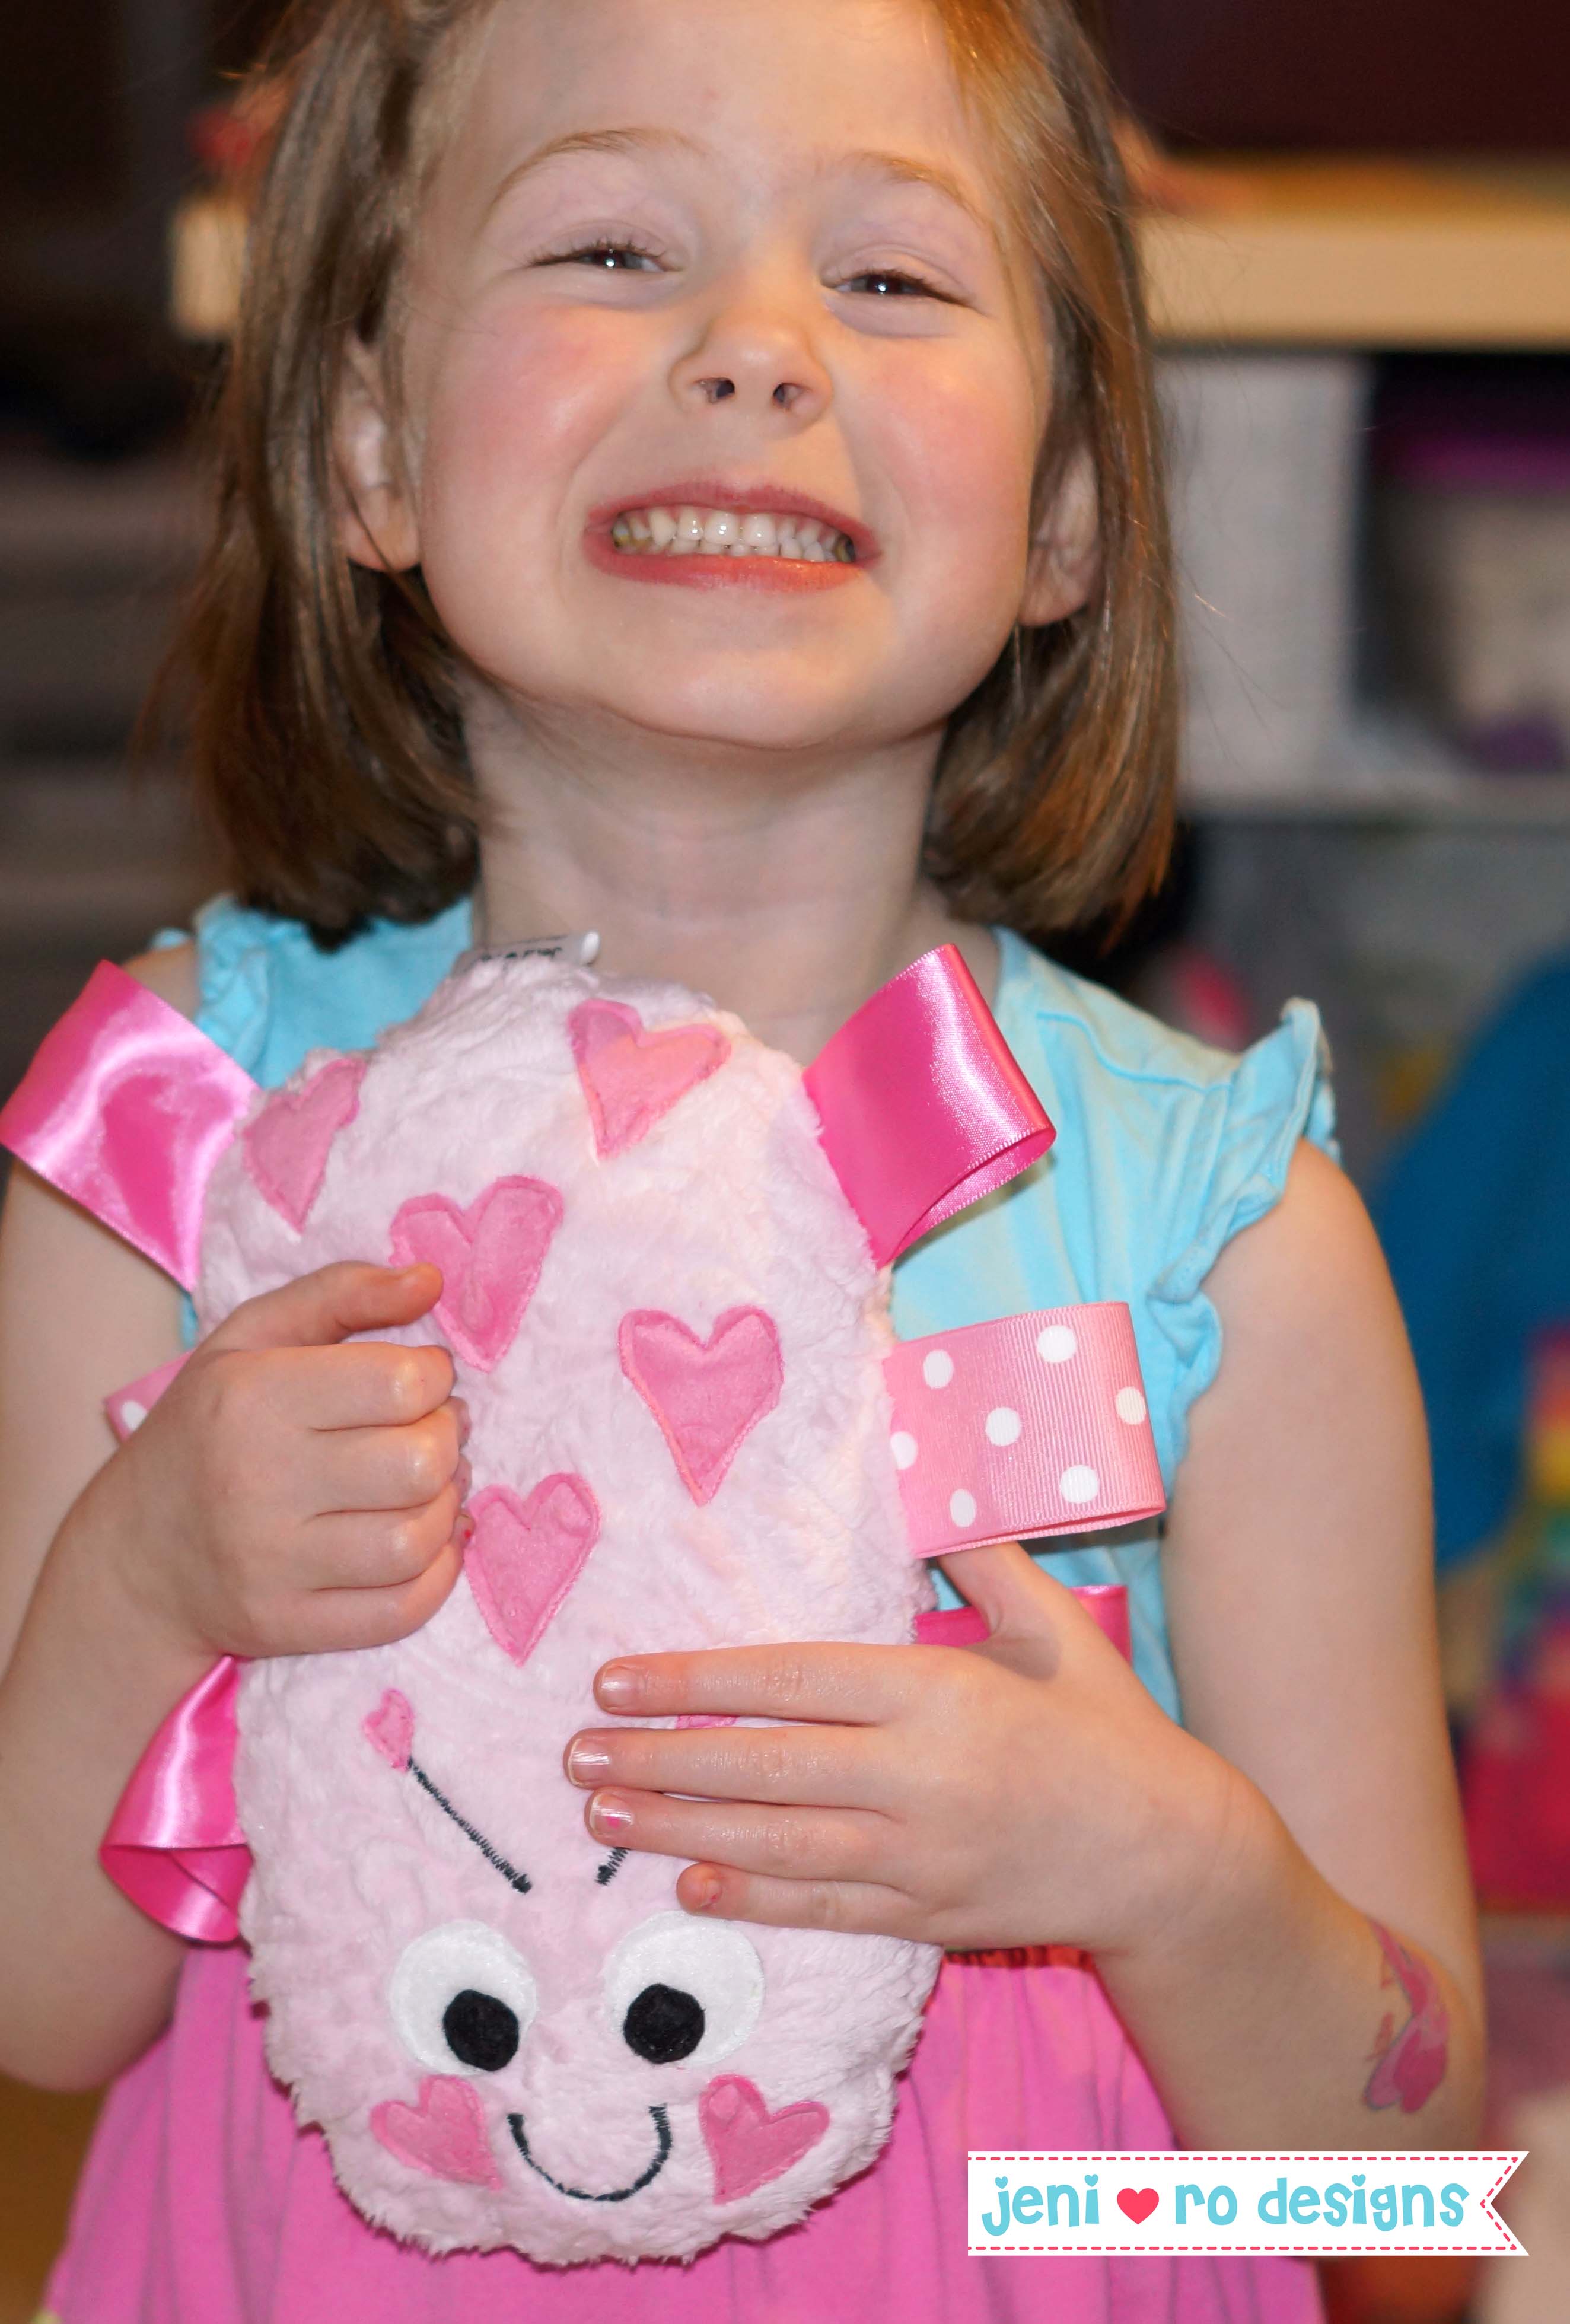
Your luv bug is ready to make your Valentine smile!

Make a few, Make a whole pile!
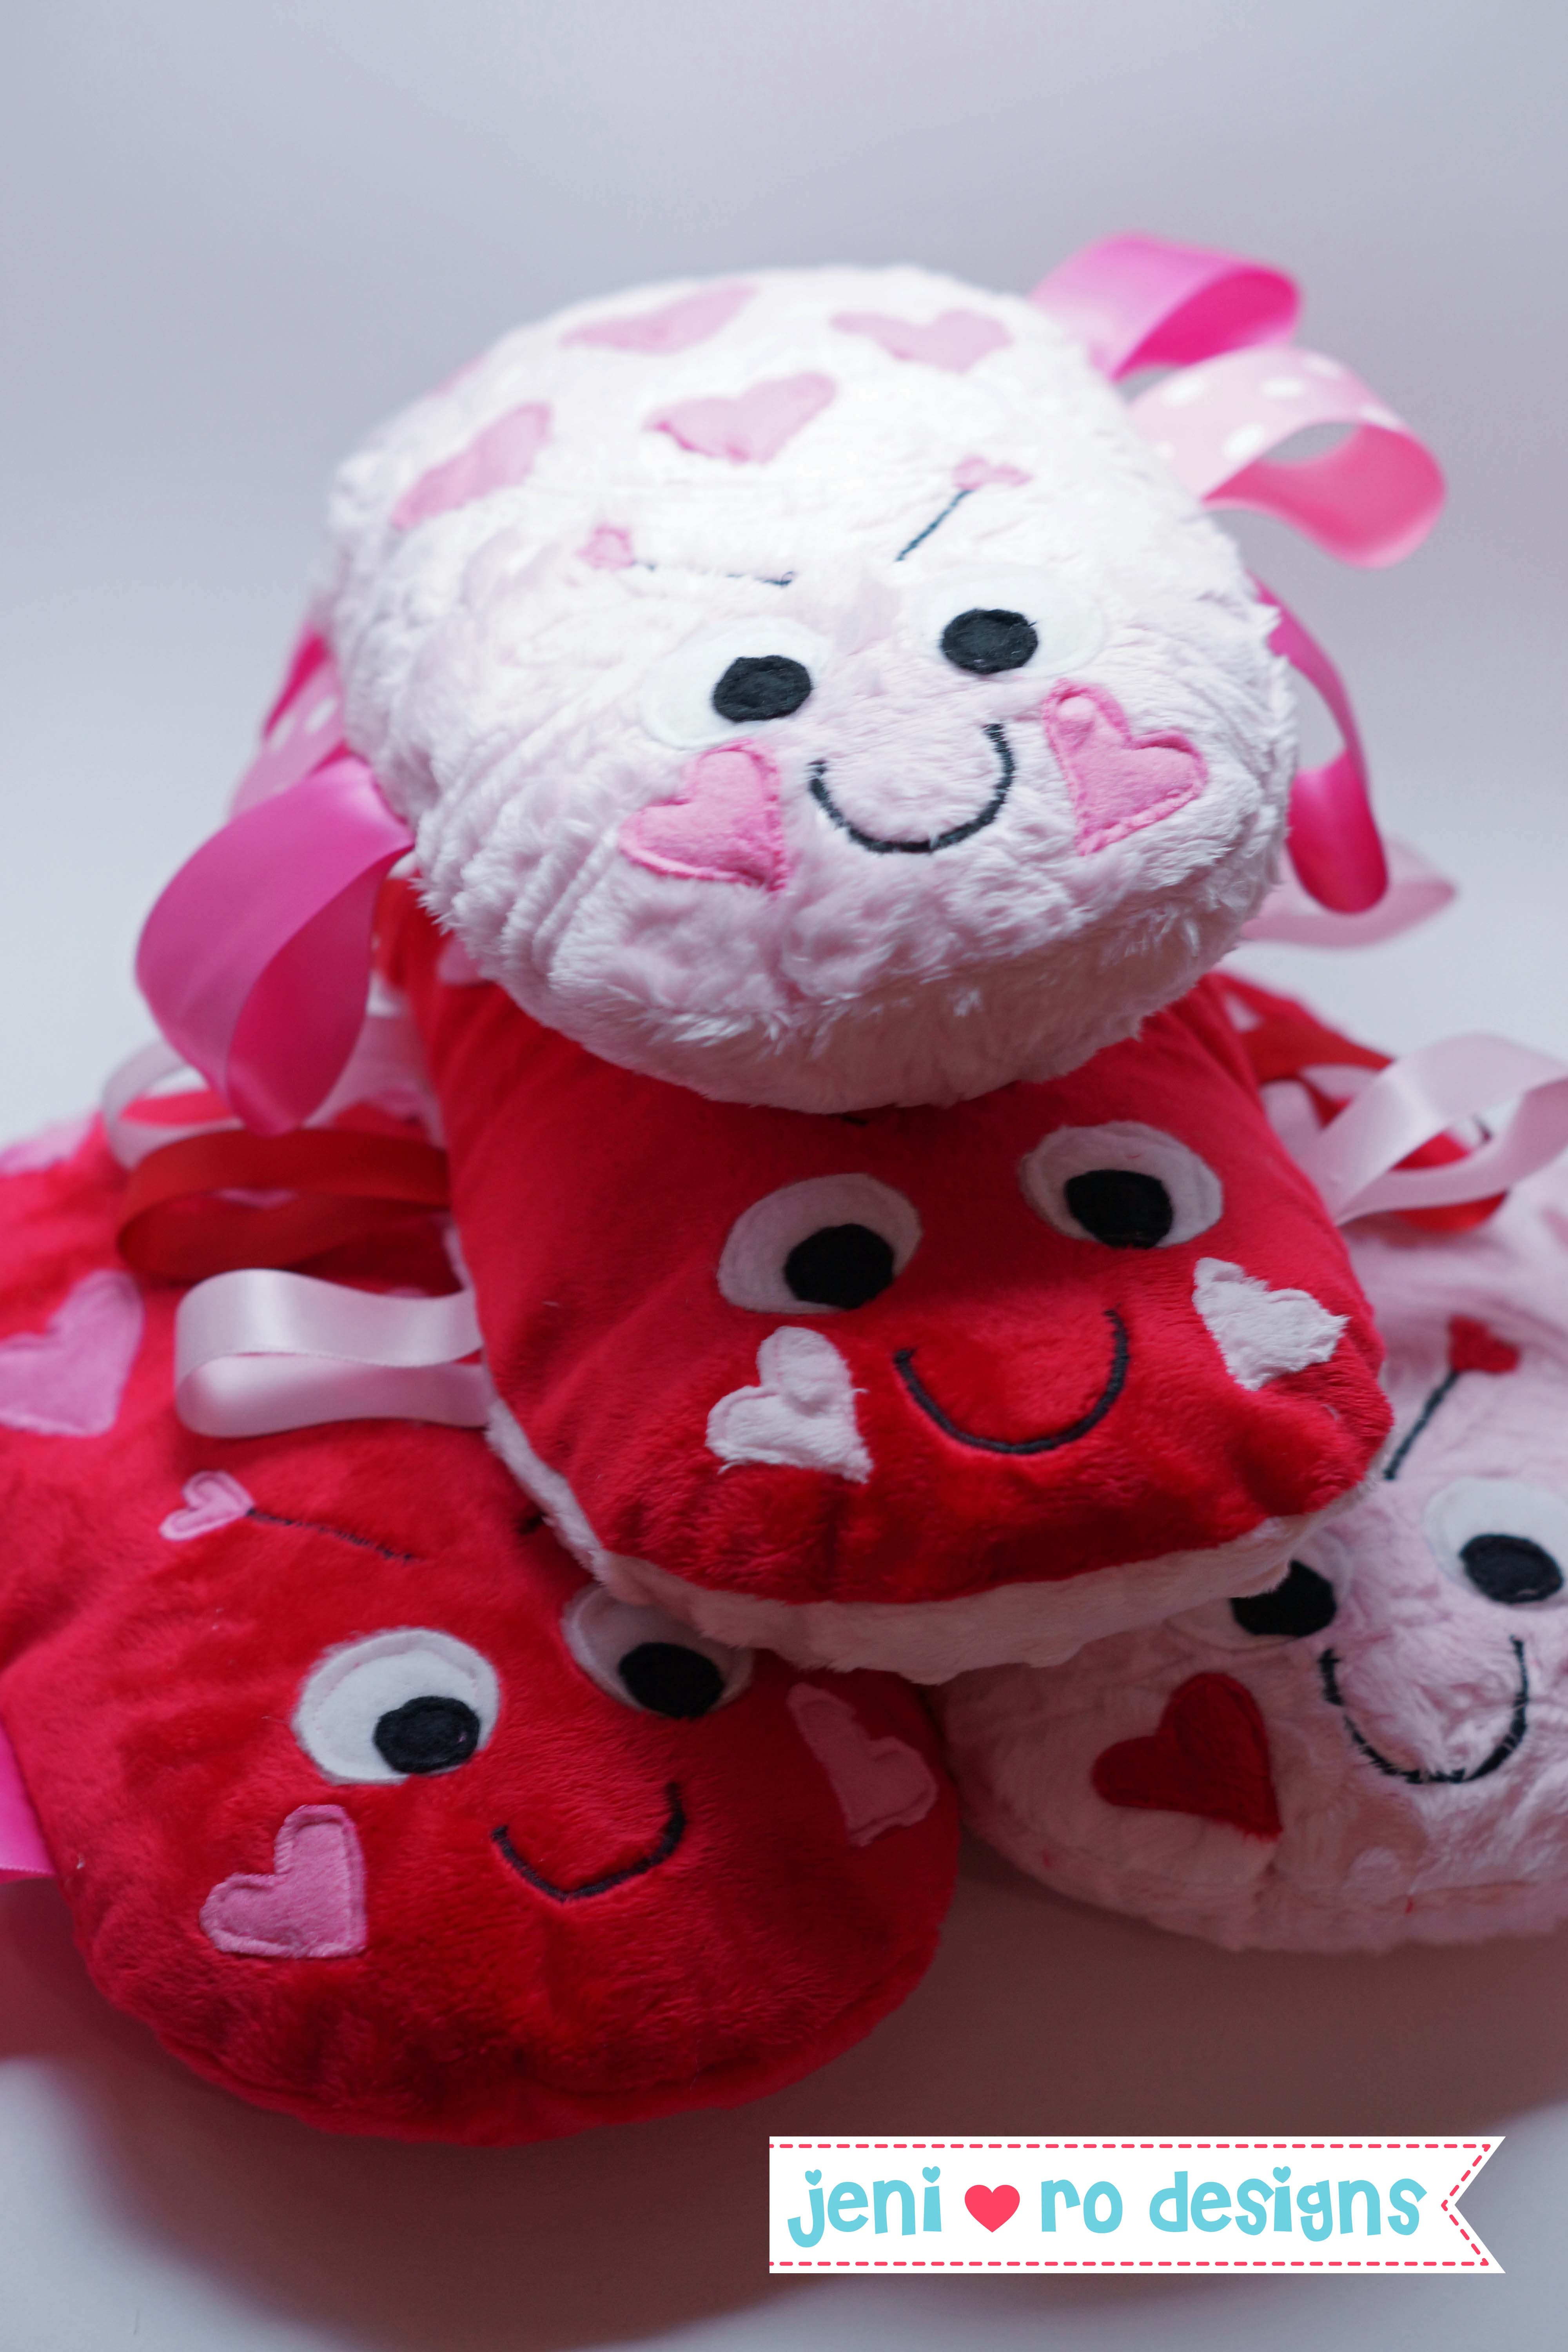
My silly luv bug likes the pink one the most!
Thanks for letting me share this fun pattern and tutorial and I hope you have fun making your Valentine a Cuddle luv bug! Check out my etsy shop, for cute Valentine party decorations as well!